Commercial Bone Saw Machine Buying Checklist for Butchers

Table of Contents

A commercial bone saw should match the products you cut, daily workload, available space, cleaning routine, electrical supply, and service requirements. This checklist helps butchers compare machines on practical operating factors before purchase.

Quick answer: what to check before buying

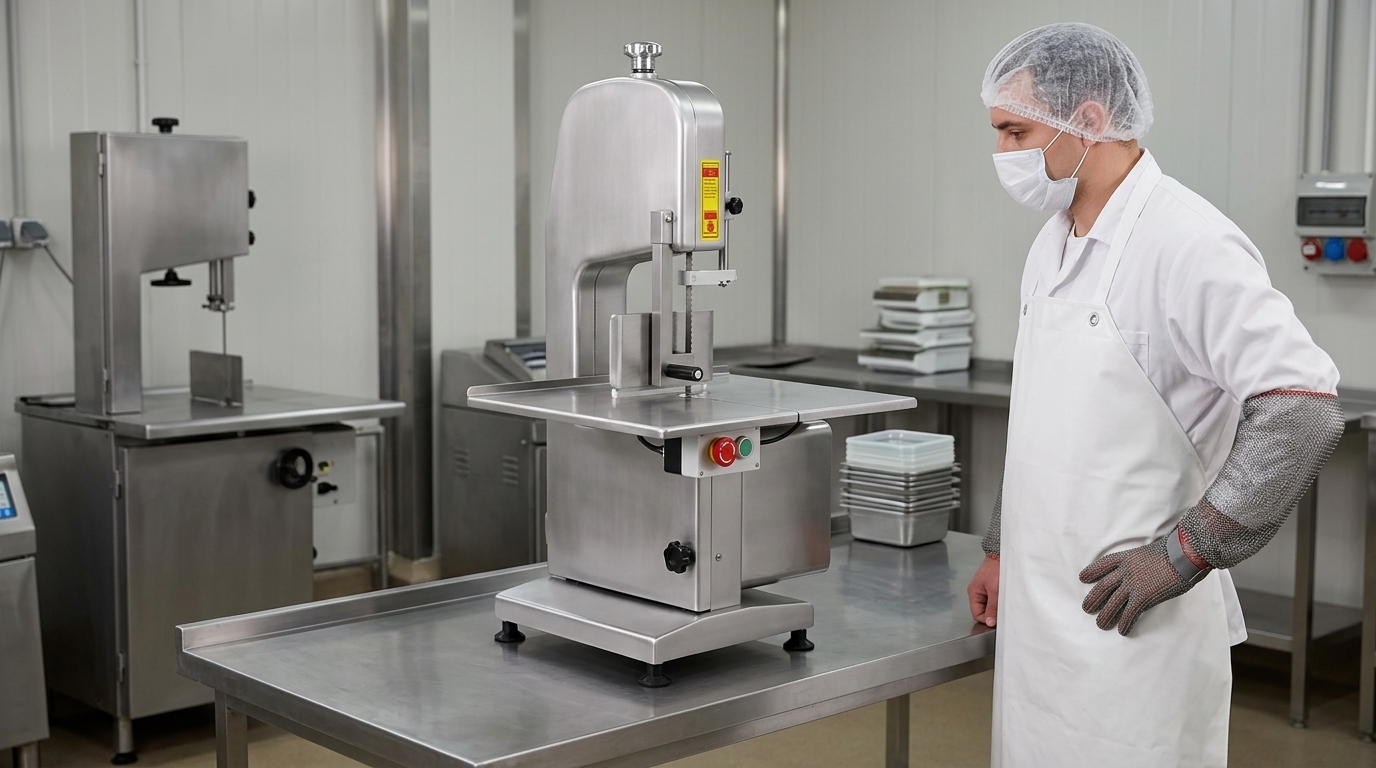
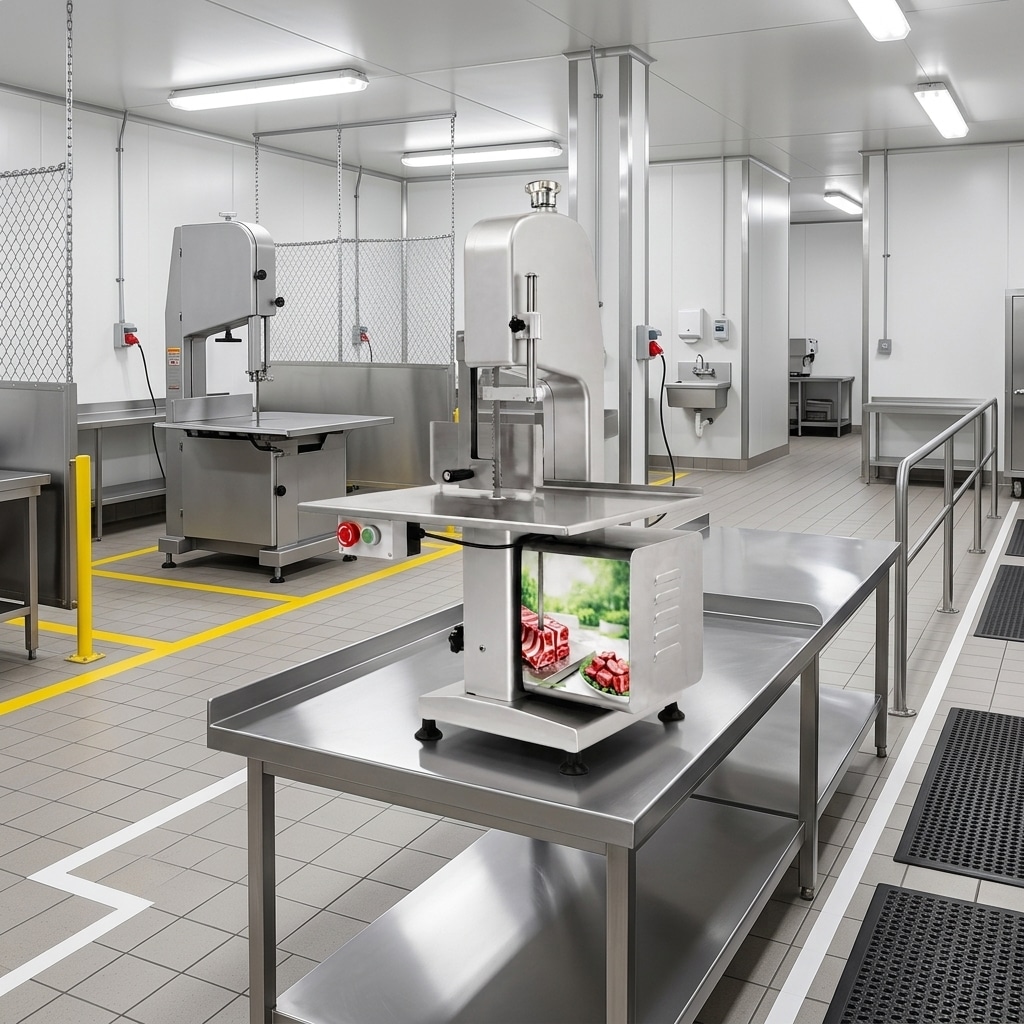
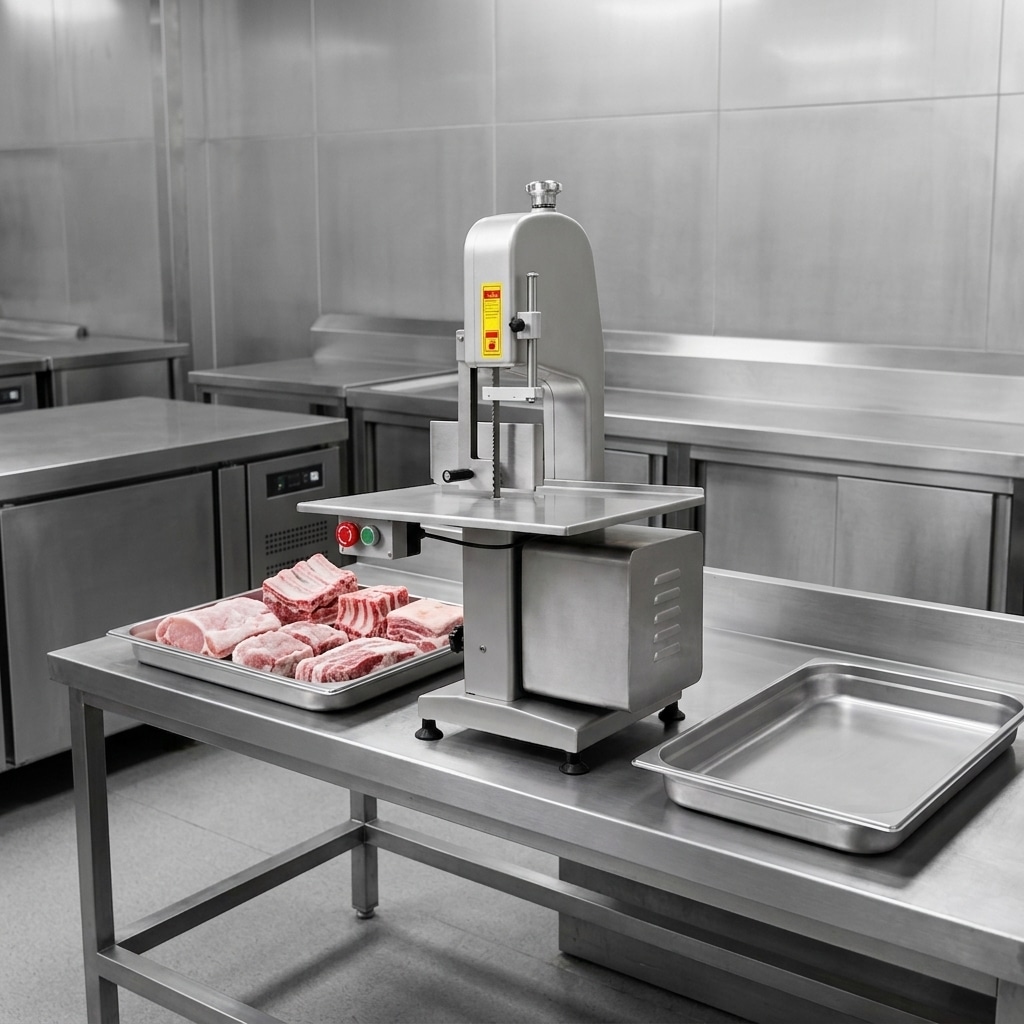
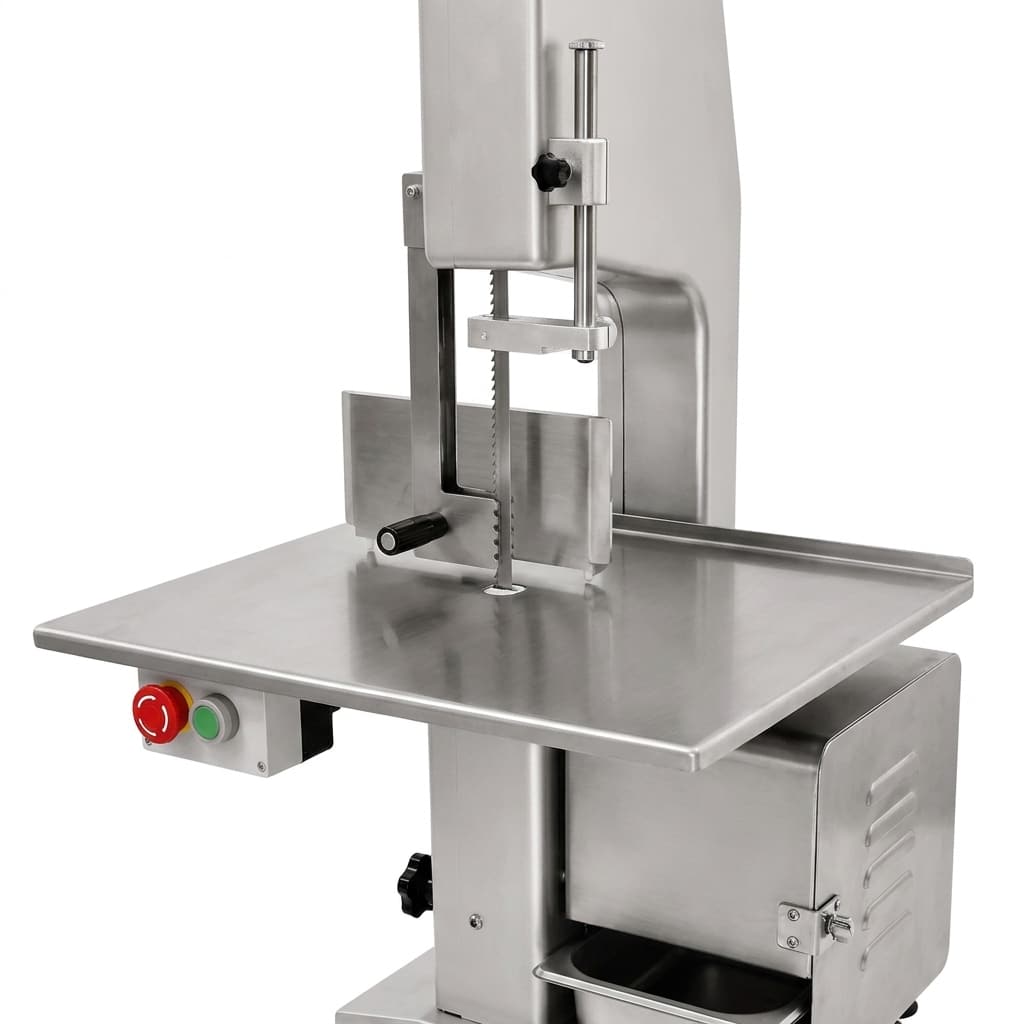
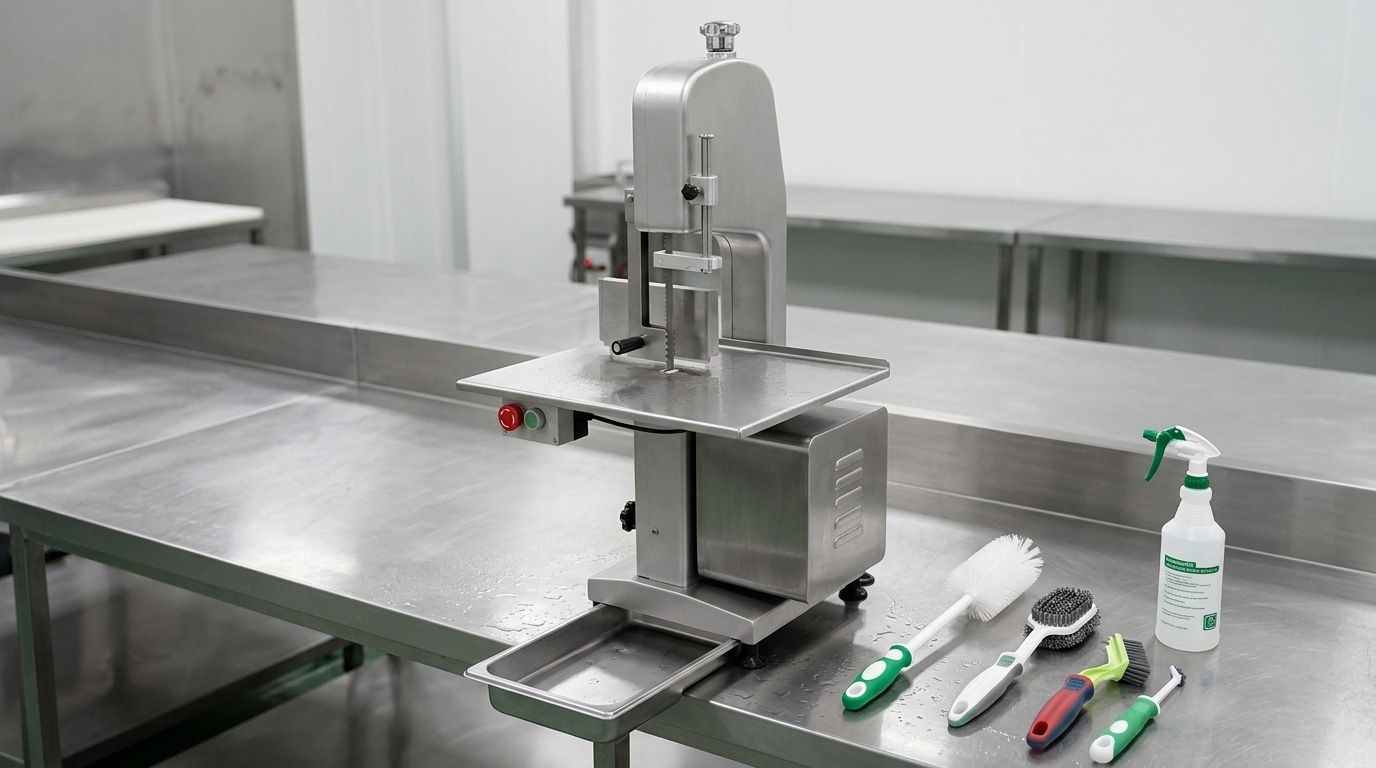
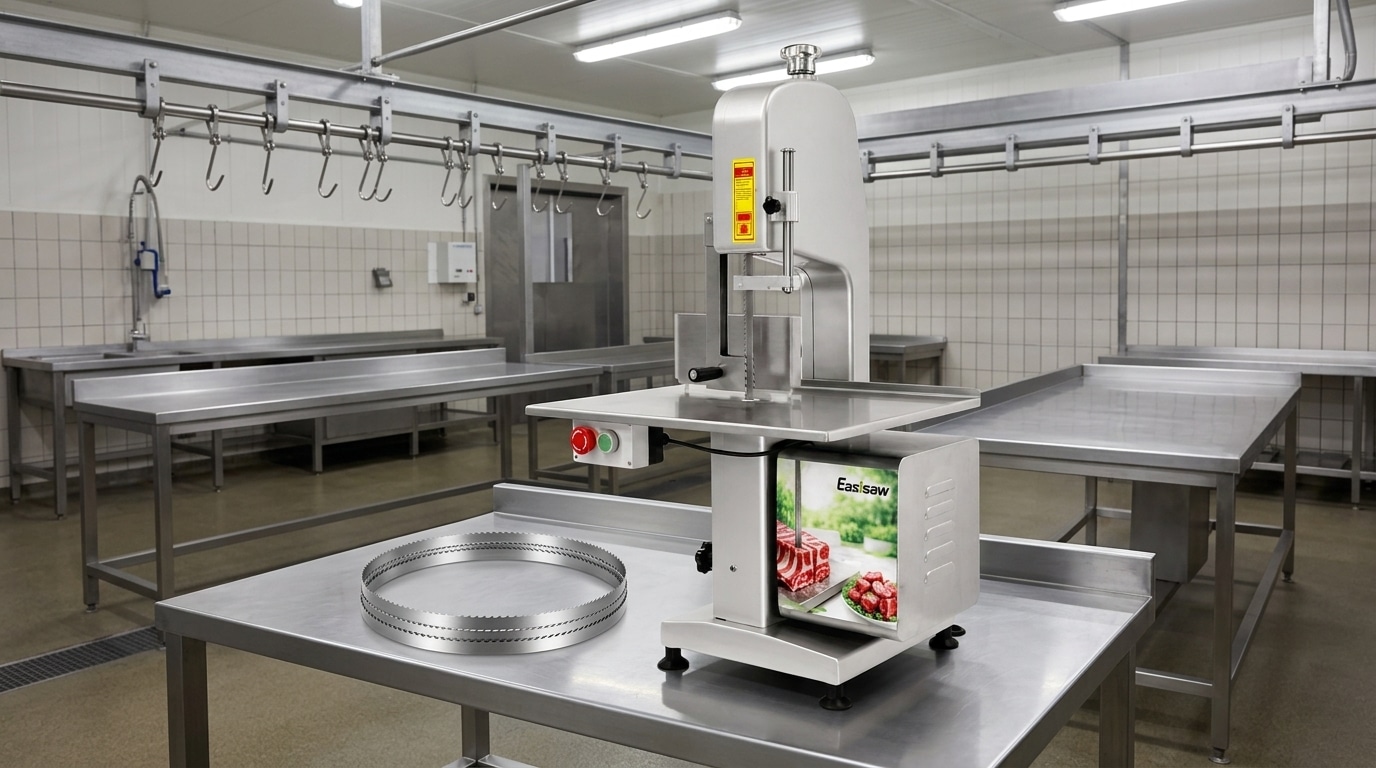
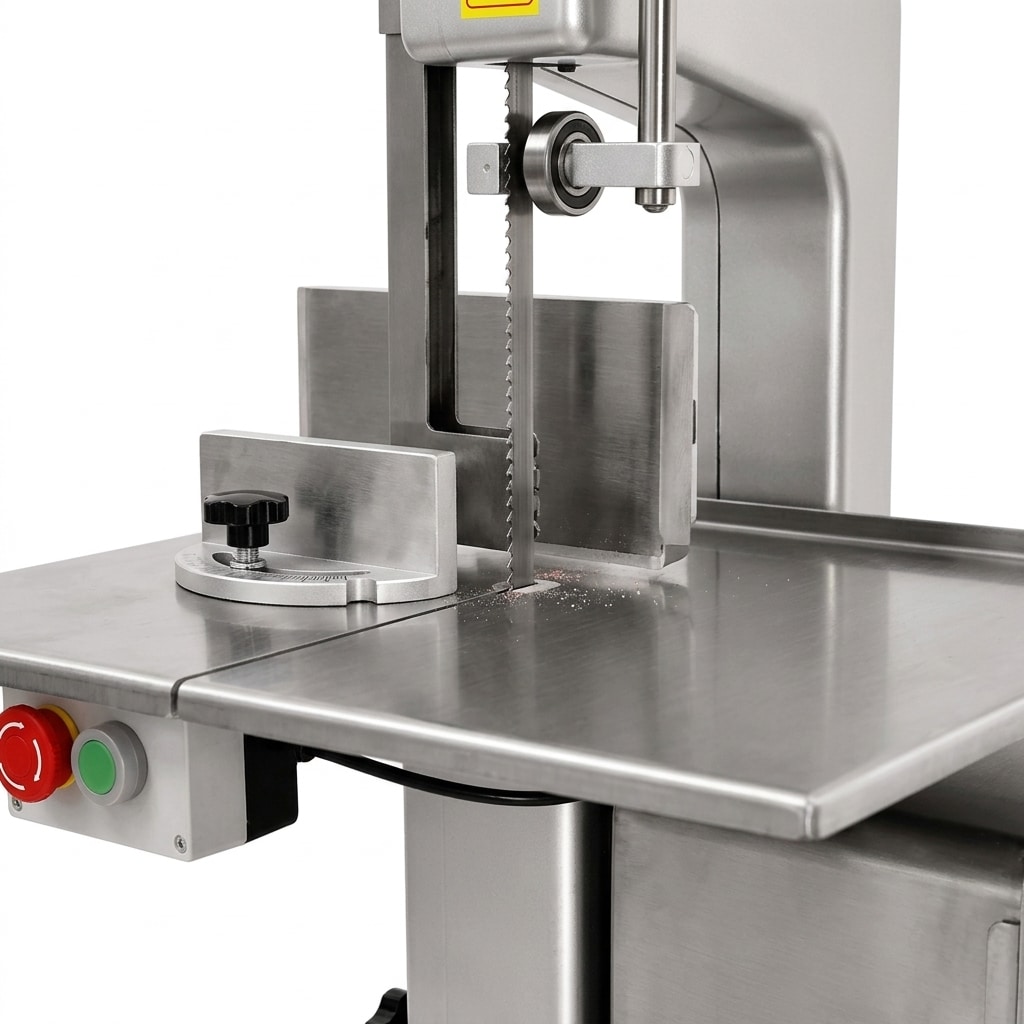
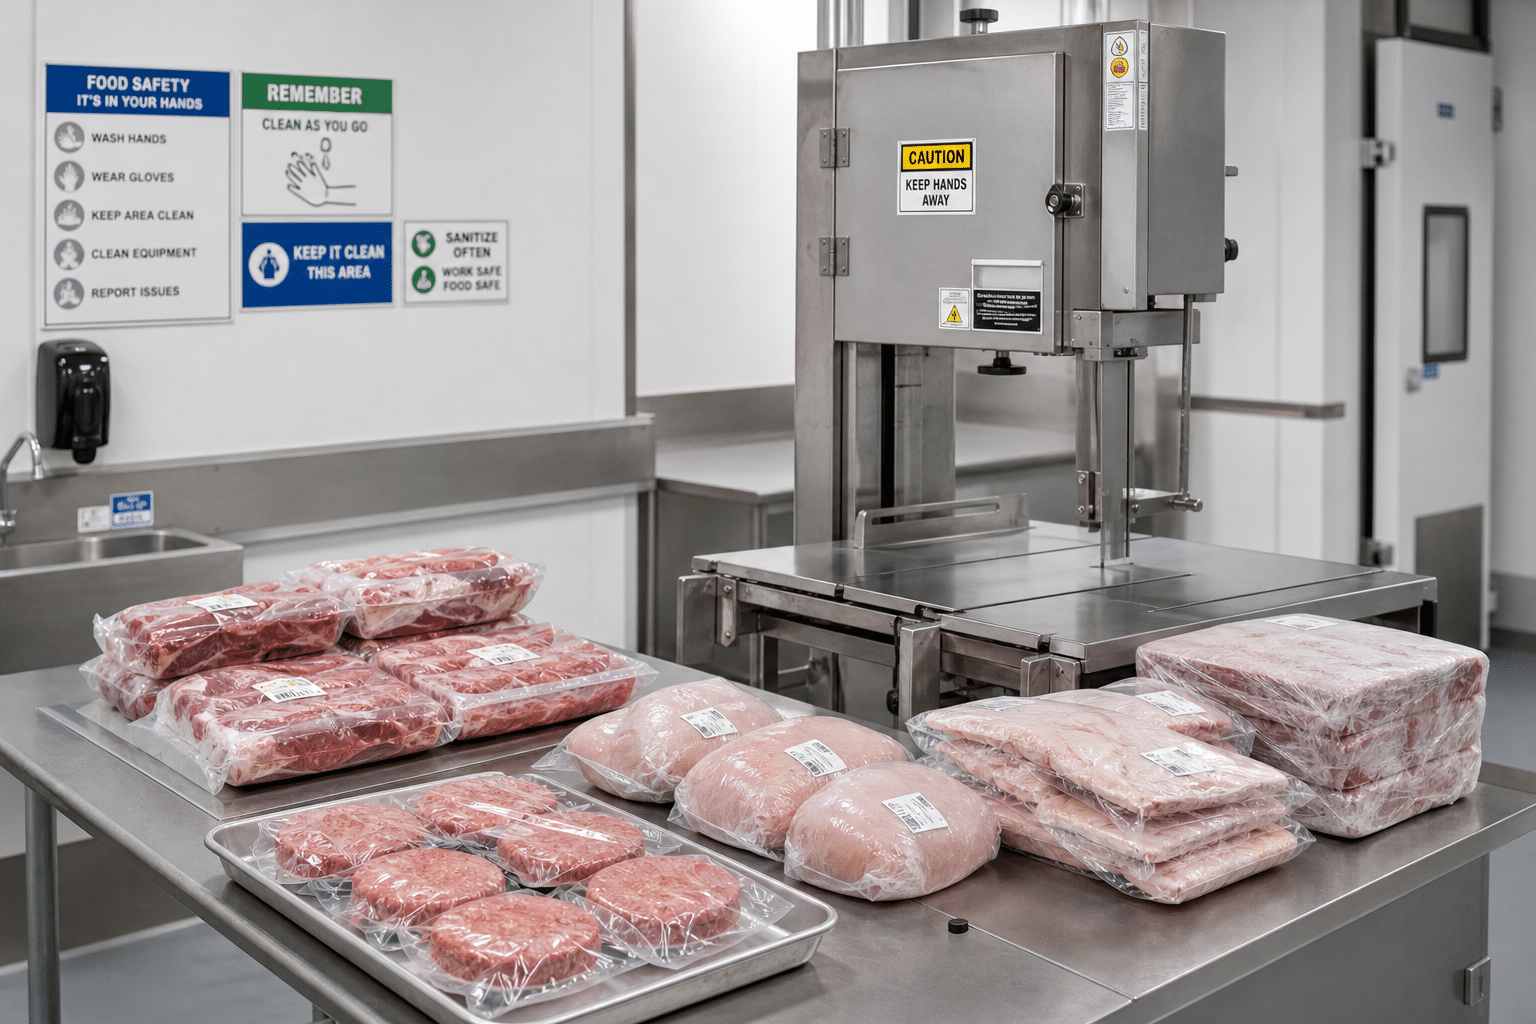
Commercial bone saw machine in a clean butcher preparation area

The right commercial bone saw machine is the one that safely handles your usual product size, temperature, and daily cutting volume without creating a difficult cleaning or service burden. Before comparing prices, confirm the meat and bone-in products you will cut, the largest product dimensions, the required bench or floor space, local electrical supply, blade availability, and the safety procedures your team can consistently follow.

For most butcher shops, meat counters, restaurants, and small processing rooms, the buying decision should be based on workflow rather than motor ratings alone. A machine may appear suitable on paper but still be a poor fit if its worktable is too small, its cutting clearance does not accept your typical cuts, or replacement blades are difficult to source.

Use this bone saw machine buying checklist to create a written specification before requesting quotations. Ask each supplier to confirm the supplied configuration, compatible blade dimensions, electrical requirements, cleaning instructions, available parts, and service process for your market.

What is a commercial bone saw machine?

A commercial bone saw machine, often called a meat band saw or butcher band saw, uses a continuous band blade to portion meat, bone-in cuts, poultry, fish, or frozen products. It is commonly used where consistent portions and clean, repeatable cuts are needed before retail display, further processing, or kitchen preparation.

It is not a general-purpose workshop saw. Food-contact construction, guarding, blade tensioning, worktable design, washable surfaces, and safe handling procedures are central to its intended use. The correct machine must also suit the condition of the product. Fresh bone-in meat, chilled poultry, and frozen blocks can behave very differently during cutting.

Operators should follow the machine manual, their local food hygiene requirements, and workplace safety rules. A bone saw is only one part of the process: receiving, chilled or frozen storage, preparation space, packaging, cleaning tools, and staff training all affect the result.

1. Start with your products and cutting workload

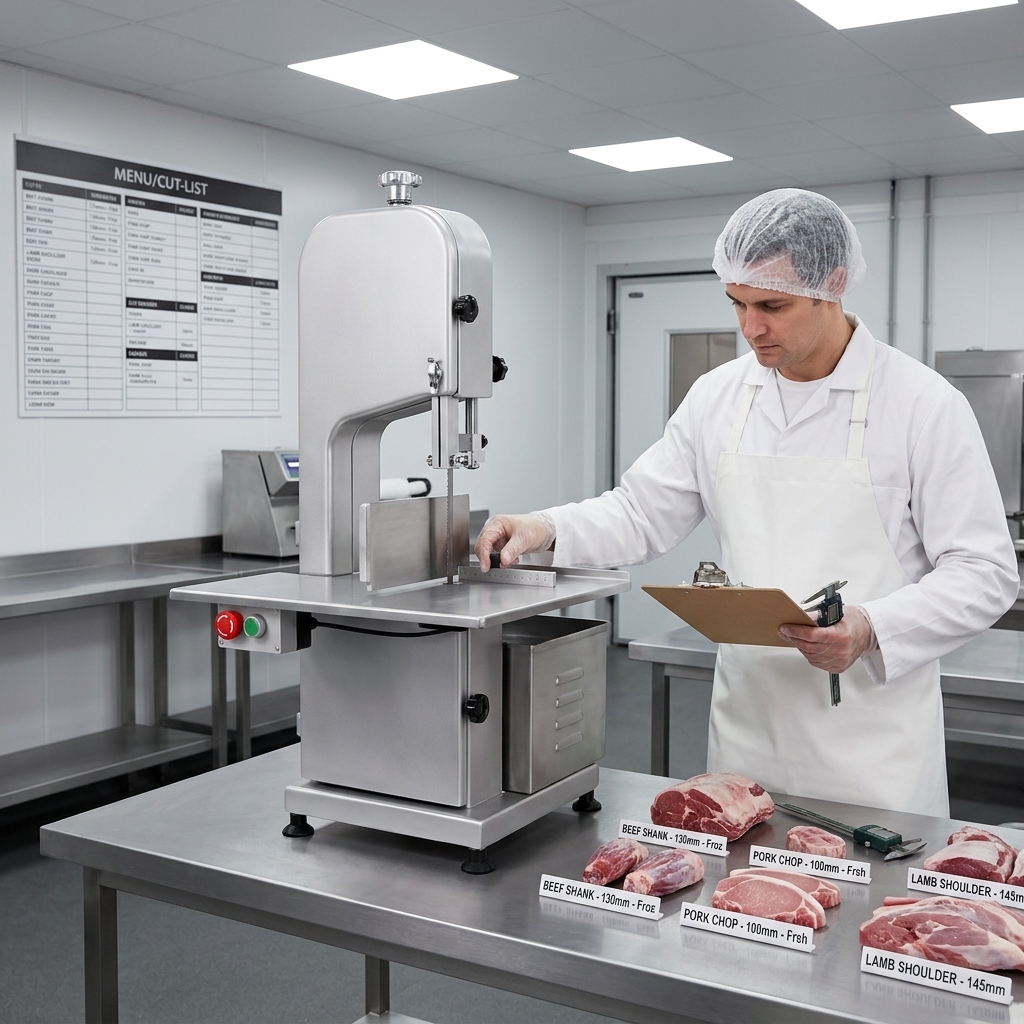
Butcher reviewing products before selecting a commercial bone saw

List what the machine will cut during a normal day, not only the occasional difficult item. Include product type, whether it is fresh, chilled, tempered, or frozen, typical dimensions, the heaviest pieces, and the desired finished portion. This information is more useful than a vague request for a “powerful” saw.

Questions to answer before selecting a machine

  • Which products will be cut: beef, pork, lamb, poultry, fish, ribs, shanks, chops, or frozen blocks?
  • Are products normally fresh or chilled, fully frozen, or partially tempered before cutting?
  • What are the maximum height and width of the products at the cutting station?
  • How many cutting sessions occur in a day, and how long does each session last?
  • Do you need repeated portions of a fixed thickness, or flexible one-off cuts?
  • Will the same machine be used by several operators across shifts?

Frozen material generally requires a more deliberate selection process because hardness, product shape, and blade tooth configuration affect cutting behaviour. Do not assume that a saw suitable for fresh bone-in products will be appropriate for every frozen item. Review the practical differences in this guide to choosing a bone saw for fresh versus frozen meat before finalising the intended application.

Be realistic about peak periods. A machine chosen for a few occasional cuts may not suit a busy counter preparing multiple product lines before service. Conversely, selecting a large machine for a compact operation can waste valuable space and complicate cleaning.

2. Choose tabletop or floor configuration

Tabletop and floor commercial bone saw configurations in a cutting room

The machine footprint should suit the cutting area, operator movement, product flow, and cleaning access. Tabletop machines can be practical where a stable, suitably sized workbench is available and cutting demand is moderate. Floor models may suit operations that need a dedicated cutting station, a larger working area, or more room to manage larger products.

Measure more than the installation footprint. Leave practical space for product infeed and discharge, packaging trays, cleaning access, and safe operator positioning. Consider where chilled or frozen product arrives, where it waits before cutting, and where finished portions move next. A saw placed in a narrow route can create congestion and increase handling risk.

The bench or floor must support the machine securely and remain stable in use. In wet food-processing areas, assess drainage, splash control, lighting, and the distance to a suitable handwashing and cleaning area. If the machine is expected to move for cleaning, check how that movement can be done safely.

For a more detailed layout comparison, see tabletop versus floor bone saw considerations for commercial operations. The best format is not automatically the largest one; it is the one that provides adequate product support and safe working space in your actual room.

3. Check cutting clearance and worktable support

Cutting clearance is the usable space available for the product around the blade and under the upper guide assembly. It must accommodate the largest items you plan to cut with enough room to position them safely. Do not estimate this from product photographs or overall machine dimensions; request the manufacturer’s stated usable cutting dimensions for the exact model.

The worktable should give the operator stable support while keeping the product under control. Review the fence or thickness guide if uniform portions are important. It should be straightforward to set, easy to clean, and secure during use. Also consider whether the product can be supported without operators placing hands close to the blade path.

Bring a dimensioned product list to the supplier discussion. Include items such as large bone-in joints, long rib sections, poultry frames, or frozen blocks that may be awkward to manoeuvre. If products are received in cartons or bags, make sure the material is removed and the product is properly prepared according to your process before it reaches the saw.

A good specification states the maximum product envelope, the typical cut thickness range required by the business, and the need for a suitable guide or fence. It should not rely on assumptions such as “standard butcher cuts.”

4. Confirm blade compatibility and cutting setup

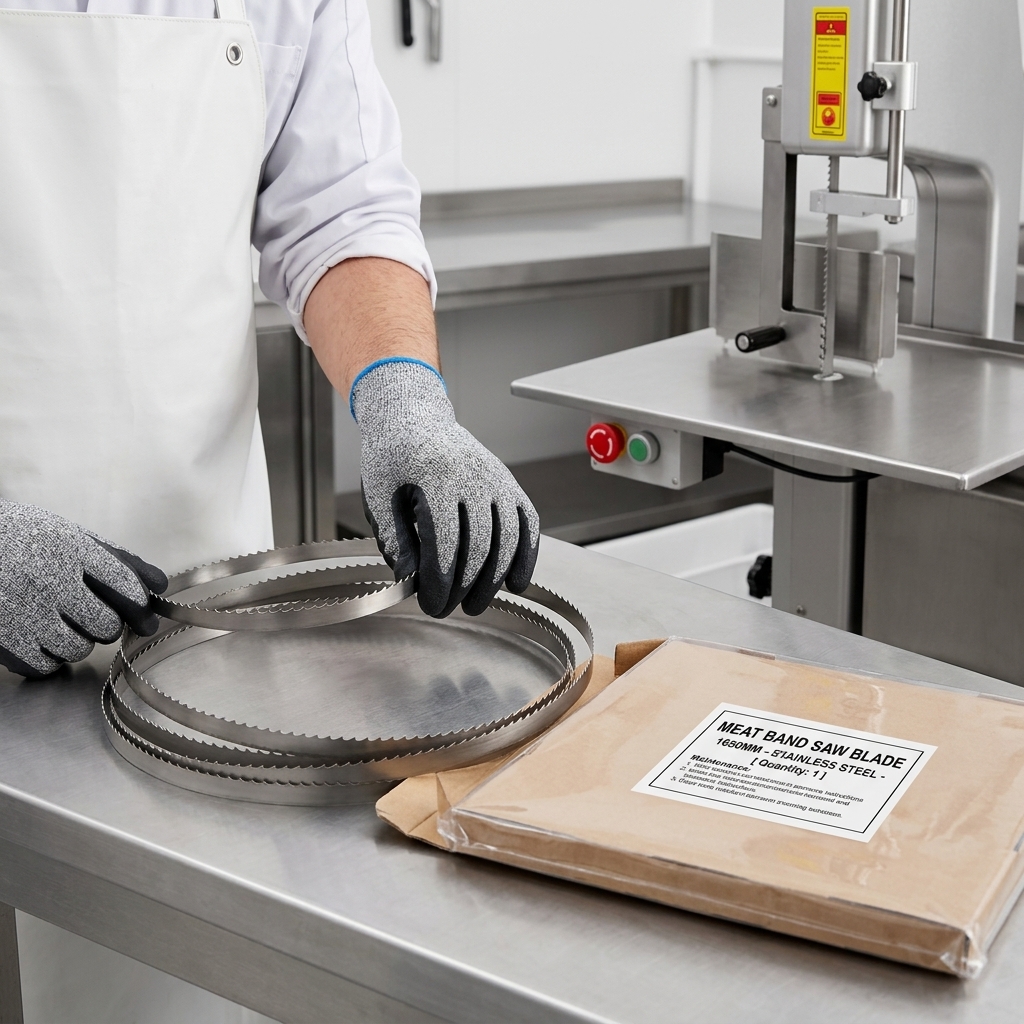
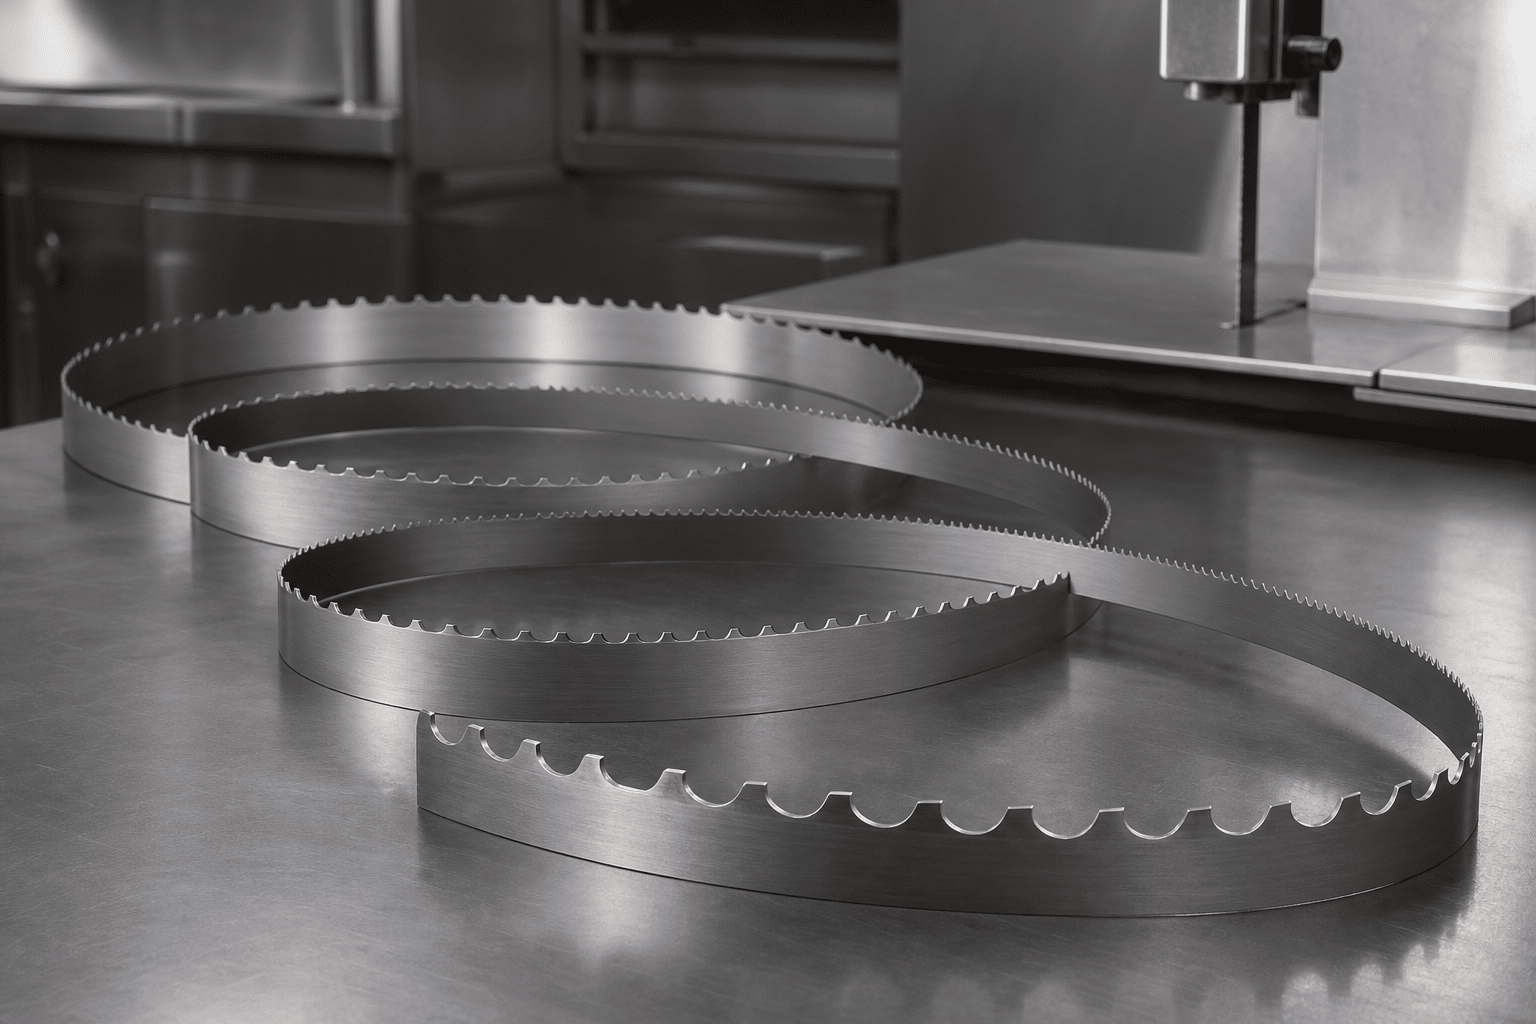
Inspection of a replacement blade for a commercial meat band saw

The blade is a consumable working component, not an afterthought. Before purchase, confirm the required blade length, width, tooth pitch, material specification, and approved replacement options for the model being considered. Keep these details with the machine records so that the team does not order an incompatible blade later.

Blade selection should reflect product hardness and the type of cut. A tooth pattern that works well for one application may not be the best choice for another. Rather than selecting by appearance alone, discuss the product list with the supplier and follow the machine manufacturer’s guidance. This commercial meat band saw blade selection guide explains why blade dimensions and tooth pitch should be matched to the saw and application.

Ask how blade tension is set and checked, how guides are adjusted, and which components should be inspected before each shift. Poorly fitted, worn, or incorrectly tensioned blades can affect cut quality and may create avoidable operational risk. Operators should never attempt improvised substitutions or adjustments beyond the manufacturer’s instructions.

Plan a controlled blade inventory. Keep the correct replacement blades in clean, protected storage; label them by model and specification; and establish a documented process for changing and disposing of blades. Your local procedures should address safe handling of sharp components and food-area hygiene.

5. Assess safety, cleaning, and sanitation

A commercial bone saw should be selected with safe daily use and complete cleaning in mind. Examine the blade guard arrangement, upper and lower blade coverage, product guide, emergency stopping method, non-slip footing or stable mounting, and access to areas that need routine cleaning. The safety features must be used correctly; they do not replace training, supervision, and a documented safe operating procedure.

Ask the supplier to explain the normal shutdown, isolation, disassembly, cleaning, rinsing, sanitising where required by your procedure, drying, reassembly, and pre-use inspection steps. Avoid equipment that cannot be practically cleaned within the time and staffing available. Areas around blade guides, wheels, doors, worktables, and product guides deserve particular attention because residue can build up during service.

Operators should be trained to use the pusher or product-handling tool supplied or specified for the machine, keep hands away from the blade path, avoid loose clothing and jewellery, and stop work if guards, blades, or controls are not in proper condition. Cleaning and blade changes should only be performed after the machine has been stopped and isolated according to the manual and site procedure.

Use essential commercial bone saw safety and maintenance protocols as a starting point for building your routine. Your site plan should also comply with local occupational safety and food hygiene obligations.

6. Confirm power and installation requirements

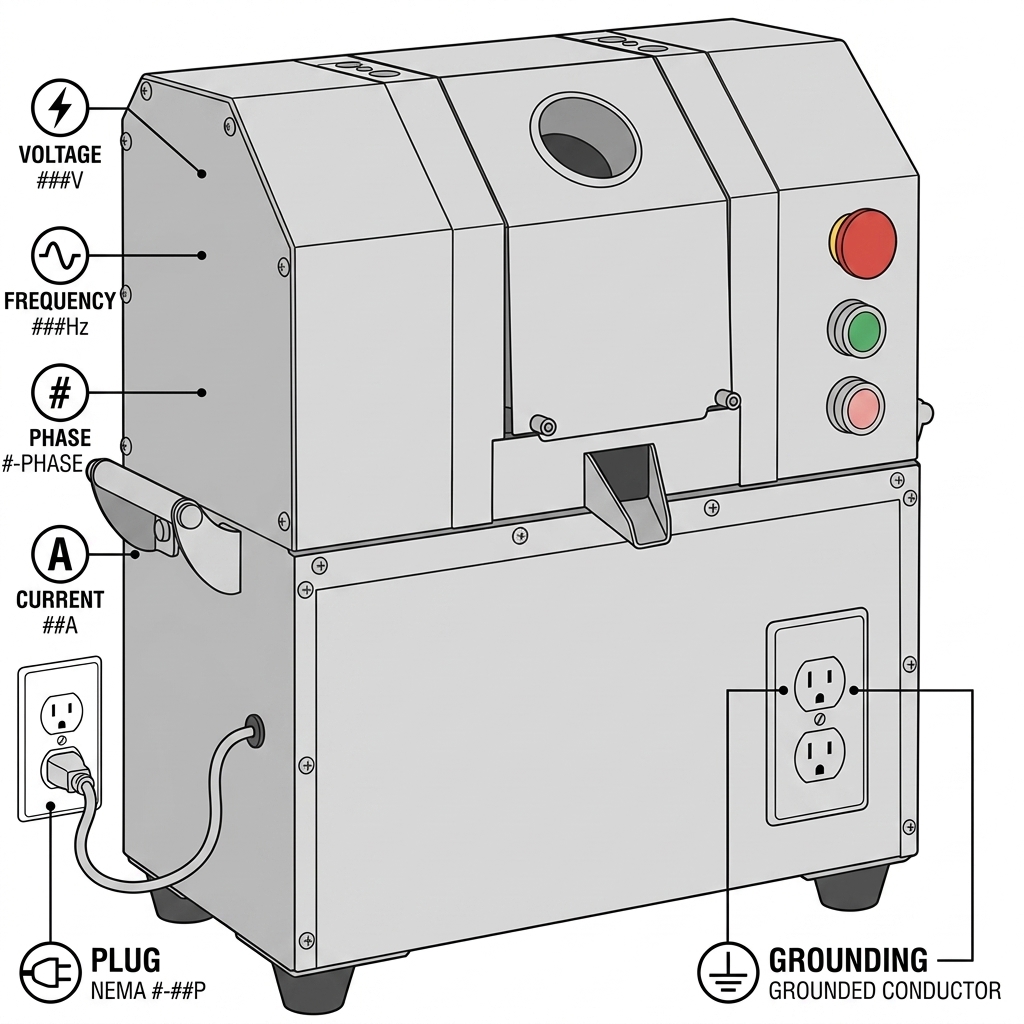
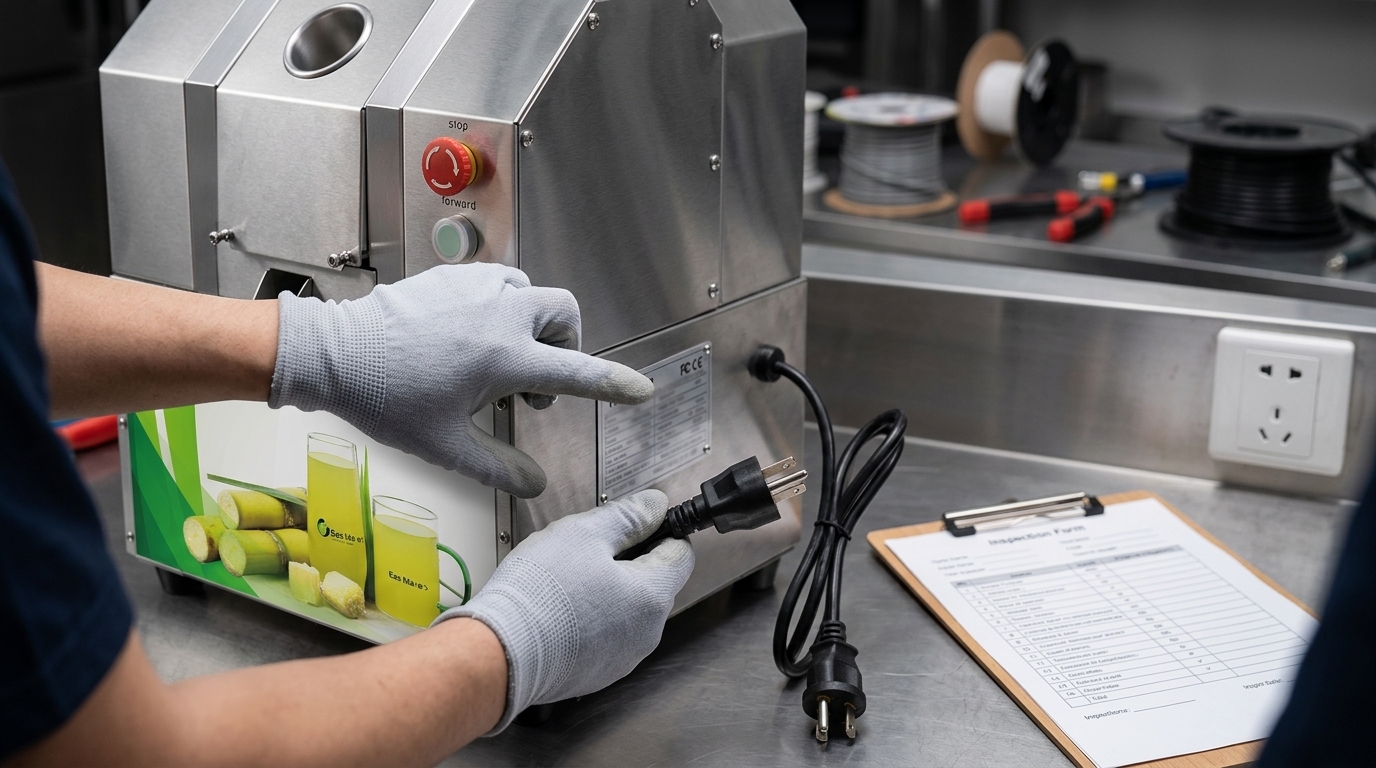
Confirm the electrical requirements for the exact machine and destination market before ordering. Check the rating plate specification or formal supplier documentation for voltage, frequency, phase, plug arrangement, and any local installation requirements. Never assume that an available outlet is suitable because the plug appears similar.

Share the site electrical details with the supplier early. If a qualified electrician is required to prepare the circuit, arrange that work before delivery. The electrical connection, protective device, grounding arrangements, and any local inspection requirements should be handled in accordance with applicable regulations and by qualified personnel where required.

Also plan the physical delivery route. Measure doorways, corridors, lifts, ramps, and the final installation point. Confirm whether the machine is shipped assembled, what must be fitted on site, and who is responsible for commissioning. Installation should include a stability check, verification of guards and controls, and operator familiarisation before production begins.

7. Review service, spare parts, and total ownership

The purchase price is only one part of ownership. A practical commercial bone saw program includes replacement blades, routine inspection, cleaning supplies, operator training, planned maintenance, and a clear route for obtaining parts or technical support.

Ask the supplier which wear items are expected to need routine attention, how spare parts are identified, how technical questions are handled, and whether manuals are supplied in a language suitable for your operators. Request a parts list or exploded diagram where available. Keep machine serial number, model information, blade specification, purchase documents, and maintenance records together.

For distributors, multi-site operators, and private-label buyers, discuss packaging, documentation, market-specific electrical configuration, branding, and after-sales responsibilities before placing an order. A clear agreement is more valuable than assumptions about what support is included.

Finally, assess the supplier’s responsiveness during the quotation stage. If product questions about configuration, product fit, or support cannot be answered clearly before purchase, that may indicate difficulty after commissioning. Select a partner that can help you define a machine specification appropriate to your process rather than simply offering a generic model.

Final pre-purchase checklist

Use the following checklist before approving a commercial bone saw machine purchase:

  • Documented list of products, temperature condition, and maximum dimensions.
  • Expected daily and peak cutting workflow defined.
  • Tabletop or floor configuration selected for the actual layout.
  • Usable cutting clearance confirmed in writing for the exact model.
  • Worktable, fence, and product support assessed for your portions.
  • Correct blade dimensions and application-appropriate tooth configuration confirmed.
  • Replacement blade source and controlled storage plan established.
  • Guarding, product-handling method, emergency stop, and safety procedures reviewed.
  • Cleaning access and end-of-shift sanitation routine evaluated.
  • Voltage, frequency, phase, plug, and installation requirements confirmed.
  • Delivery route, final placement, and commissioning responsibilities checked.
  • Manuals, parts information, maintenance guidance, and support route confirmed.
A complete checklist reduces the chance of buying a machine that is too small, poorly matched to frozen products, difficult to clean, or unsupported in your operating market. Keep the completed document with your purchasing records and use it to compare quotations on the same basis.

Fresh vs Frozen Meat: Choosing the Right Bone Saw

Table of Contents

A bone saw for frozen meat must be selected around the actual hardness, product size, daily workflow, and cleaning requirements of your operation. This guide explains the practical differences between cutting fresh and frozen meat and the specifications buyers should confirm before purchasing.

Quick answer: Which bone saw is right for your meat?

Commercial bone saw prepared for portioning frozen bone-in meat in a clean food processing workspace

Choose a bone saw for frozen meat when your main products are frozen meat blocks, bone-in portions, poultry, fish, or other firm products that need controlled portioning before sale or further processing. The right machine should be specified for the product’s frozen condition, maximum product dimensions, intended cut type, electrical supply, and cleaning routine.

A commercial bone saw may also be used for chilled or fresh bone-in meat when the manufacturer permits it and the product can be handled safely and hygienically. However, fresh meat is softer and can be more difficult to guide consistently. It may also leave more residue on the blade and worktable. A business that processes both fresh and frozen items needs a workflow that prevents cross-contamination and allows effective cleaning between product types.

Do not choose only by motor rating or machine size. The practical decision depends on what you cut each day: the species and bone structure, whether product arrives solidly frozen or partially tempered, the largest block or carcass section, the number of cuts required per shift, available installation space, and local food-safety obligations.

Why fresh and frozen meat cut differently

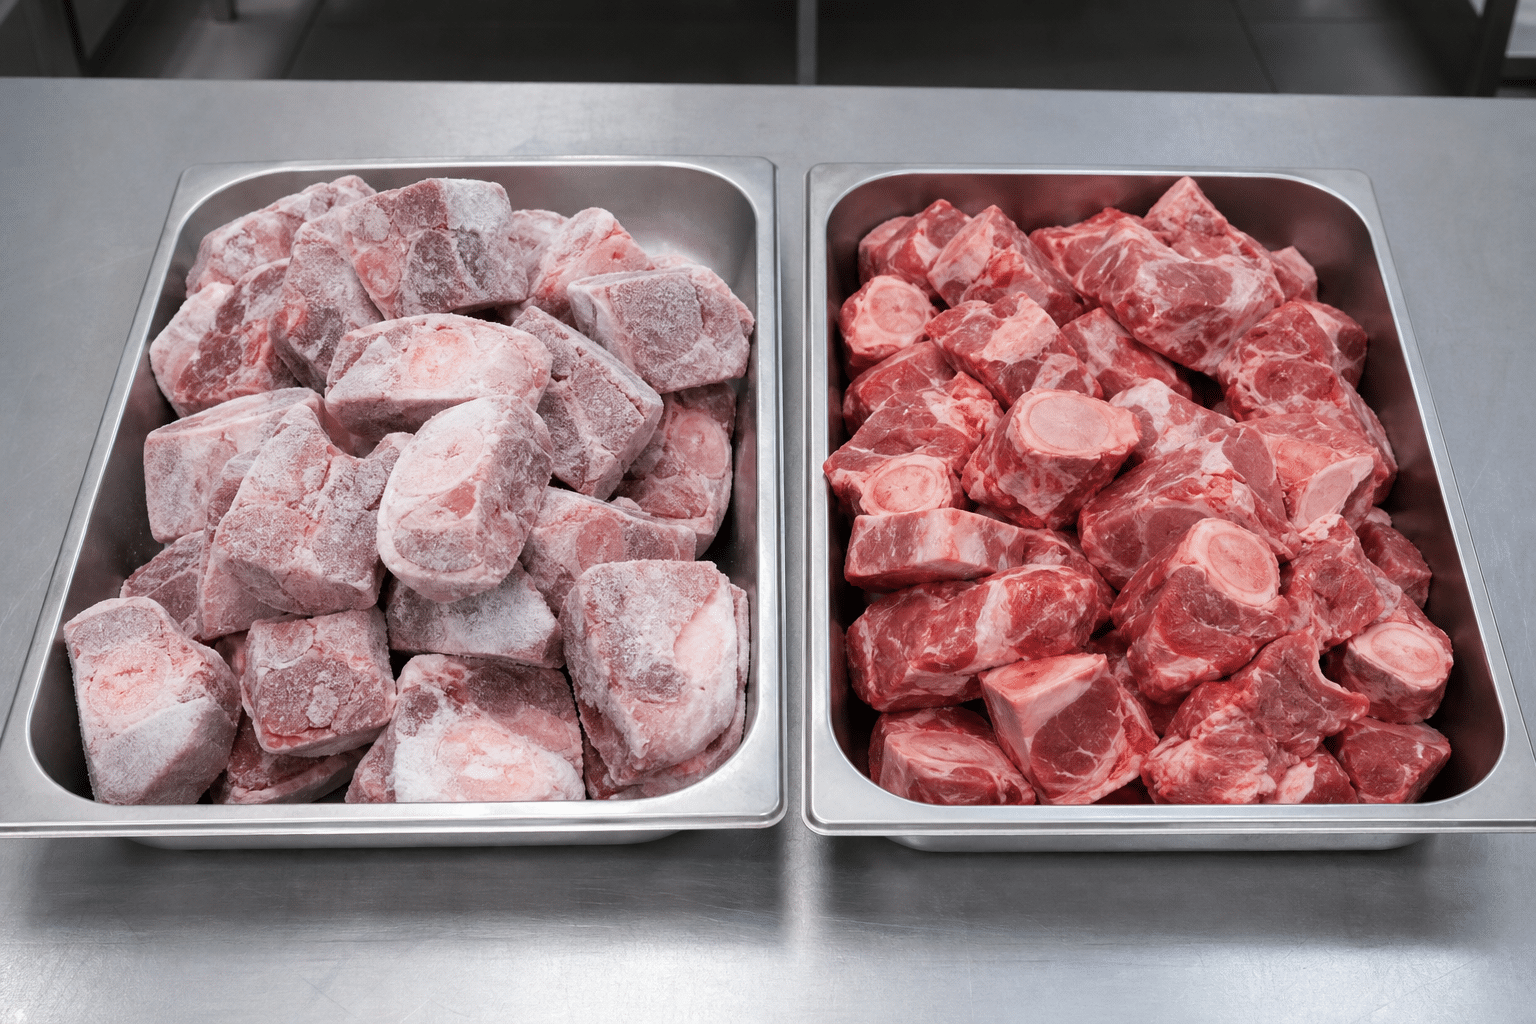
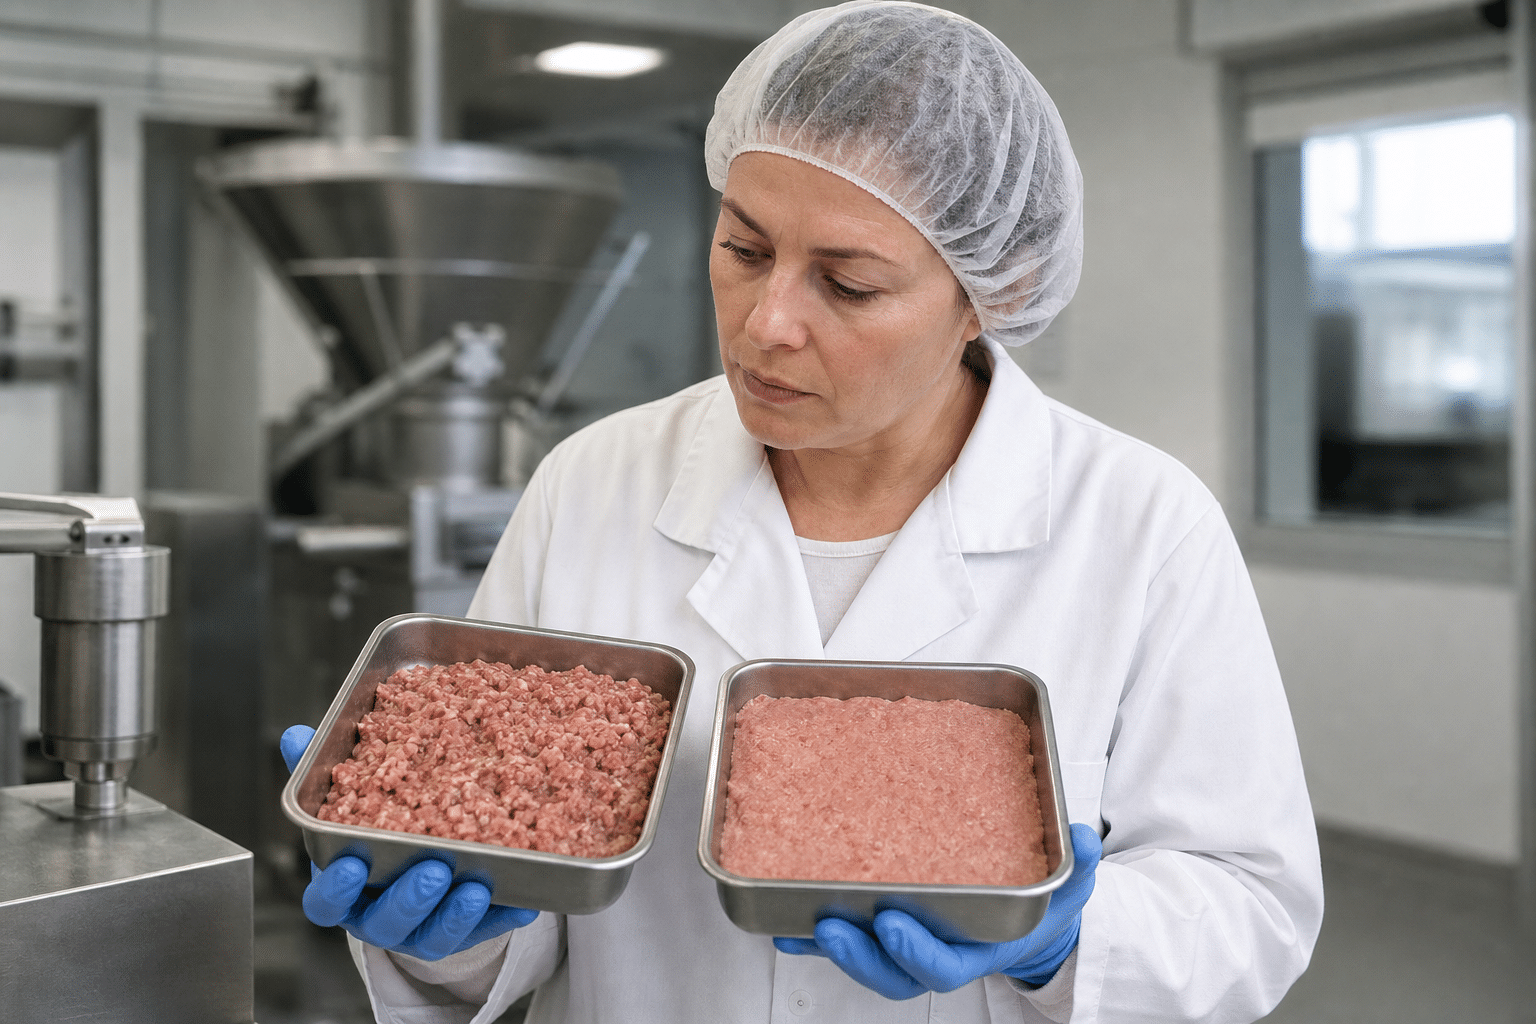
Separate trays showing frozen and chilled bone-in meat for comparison in a commercial preparation area

Meat condition changes the cutting task. Frozen product is firm and holds its shape, but it presents greater resistance at the blade, particularly where dense bone is present. Chilled or fresh meat is softer, more flexible, and more likely to move if it is not supported and fed correctly. These differences affect blade choice, operator technique, cleaning frequency, and the type of saw configuration that suits the operation.

Frozen meat and bone-in blocks

Frozen meat is commonly portioned to create manageable retail, food-service, or production sizes. The saw needs enough usable cutting clearance for the largest product that will be introduced, and the table should support stable, straight feeding. Product that is frozen unevenly may not cut in a uniform way: a hard exterior with a softened centre can affect control and cut finish. Operators should follow the equipment manual and site procedures for the permitted product condition.

Chilled or fresh bone-in meat

Fresh meat can be cut into chops, ribs, steaks, and smaller bone-in portions, but the soft tissue can pull or drag if the blade is dull, contaminated, incorrectly tensioned, or fed too quickly. Fresh product also requires disciplined separation from frozen stock, especially where different species or raw and ready-to-use products are handled. A bone saw is not automatically the best tool for every fresh-cut task; knives, portion cutters, or other equipment may be more appropriate for boneless or delicate products.

In both cases, the objective is controlled cutting, not forcing product through the blade. A stable product, correctly maintained blade, clean table, and trained operator are more important than trying to increase speed through excessive feed pressure.

How to choose a bone saw for frozen meat

Commercial bone saw showing a clean worktable, product guide, and blade guard

When comparing a commercial bone saw for frozen meat, start with the real product and process rather than a generic machine category. Request complete technical information from the supplier and confirm that the proposed model is appropriate for your planned use.

  • Product type and condition: Identify whether you will cut frozen beef, pork, lamb, poultry, fish, bone-in portions, or mixed products. State whether products are solidly frozen, chilled, or partially tempered.
  • Maximum cutting dimensions: Measure the widest, tallest, and longest product you expect to process. Check usable throat clearance and table space, not only overall machine dimensions.
  • Required cut: Define whether you are cross-cutting blocks, making chops, splitting bone-in sections, or producing consistent retail portions. The desired cut size influences table guidance and operator workflow.
  • Blade and tensioning arrangement: Confirm the compatible blade type and dimensions, the adjustment process, and the supplier’s guidance for inspection and replacement. A blade must be maintained within the machine’s approved specification.
  • Construction and cleanability: Review food-contact areas, access for cleaning, removable components where applicable, drainage, and areas where meat residue could accumulate.
  • Power and installation: Verify rated voltage, frequency, phase, plug or hard-wiring requirements, and the space needed for safe access around the machine. Never assume a machine configured for another market matches your local electrical supply.
  • Support and spares: Ask about manuals, recommended service intervals, blade supply, wear parts, and the process for obtaining technical support.

Safety devices, guards, blade tension, and operating controls should be checked before every shift. For a useful reference point, see these commercial bone saw safety and maintenance protocols when building your equipment evaluation and staff training process.

When a bone saw is suitable for fresh meat

A bone saw can be a practical part of a fresh-meat operation when the job involves bone-in portions and the machine is approved by its manufacturer for that use. But it should fit within the full preparation line, not be treated as a universal cutter.

For example, a butcher shop may use a saw to cross-cut bone-in products, then use knives for trimming and final presentation. A central kitchen may portion frozen blocks before controlled thawing or further preparation. A processor that receives a mixture of chilled and frozen material may need separate production periods, cleaning breaks, labelled utensils, and defined storage routes to keep the workflow under control.

Fresh meat requires careful support during cutting. Product should be placed flat and kept stable against the table and any approved guide. Operators should not use hands close to the blade path, should not reach around guards, and should not attempt to correct a moving or unstable piece while the blade is running. If the product is too small to hold safely, use the manufacturer-approved pushing or holding method rather than improvising.

Avoid selecting a larger saw merely because fresh items occasionally include bone. The better choice is the model and workflow that safely handles the largest regular product, supports the normal number of cuts, and can be cleaned without compromising the next production task.

Safe operating practices for meat bone saws

Bone saws use a moving blade and must be operated only by trained personnel working to the machine manual and the site’s safety procedures. Guards and safety components are part of the operating system; they must not be removed, bypassed, or modified to make a difficult cut easier.

Before starting, inspect the work area and machine. Confirm that the blade is correctly installed and in acceptable condition, guards are in place, the table is clean, the product guide is secure where fitted, and the electrical connection matches the machine rating. Keep the floor dry and free of packaging, offcuts, or other trip hazards.

During cutting, use a calm, even feed. Do not force a hard frozen block into the blade. Forcing can reduce control, affect cut quality, and increase stress on the blade and machine. Stop the saw before clearing a jam, retrieving a dropped item, adjusting a guide, or cleaning the cutting area. Follow lockout or isolation procedures required by your workplace before servicing.

Operators should use the personal protective equipment specified by their risk assessment and local rules. Equipment does not replace training: written procedures, supervised onboarding, and regular refresher instruction remain essential. Use a documented daily inspection routine based on bone saw operating safety guidance so that defects are reported before processing begins.

Cleaning and maintenance between products

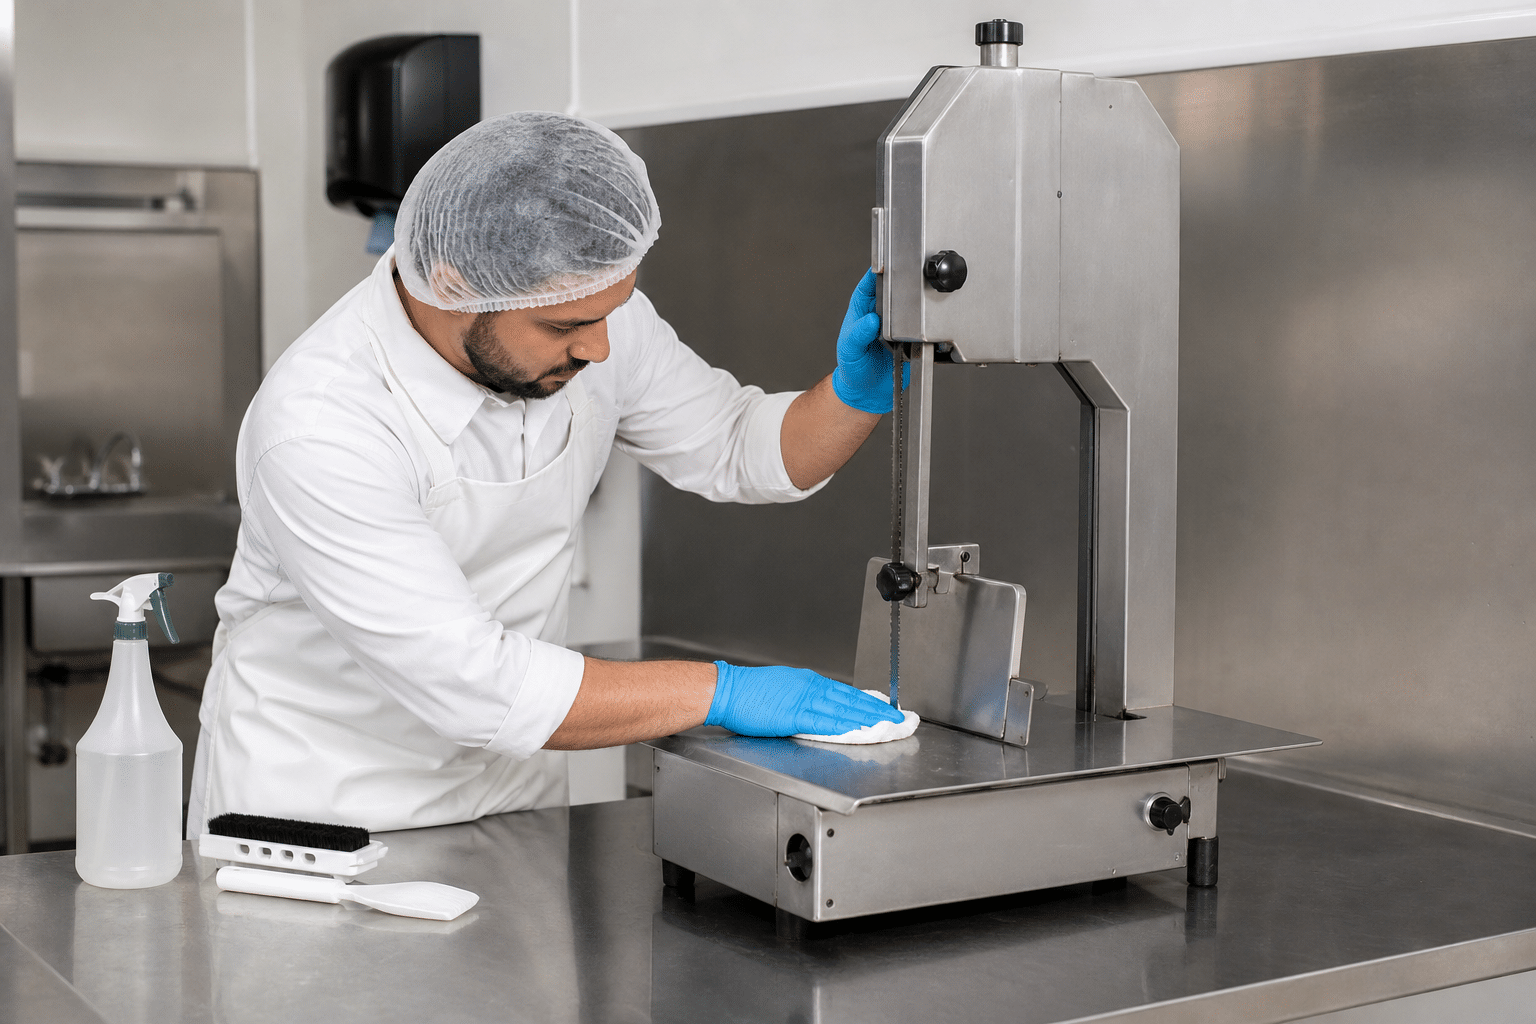
Clean commercial bone saw prepared for routine inspection and maintenance

Effective cleaning is particularly important in operations that switch between fresh and frozen products, different meat species, or different batches. The exact cleaning method depends on the machine design, the instructions supplied with it, and your food-safety plan. Always disconnect or isolate the machine before cleaning, and never direct water at electrical areas unless the manufacturer specifically confirms that the machine and cleaning method are suitable.

At the end of a production period, remove visible residue from accessible areas using the approved method. Clean and sanitise food-contact surfaces, the worktable, guides, blade-area components, and removable parts according to site procedures. Allow components to dry as required before reassembly. Inspect the blade for damage, wear, residue, and correct condition before returning the machine to service.

Keep a maintenance record covering cleaning, blade changes, inspections, adjustments, faults, and repairs. This record helps managers identify repeat problems, schedule replacement parts, and demonstrate that routine checks are being completed. Blade replacement and internal servicing should be carried out by trained personnel following the equipment documentation.

For a structured starting point, adapt these preventive maintenance steps for commercial bone saws to your approved sanitation schedule and the instructions for your specific model.

Buyer checklist before ordering

Before requesting a quotation for a bone saw for frozen meat, prepare a clear brief for the supplier. This makes it easier to identify a machine configuration that matches your operation and local market.

  • List each product to be cut, including species, bone-in or boneless condition, and typical temperature at cutting.
  • Provide the maximum dimensions and approximate weight range of the largest regular product.
  • Describe the cuts you need to make and the expected number of cutting sessions per day.
  • Confirm available installation space, access route, bench or floor arrangement, and cleaning area.
  • State your local voltage, frequency, phase, and applicable food-processing or workplace requirements.
  • Ask for the current product documentation, machine dimensions, electrical details, blade specification, cleaning instructions, and spare-parts support.
  • Plan for staff training, operating procedures, cleaning records, and blade inspection from the first day of operation.

The best bone saw is not simply the one designed for the hardest product. It is the one that is correctly specified for your frozen and fresh-meat workflow, installed correctly, operated safely, and supported with a realistic maintenance routine.

Discuss your bone saw requirement

If you are planning to process frozen blocks, fresh bone-in portions, or a combination of both, contact Easimaker with your product dimensions, product condition, local power supply, and intended workflow. Our team can help you discuss the practical equipment considerations for your market and operation.

Contact Easimaker

Meat Band Saw Blade Selection Guide for Commercial Kitchens

Table of Contents

The correct meat band saw blade must match the saw manufacturer’s required dimensions and the products being cut. Use a coarser tooth pitch for frozen meat and bone-in cuts, then confirm blade length, width, thickness, material, and safe operating procedures before ordering.

Quick Answer: How to Select a Meat Band Saw Blade

Commercial meat band saw with a replacement blade in a professional food preparation area

For reliable meat band saw blade selection, start with the exact blade dimensions specified for the machine: length, width, thickness, and tooth pitch. Then match the tooth pattern and pitch to the product. Frozen meat and bone-in cuts usually need a coarser, more open tooth configuration, while fresh boneless meat generally needs a finer cutting pattern for a cleaner portioning cut. The correct blade is not simply the sharpest available blade; it is the blade that fits the saw, suits the product temperature and composition, and can be cleaned and replaced safely within the kitchen’s operating routine.

Before placing an order, verify the saw model, the manufacturer-approved blade specification, the material being cut, and the electrical and guarding condition of the machine. Blade choices should always support the machine manual and local food-safety procedures rather than replace them.

What a Meat Band Saw Blade Does

Close-up of a meat band saw blade and guide area on a commercial saw

A meat band saw blade is a continuous, flexible toothed band that travels around the saw wheels and passes through the work table. It is used to portion meat, poultry, fish, and selected bone-in or frozen products where a knife or slicer is not appropriate. In commercial kitchens, butcher shops, meat preparation rooms, and food-processing operations, blade selection affects cut quality, waste control, cleaning workload, and operator safety.

Unlike a general workshop blade, a blade used for food preparation must be selected with sanitation and product handling in mind. The blade must also run correctly on the machine’s wheel system, guides, tensioning mechanism, and guards. A blade that is the wrong length may not tension correctly. A blade with unsuitable width or thickness may track poorly or place unnecessary stress on the machine. A tooth configuration that does not suit the product can produce rough cuts, excessive drag, or rapid dulling.

Blade performance depends on the complete setup, not the blade alone. Saw cleanliness, blade tension, guide adjustment, operator feed pressure, product condition, and the condition of the wheels all influence the result. For operational context, review these commercial bone saw safety and maintenance protocols alongside the instructions for your own saw model.

The Main Blade Selection Factors

Commercial band saw blade sections showing different tooth spacing

Use the following factors in order. Machine compatibility comes first, because even an otherwise suitable blade cannot be used safely if its dimensions do not match the saw.

1. Blade length

Blade length is the full circumference of the continuous band. It must match the machine manufacturer’s requirement. Do not estimate it from the table size or use a blade from a similar-looking saw. Check the data plate, operator manual, previous verified blade packaging, or the machine supplier’s parts list. If the old blade is damaged or its size is unknown, measure it only as a cross-check, not as the sole ordering reference.

2. Blade width

Width is measured from the tooth tip to the back edge of the blade. A wider blade generally offers more stability for straight cuts, provided the saw is designed for it. A narrower blade may be specified for particular machines or cutting tasks. Always stay within the width range approved for the saw and its guides.

3. Blade thickness

Thickness affects flexibility, tracking, and durability. The correct thickness depends on the wheel diameter and design of the specific saw. A thicker blade is not automatically better. If it is outside the recommended specification, it may not flex correctly around the wheels or may create tracking problems.

4. Tooth pitch and teeth per inch

Tooth pitch is commonly described by teeth per inch, often shortened to TPI. A lower TPI means fewer, larger teeth with more space between them. A higher TPI means more, smaller teeth. Larger tooth gullets can clear heavier material more effectively, while smaller teeth can support a smoother cut in suitable products. The correct choice depends on whether the product is frozen, fresh, boneless, bone-in, fatty, or prone to producing small fragments.

5. Tooth form and blade material

Suppliers may offer different tooth forms and blade materials. Availability and suitability vary by market and saw model. Ask the supplier to identify the intended application rather than selecting only by a generic description such as “meat blade.” Confirm whether the blade is intended for food-use environments, the exact saw type, and the products in your menu or production plan.

Match the Blade to the Product Being Cut

Commercial kitchen workstation prepared for chilled and frozen meat cutting

Product condition has a direct effect on blade choice. The same operation may need different replacement blades when it processes both fresh boneless meat and frozen bone-in portions. Build the selection around the most demanding regular task, or keep clearly identified blade stock for separate approved applications where the machine manufacturer permits it.

Frozen meat and bone-in products

Frozen product and bone place greater cutting demand on the blade. In many applications, operators use a coarser tooth pitch because the larger tooth spaces can help clear material during heavier cuts. However, the saw manufacturer’s approved blade specification remains decisive. Do not use a finer blade merely to improve surface appearance if the product is likely to overload or clog the tooth spaces.

Fresh boneless meat

Fresh boneless cuts often benefit from a tooth pitch selected for controlled, tidy portioning. The objective is a consistent cut without pulling, tearing, or compressing the product unnecessarily. Product temperature, fat content, portion thickness, and feed technique all affect the result. If cut quality changes, inspect the blade condition and saw setup before changing to a different pitch.

Poultry, fish, and mixed preparation work

Poultry and fish may include bone, skin, soft tissue, or variable product temperatures. A single blade specification may not be the best choice for every task. Discuss the actual product list with the equipment or blade supplier, including whether products are chilled, partially frozen, or fully frozen. This practical product review is more useful than choosing by the broad label “meat saw blade.”

Where a kitchen combines sawing with other preparation processes, plan each workstation around its own cutting method and cleaning requirements. For example, a commercial bowl cutter workflow for high-volume food preparation is a separate process and should not be treated as a substitute for portioning with a band saw.

Confirm Compatibility Before Ordering

A purchasing record reduces costly ordering errors. Keep a verified blade specification sheet for every saw in the operation. It should include the machine brand and model, blade length, width, thickness, tooth pitch, preferred product application, and the supplier’s reference code where available. Record the date the specification was confirmed and retain a copy of the relevant manual page.

Before ordering replacement blades, check:

  • the exact saw model and serial or production reference where applicable;
  • the manufacturer-specified blade length, width, and thickness;
  • the tooth pitch and tooth form approved for the intended products;
  • whether the saw will be used for fresh, frozen, boneless, or bone-in materials;
  • the blade material and packaging condition required by your purchasing and hygiene procedures;
  • the quantity needed to support planned blade changes without storing stock beyond its suitable condition.

Also confirm the machine’s power connection, isolation method, and service condition before returning it to use after a blade change. The principles in this guide to checking commercial food-equipment power requirements are useful for verifying rating-plate information, although the saw’s own manual is the controlling document for its electrical requirements.

Blade Handling, Cleaning, and Replacement

Safe inspection and cleaning of a commercial meat band saw

A correctly selected blade still requires correct handling. Blades are sharp, flexible, and can spring open when unpacked. Only trained personnel should remove, install, tension, or dispose of them. Isolate the machine from its power supply before blade work, follow the machine’s lockout or disconnection procedure, and use the personal protective equipment required by the site.

Cleaning should follow the saw manufacturer’s instructions and the operation’s food-safety plan. Remove product residues from accessible approved areas, clean and sanitise the relevant food-contact parts as specified, and ensure components are dry where required before reassembly. Do not force water or cleaning chemicals into electrical areas, bearings, or other components unless the equipment documentation explicitly permits the method.

Replace a blade when inspection shows damage, corrosion, missing or damaged teeth, cracking, kinks, tracking problems, or a noticeable decline in cutting performance. Do not continue using a blade that has contacted an unsuitable surface or has been mishandled. Dull blades can encourage excessive feed force, which reduces control and may affect cut consistency.

A scheduled maintenance process helps operators identify blade-related issues before they interrupt service. The planning approach in this bone saw maintenance and safety guide can support a broader inspection routine, but always apply the checks and intervals required by the specific meat saw manufacturer.

Common Meat Band Saw Blade Selection Mistakes

The most frequent problems are preventable when purchasing, kitchen, and maintenance teams use the same verified specification.

  • Ordering by appearance: Blades that look similar can differ in length, width, thickness, and tooth pitch.
  • Using one blade for every product without review: Fresh boneless portions and frozen bone-in cuts can place different demands on the blade.
  • Ignoring the saw manual: A supplier recommendation should not override the machine manufacturer’s dimensional and safety requirements.
  • Changing pitch to solve a mechanical issue: Poor tracking, vibration, or uneven cuts may be caused by guides, wheel condition, tension, or operator technique rather than the tooth pitch.
  • Waiting too long to replace a damaged blade: Continuing with damaged or dull teeth can affect product quality and safe control.
  • Failing to record a proven specification: Without a confirmed reference, future orders rely on guesswork and can delay production.

Final Blade Selection Checklist

Use this checklist before approving a meat band saw blade purchase:

  • Confirm the exact machine brand and model.
  • Confirm manufacturer-approved blade length, width, and thickness.
  • Select tooth pitch and tooth form for the actual product mix.
  • State whether products are fresh, chilled, partially frozen, fully frozen, boneless, or bone-in.
  • Confirm that the blade material and supply format fit site hygiene procedures.
  • Inspect guides, wheels, guards, table components, and tensioning arrangements before fitting a new blade.
  • Train designated staff in safe installation, inspection, cleaning, and replacement.
  • Record the final specification so future purchasing is consistent.

The most dependable approach is to treat blade selection as part of the whole processing system: machine compatibility, product type, operator practice, cleaning, maintenance, and spare-parts planning. When the specification is uncertain, pause the order and confirm it with the saw manufacturer or a qualified equipment supplier.

How to Make Consistent Meat Texture With a Bowl Cutter

Table of Contents

Consistent meat texture comes from controlling raw-material preparation, batch size, knife action, processing time, temperature, and ingredient order. This practical guide explains how commercial operators can use a bowl cutter to produce repeatable coarse, medium, or fine meat mixes.

The Short Answer: Control the Process, Not Only the Machine

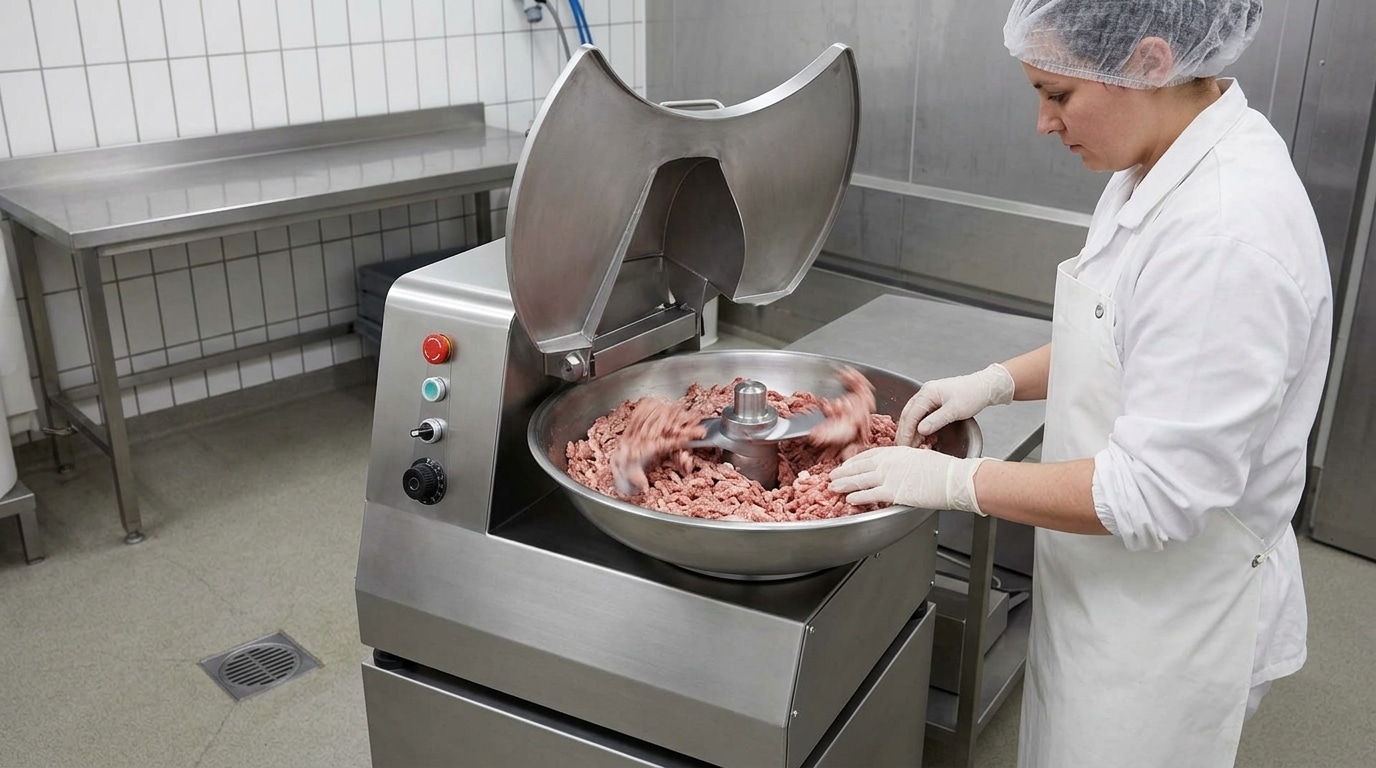
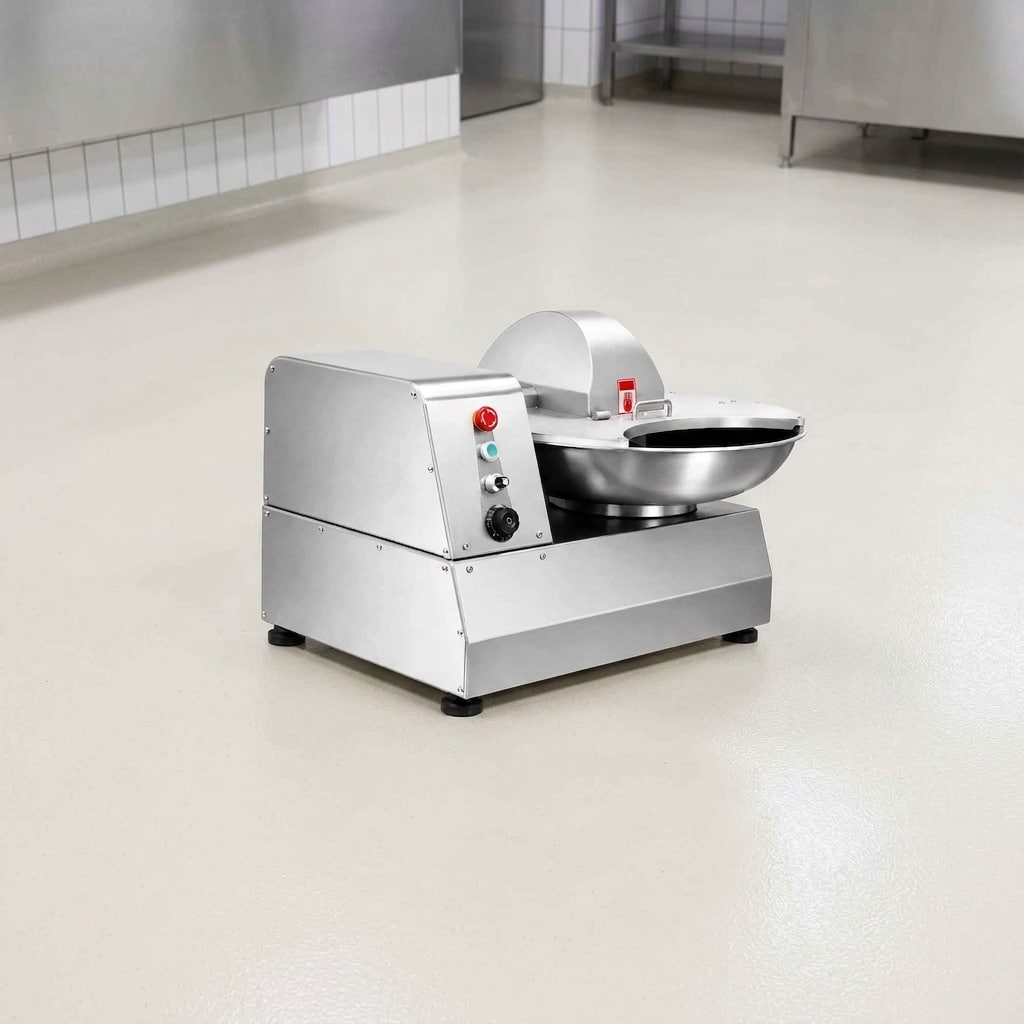
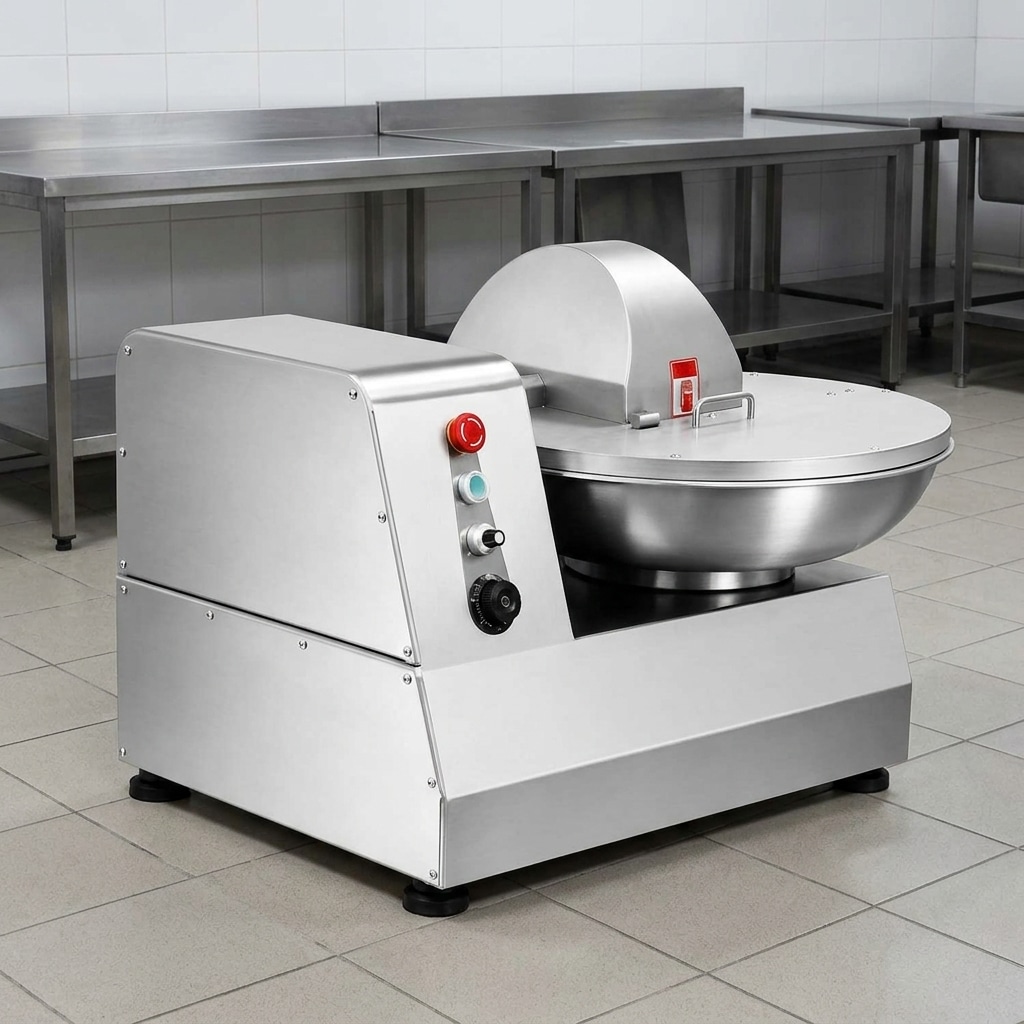
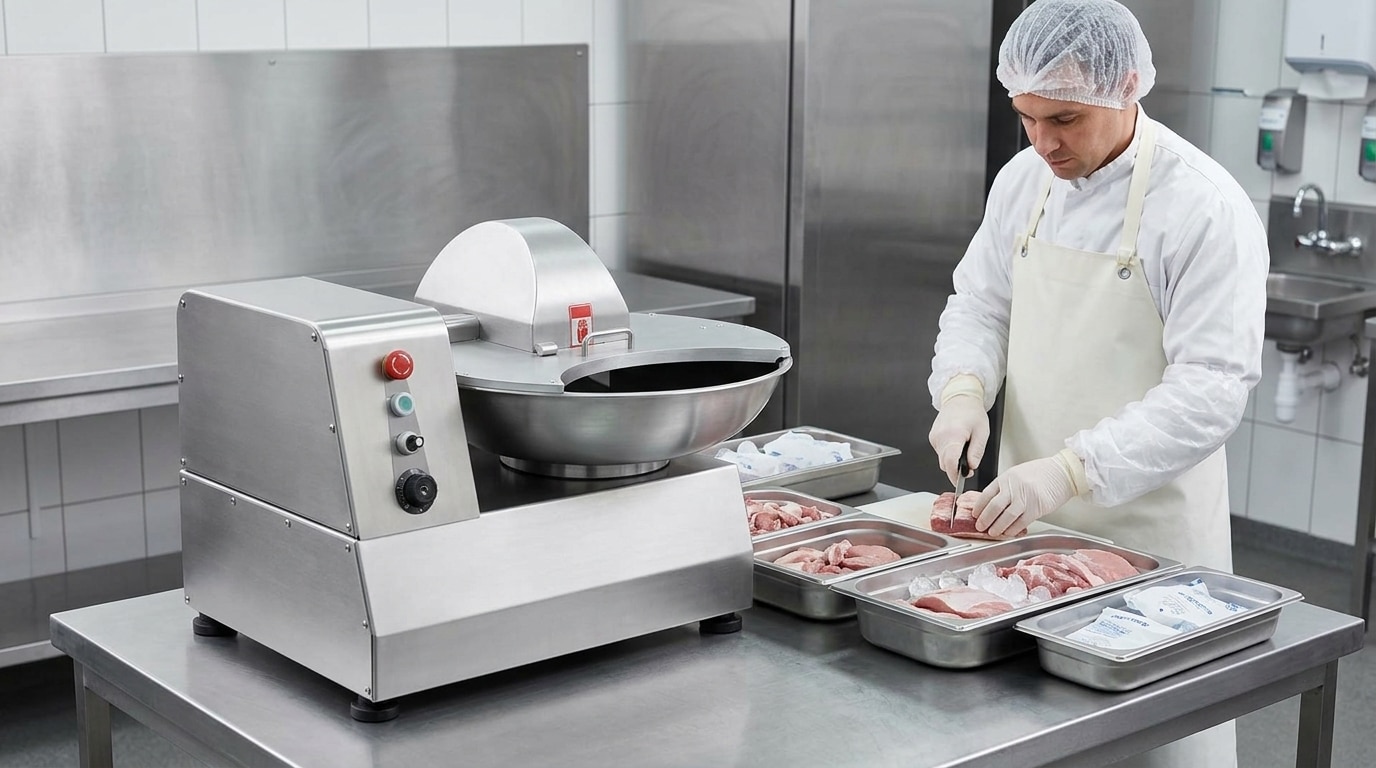
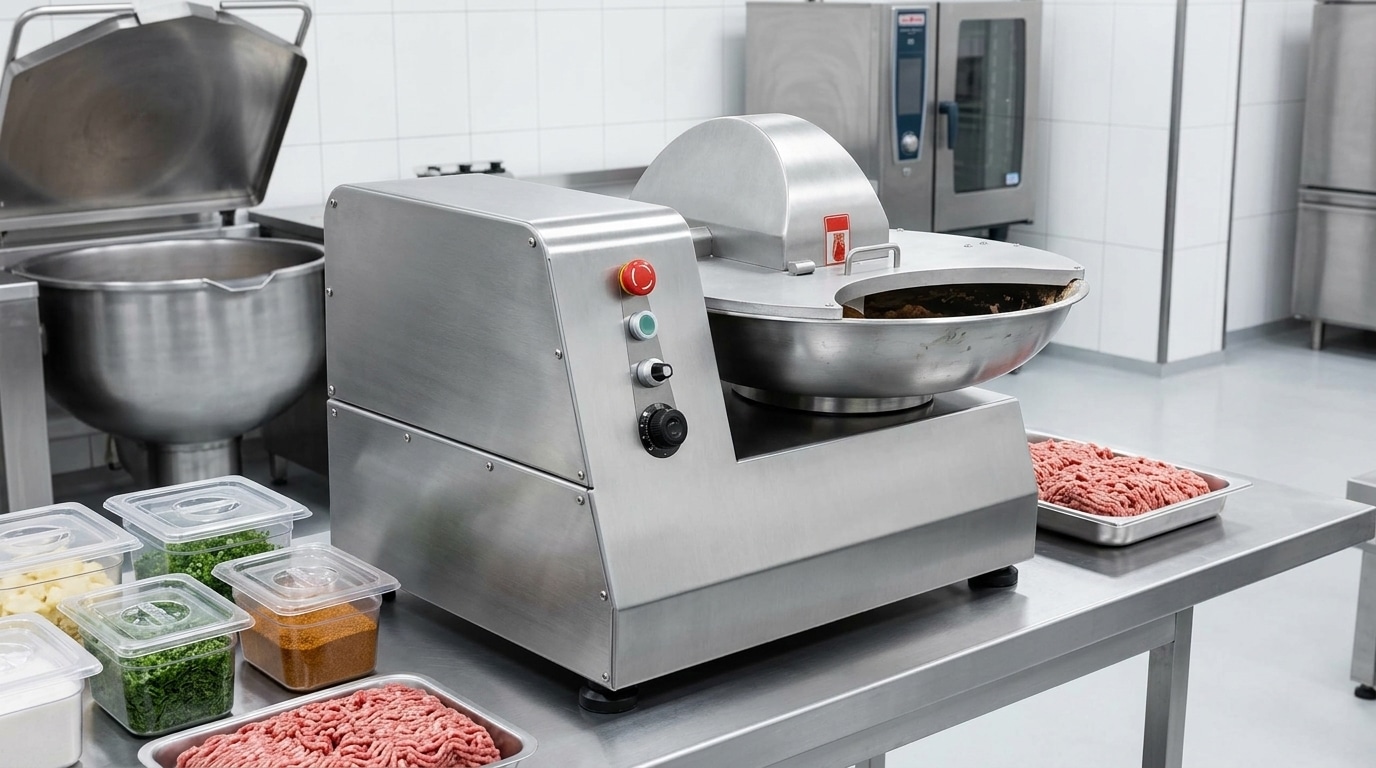
Commercial bowl cutter used for controlled meat processing in a clean production area

To use a bowl cutter for meat consistently, start with uniformly prepared cold meat, run a repeatable batch size, add ingredients in a fixed sequence, and stop at the same visual and temperature endpoint for every batch. Knife speed, bowl speed, processing time, meat temperature, fat distribution, and knife condition all affect the final texture.

A bowl cutter can produce a coarse chopped mix, a defined medium grind, or a fine meat paste depending on the recipe and process. The machine alone does not determine the result. Operators need a written method that specifies raw-material size, starting temperature, loading order, cutting stages, and the acceptable final appearance. This is especially important for products such as sausages, meatballs, patties, formed products, fillings, and seasoned minced-meat preparations.

Before introducing a bowl cutter into a larger production flow, review how trimming, portioning, and cutting affect the incoming meat. When bone-in or frozen blocks must be reduced before chopping, the correct upstream saw arrangement also matters. Our guide to tabletop versus floor bone saws can help operators plan a practical cutting station around available space and product volume.

What a Bowl Cutter Does in Meat Processing

Key components of a commercial bowl cutter for meat processing

A commercial bowl cutter is a food-processing machine that uses rotating knives and a moving bowl to chop and mix meat, fat, seasonings, water or ice, and other recipe ingredients. The knife assembly cuts the material while the bowl brings product repeatedly through the cutting zone. Depending on the machine configuration and the operator’s settings, the process may be used primarily for chopping, mixing, or developing a finer and more uniform meat system.

Compared with simply passing meat through a grinder, bowl cutting gives the operator direct control over how long the product is worked after ingredients are combined. That makes it useful where particle definition, ingredient dispersion, binding, or a finer texture must be managed closely. It is not a substitute for good raw-material control: inconsistent trim, large frozen pieces, warm fat, or poorly distributed seasoning will still produce variable batches.

For a high-level overview of where this equipment fits in commercial production, see how commercial bowl cutters support high-volume food preparation. Always follow the operating instructions and safety requirements for the specific model installed in your facility.

Prepare Meat for Repeatable Cutting

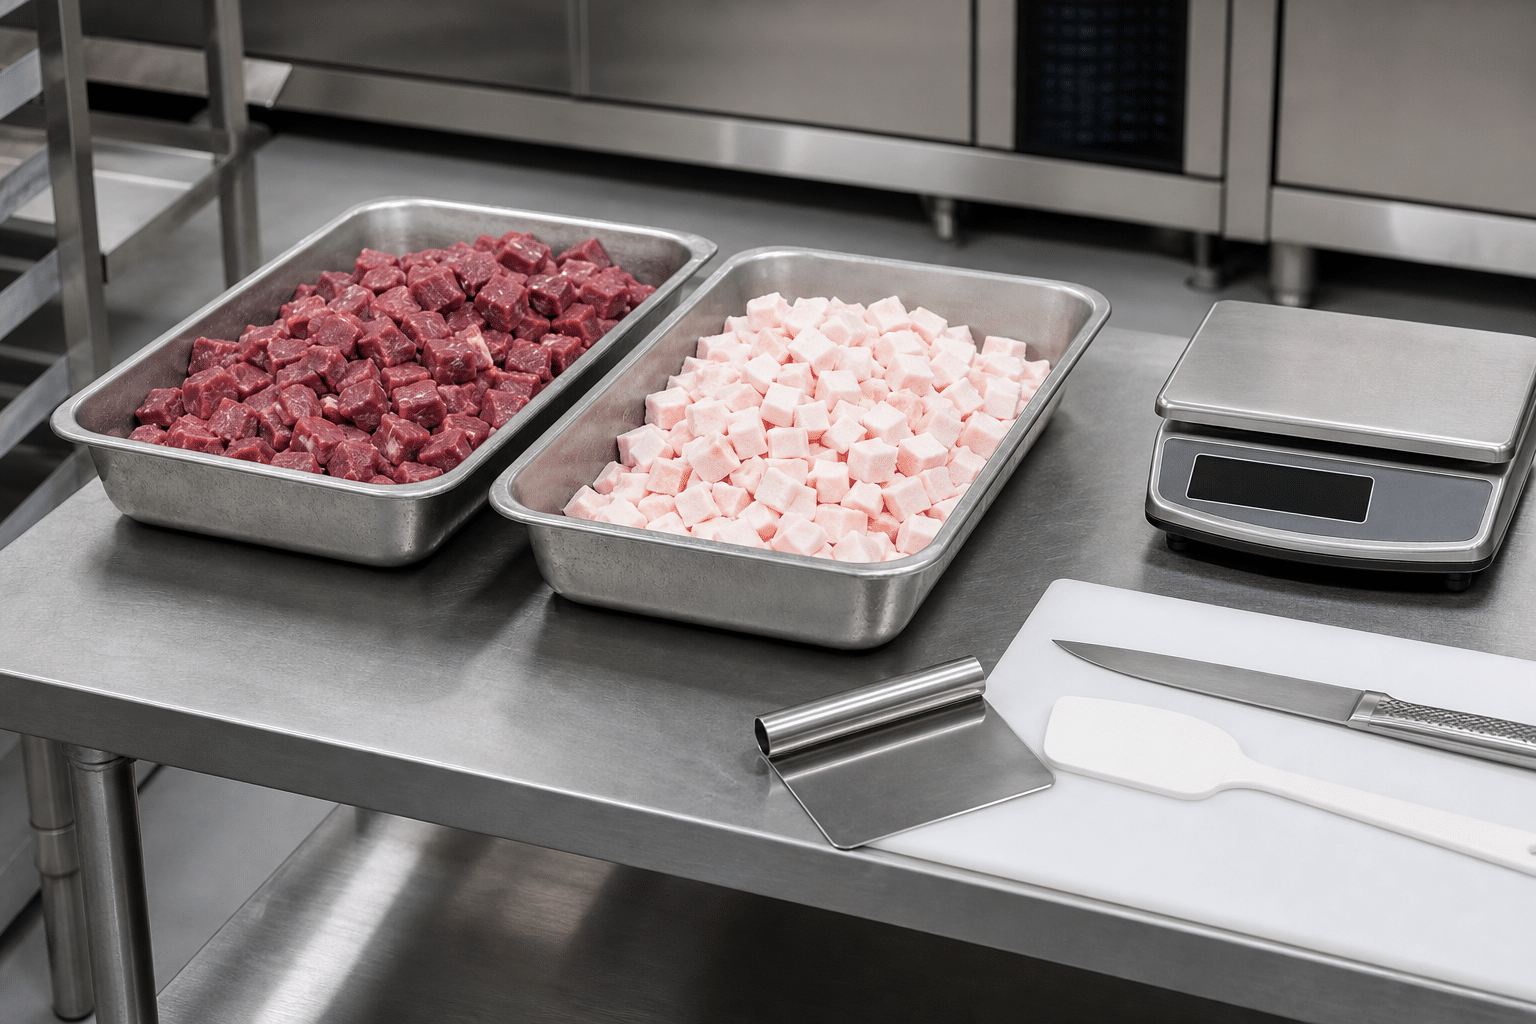
Uniformly prepared chilled meat and fat ready for bowl cutter processing

Texture consistency begins before the product enters the bowl. Standardise the incoming meat and fat as far as practical. Use the same approved cut specification, trim level, meat-to-fat ratio, and pre-cut piece size for each recipe. Large pieces take longer to reduce, while very small pieces may be overworked before larger pieces have reached the target texture.

Set a raw-material standard

  • Meat and fat: Use the recipe’s defined raw materials and keep the fat distribution consistent from batch to batch.
  • Piece size: Pre-cut meat into pieces that can move freely in the bowl and pass safely through the knife zone. The correct size depends on the bowl cutter, recipe, and loading method.
  • Temperature: Begin with properly chilled meat and fat. Warm raw material can smear rather than cut cleanly and can reduce control over the final texture.
  • Frozen material: Do not assume every bowl cutter can process large hard-frozen blocks. Follow the machine manual and use an appropriate upstream cutting method where required.
  • Foreign-material control: Remove bone fragments, packaging material, clips, and other contaminants before loading.

If your operation processes both fresh and frozen meat, establish separate preparation instructions. Product hardness, cut size, and safe handling requirements can differ significantly. The guide to choosing a bone saw for fresh versus frozen meat explains why the upstream cutting approach should match the condition of the product.

Weigh every component rather than estimating by volume. This includes meat, fat, salt, spices, dry ingredients, water, and ice. Accurate scaling protects flavour and product consistency, but it also helps the operator identify whether a texture issue comes from machine operation or a change in the formulation.

A Practical Bowl Cutter Process for Consistent Texture

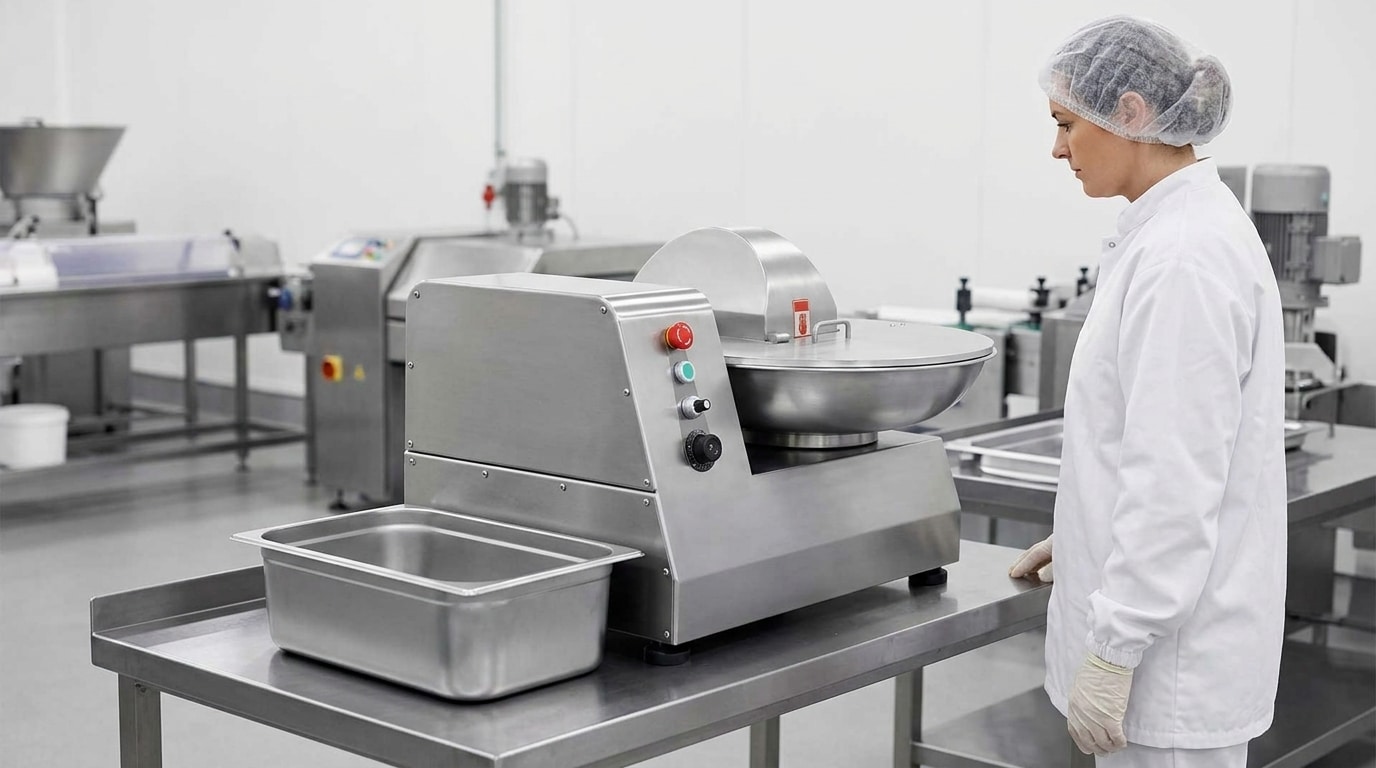
Operator monitoring a staged meat cutting process with a bowl cutter

The most reliable approach is to turn the recipe into a controlled standard operating procedure. Record the settings and sequence that produce the approved texture on your own equipment, then train operators to follow that method. The precise speed settings and times depend on the bowl cutter model, knife configuration, product formulation, and desired result, so they should not be copied from a different machine without validation.

1. Inspect the machine before loading

Confirm that the bowl, knife head, lid, scraper or discharge arrangement, guards, and controls are clean, correctly assembled, and in sound condition. Check that knives are undamaged and secure. A dull or damaged knife can tear, smear, or unevenly cut product. Never reach into the bowl or attempt an adjustment while moving parts are in operation.

2. Load a consistent batch

Use a batch weight that suits the machine and recipe. Underloading can prevent the meat from circulating through the knife zone as intended. Overloading can restrict movement, produce uneven cutting, and make temperature control harder. Define a normal production batch and a separate, validated smaller batch method if your operation needs one.

3. Cut in stages

For a coarse texture, use short cutting stages and inspect early. For a medium texture, use controlled cutting periods with pauses for visual checks. For fine products, use a staged process that brings the meat to a uniform base before completing ingredient addition and final cutting. Avoid relying on time alone; the same time can give different results if the starting temperature, batch weight, or raw-material size has changed.

4. Add ingredients in the specified order

Ingredient sequence affects both texture and distribution. A typical process may introduce lean meat first, then salt and seasonings, followed by chilled liquid or ice in controlled additions, with fat added at the point defined by the recipe. However, the correct order must be developed for the individual product. Dry ingredients added too late may not distribute evenly; liquid added too quickly may cause product to move differently in the bowl; fat added at the wrong stage may not give the intended particle definition.

5. Check the endpoint and discharge promptly

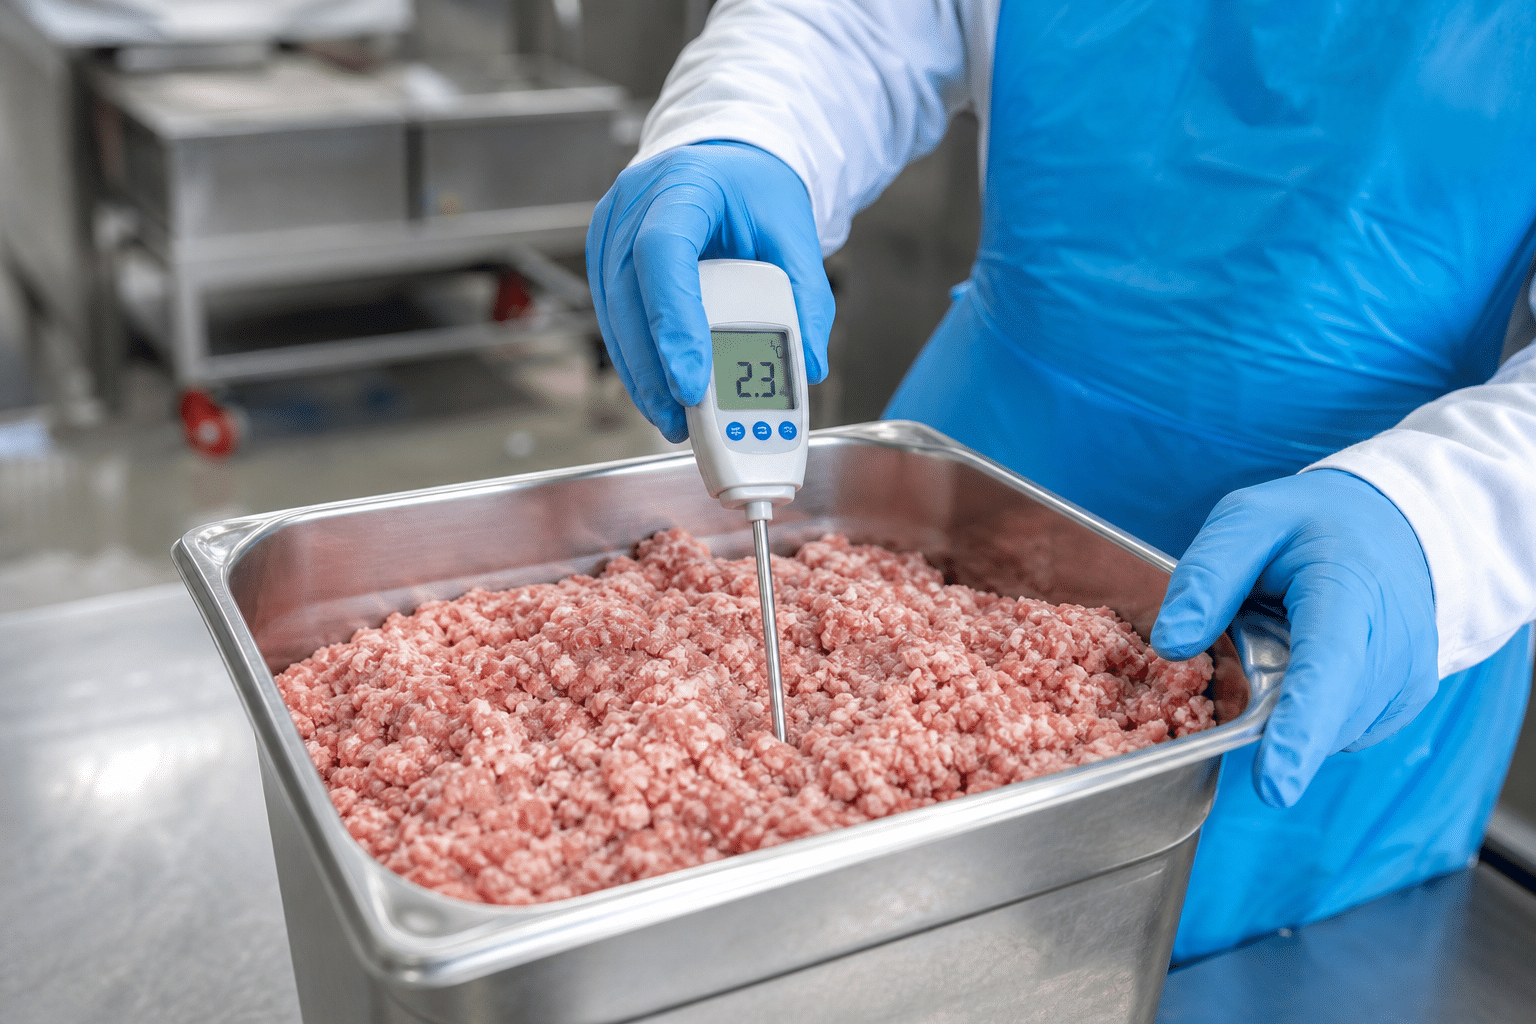
Use agreed visual checks: particle size, distribution of visible fat, absence of uncut pieces, surface appearance, and uniform seasoning. Where your food-safety programme requires it, measure and record product temperature with a suitable calibrated probe. Once the approved endpoint is reached, stop processing and discharge the batch promptly into clean receiving equipment. Continuing to run after the target is reached is a common cause of overworked texture.

Manage Temperature and Emulsion Stability

Checking meat mixture temperature during controlled bowl cutter processing

Knife action creates friction, and friction can raise product temperature. As the product warms, the meat and fat may behave differently in the bowl. This is one reason why a batch that looks correct early in the process can become smeared, greasy, or overly fine if it continues too long.

Use cold raw material and follow the recipe’s instructions for chilled water or ice where applicable. Add those ingredients in controlled quantities and at the specified stage. Do not use ice simply to compensate for an uncontrolled process. If a batch regularly reaches an unsuitable temperature before it reaches the required texture, investigate the real cause: knife sharpness, batch size, cutting time, starting raw-material temperature, room conditions, or recipe design.

Fine meat systems require especially close control. In these products, salt, protein extraction, water addition, fat incorporation, and knife work interact. The required process is product-specific and should be validated by the manufacturer or product-development team. Operators should not make unrecorded changes to speed, time, ingredient order, or water addition during routine production.

A simple batch record can make temperature-related issues easier to identify. Record the meat starting condition, batch weight, start temperature if measured, process stages, final appearance, and any corrective action. After several batches, these records can reveal patterns that are not obvious from one production run.

Common Texture Problems and Corrections

Visual quality check of meat texture after bowl cutter processing

When texture varies, avoid changing several variables at once. Compare the affected batch with the approved process record, identify the most likely difference, correct it, and document the result. The following checks address common operating symptoms.

  • Uneven particle size: Review pre-cut size, batch loading level, ingredient order, and whether the product is circulating correctly. Check knife condition and confirm that the cutting stage was long enough for the largest pieces, without unnecessarily extending the full batch.
  • Meat appears smeared rather than cleanly cut: Check raw-material temperature, fat condition, knife sharpness, and total processing time. Smearing is often associated with warm product or overprocessing.
  • Visible uncut pieces: Review incoming piece size, batch weight, knife condition, and process time. Do not attempt to solve a recurring issue only by running every batch longer, as this may overwork the rest of the product.
  • Fat is unevenly distributed: Confirm the meat-to-fat ratio, the size and temperature of fat pieces, and the stage at which fat was added. A change in trim specification can create a different result even when machine settings remain unchanged.
  • Seasonings are not evenly dispersed: Verify ingredient weights, screening or pre-blending practices where used, liquid addition, and the time allowed for mixing after addition.
  • Batch-to-batch variation between operators: Replace informal judgement with a documented recipe card, defined visual reference, batch weight, and process stages. Train each operator on the same acceptance criteria.

If knife damage, unusual noise, vibration, poor stopping performance, guard issues, or electrical faults are observed, stop the machine and follow the manufacturer’s service procedure. Mechanical problems should be assessed by qualified personnel rather than bypassing safeguards to continue production.

Cleaning, Inspection, and Batch Records

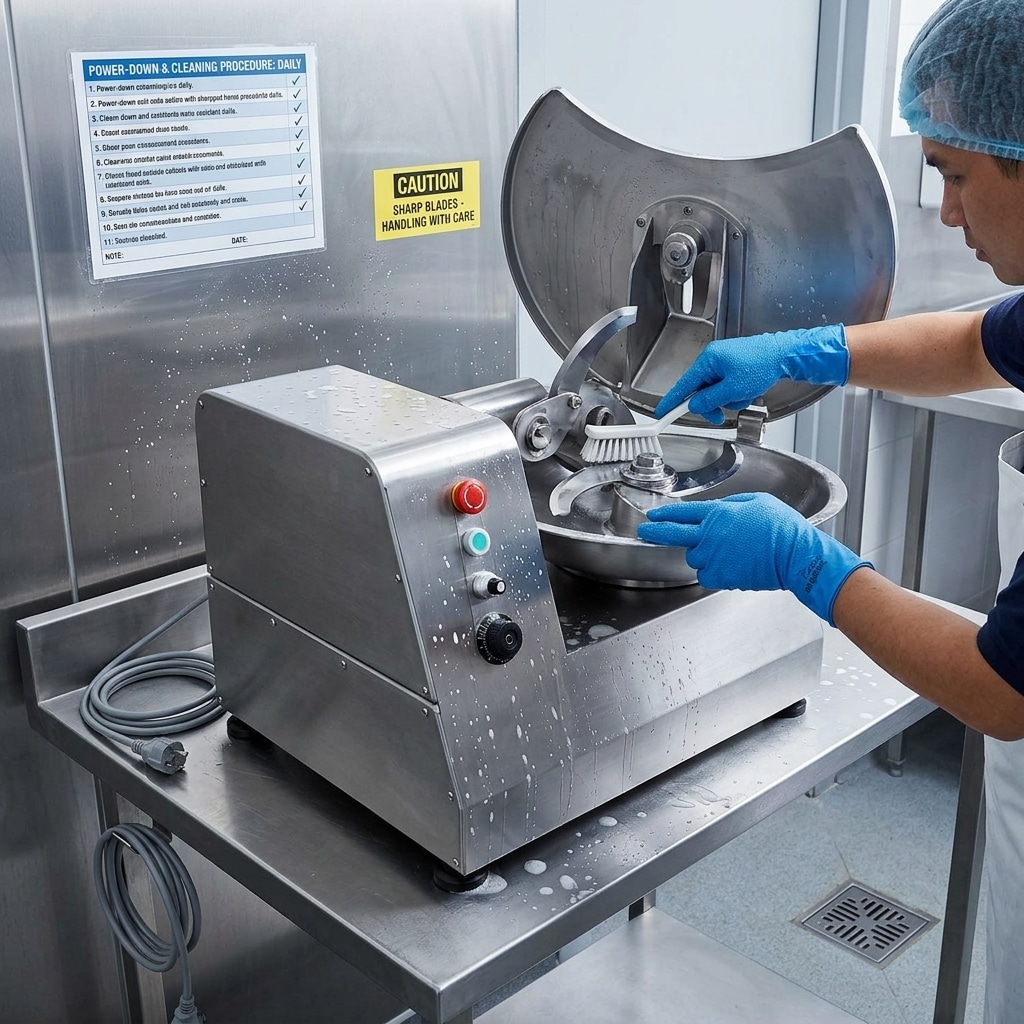
Cleaning and inspecting a commercial bowl cutter after meat processing

Consistent texture and safe daily operation depend on effective cleaning and inspection. Meat residue around knives, the bowl, seals, covers, scrapers, and discharge components can affect hygiene and may interfere with machine performance. Clean the equipment at the intervals required by your food-safety programme and always carry out the full end-of-shift cleaning procedure.

Isolate the machine from its power source before cleaning, adjustment, inspection, or knife handling, following the manufacturer instructions and your site’s lockout procedures. Use suitable cut-resistant personal protective equipment when handling knives. Do not direct water into electrical areas unless the machine documentation specifically permits the method.

Build the following checks into the daily routine:

  • Inspect knives for wear, damage, and secure fitting.
  • Check guards, lids, interlocks, and emergency-stop functions according to the approved inspection procedure.
  • Examine the bowl and product-contact surfaces for residue or damage.
  • Confirm that cleaning chemicals are compatible with food-contact materials and are used at the correct concentration.
  • Record cleaning completion, defects found, corrective actions, and blade-service needs.

Finally, retain a concise production record for each recipe: lot or raw-material reference, batch weight, ingredient weights, key process stages, product temperature where monitored, operator, and final acceptance. This level of control helps a supervisor trace an inconsistent batch back to a practical cause and refine the operating method without guesswork.

What Can a Commercial Bowl Cutter Process?

Table of Contents

A commercial bowl cutter can chop, mince, mix, and emulsify many food ingredients, especially meat, fat, seasonings, vegetables, herbs, and selected prepared-food mixtures. Results depend on ingredient preparation, knife condition, batch size, processing time, and temperature control.

What a Commercial Bowl Cutter Can Process

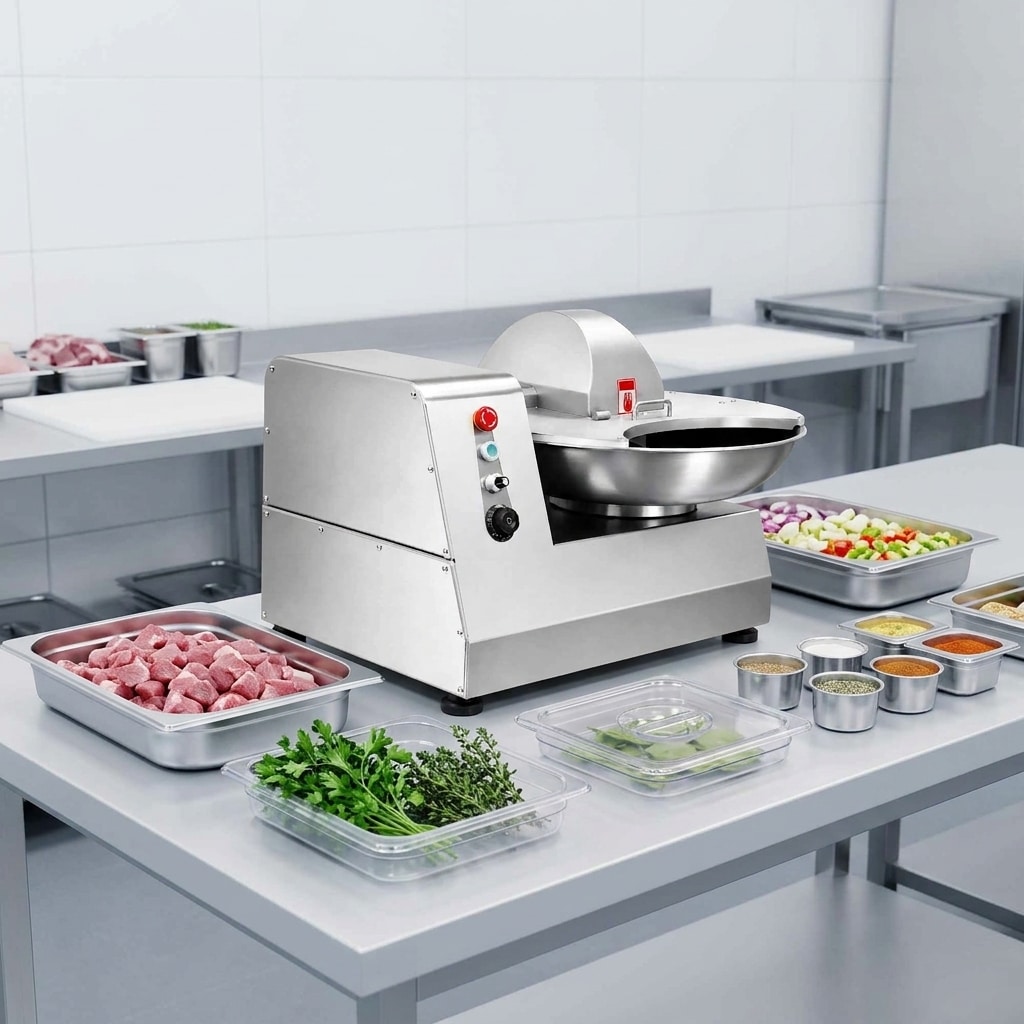
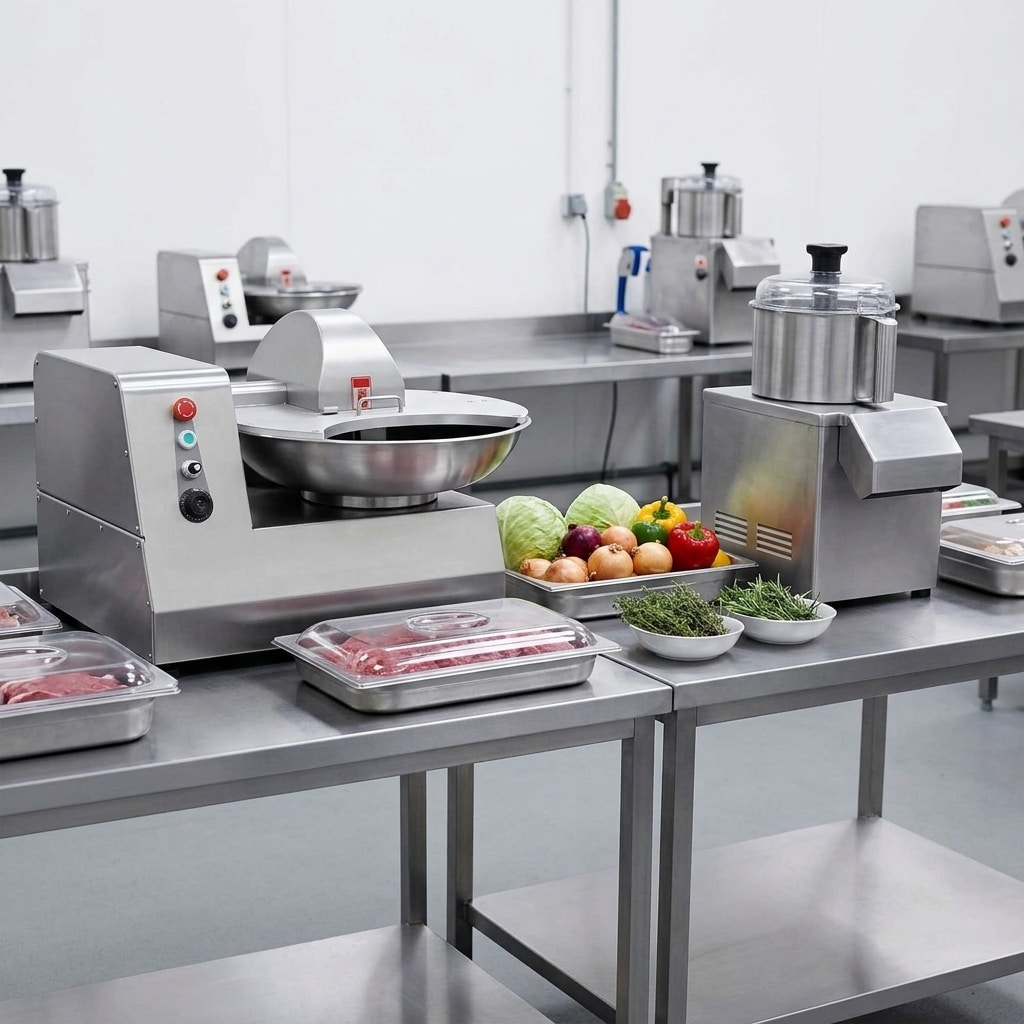
Commercial bowl cutter with suitable meat, vegetables, herbs, and seasonings ready for processing

A commercial bowl cutter can process chilled meat, poultry, fish, fat, vegetables, herbs, aromatics, seasonings, and many mixed food preparations. It is commonly used to chop, mince, blend, and, where the recipe and process allow, create a fine meat or food emulsion. Typical applications include sausage meat, burger mixes, meat fillings, pâté-style mixtures, chopped vegetables, herb blends, and selected prepared-food ingredients.

The machine is not a universal grinder or a bone-processing machine. Good results depend on using ingredients that are appropriate for knife cutting, preparing them to a manageable size, controlling the batch, and stopping at the intended texture. Hard foreign objects, bones, frozen solid blocks, and unsuitable packaging must be kept out of the bowl.

For a buyer asking what can a commercial bowl cutter process, the practical answer is: ingredients that need controlled cutting and mixing in one batch. The final product may be coarse, medium, finely chopped, or smooth, depending on the recipe, knife action, ingredient order, and processing time.

How a Commercial Bowl Cutter Works

Commercial bowl cutter in a clean food production setting

A bowl cutter, also called a bowl chopper in some markets, uses rotating knives and a moving bowl to repeatedly cut ingredients. As material travels through the knife zone, it is reduced and redistributed through the batch. This action allows operators to combine cutting and mixing instead of moving ingredients between separate machines for every stage.

The result is controlled by several connected variables:

  • Raw-material condition: chilled, trimmed, and portioned ingredients generally process more predictably than warm, irregular, or oversized pieces.
  • Knife condition: sharp, correctly maintained knives cut more cleanly than dull knives.
  • Batch size: an underloaded or overloaded bowl can reduce mixing consistency.
  • Processing time: longer processing usually creates a finer texture, but it can also change the product unnecessarily.
  • Ingredient sequence: the point at which water, ice, fat, seasonings, binders, or vegetables are added affects the result.
  • Temperature: temperature monitoring is important for meat and other sensitive food products.

A bowl cutter is therefore best viewed as a process machine, not simply a chopping machine. Operators should define the intended texture before processing and use a repeatable loading and timing procedure.

Meat, Poultry, and Fish

Chilled trimmed meat prepared for commercial bowl cutter processing

Meat is one of the main commercial bowl cutter applications. Beef, pork, poultry, lamb, and many fish products can be chopped or mixed when they are prepared correctly for the machine and the required product specification. A bowl cutter can support a range of textures, from visibly chopped meat for fillings to a finer matrix for formed or emulsified products.

Before loading, remove bones, hard cartilage, packaging, clips, and other foreign material. Trim ingredients to suit the bowl cutter and avoid feeding pieces that are too large for safe, even circulation. Chilled raw materials are commonly used because processing friction can increase product temperature. The appropriate starting temperature and maximum process temperature should be set by the operator’s food-safety system and recipe requirements.

For coarse products, use short, controlled processing intervals and inspect the particle size rather than relying only on a timer. For finer products, add ingredients in stages and avoid processing beyond the required texture. This helps maintain repeatability between batches. For further operating guidance, see how to make consistent meat texture with a bowl cutter.

Fish and seafood require similar attention to raw-material condition, bones or shell fragments, temperature, and sanitation. Where the recipe contains delicate fish flesh, trial batches are useful to establish the knife time and ingredient sequence that give the desired texture without overworking the mixture.

Sausage Meat and Emulsified Mixtures

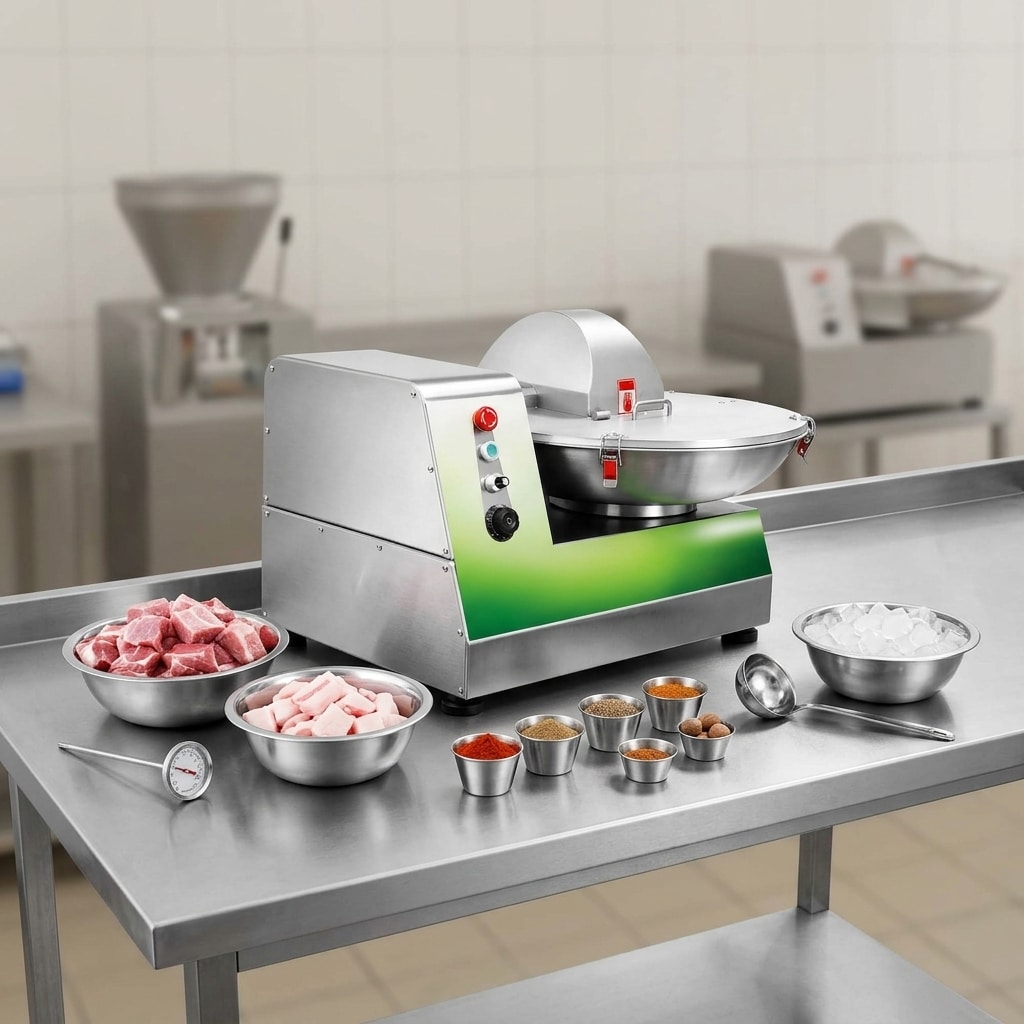
Measured ingredients for sausage meat preparation with a commercial bowl cutter

A commercial bowl cutter is widely used for sausage meat preparation because it can cut meat and fat while distributing seasonings and other recipe ingredients through the batch. Depending on the formulation, it may be used for fresh sausage mixtures, cooked sausage systems, meat fillings, and other finely processed products.

For this work, ingredient order matters. Many operations begin with chilled lean meat and salt or a recipe-specific seasoning stage, then add liquid, ice, fat, spices, and other components according to the formulation. There is no single sequence for every product, so operators should follow a validated recipe and applicable local food requirements.

Texture is not the only control point. Operators should monitor the mixture during processing for temperature, distribution of ingredients, and visual consistency. A smooth-looking mixture is not automatically the correct mixture; the target should always be the specification for that product. Documented batch procedures are especially useful when several operators use the same machine.

Read the practical guide to using a bowl cutter for sausage meat preparation for a closer look at chilled ingredients, loading sequence, texture checks, and cleaning steps.

Vegetables, Herbs, and Aromatics

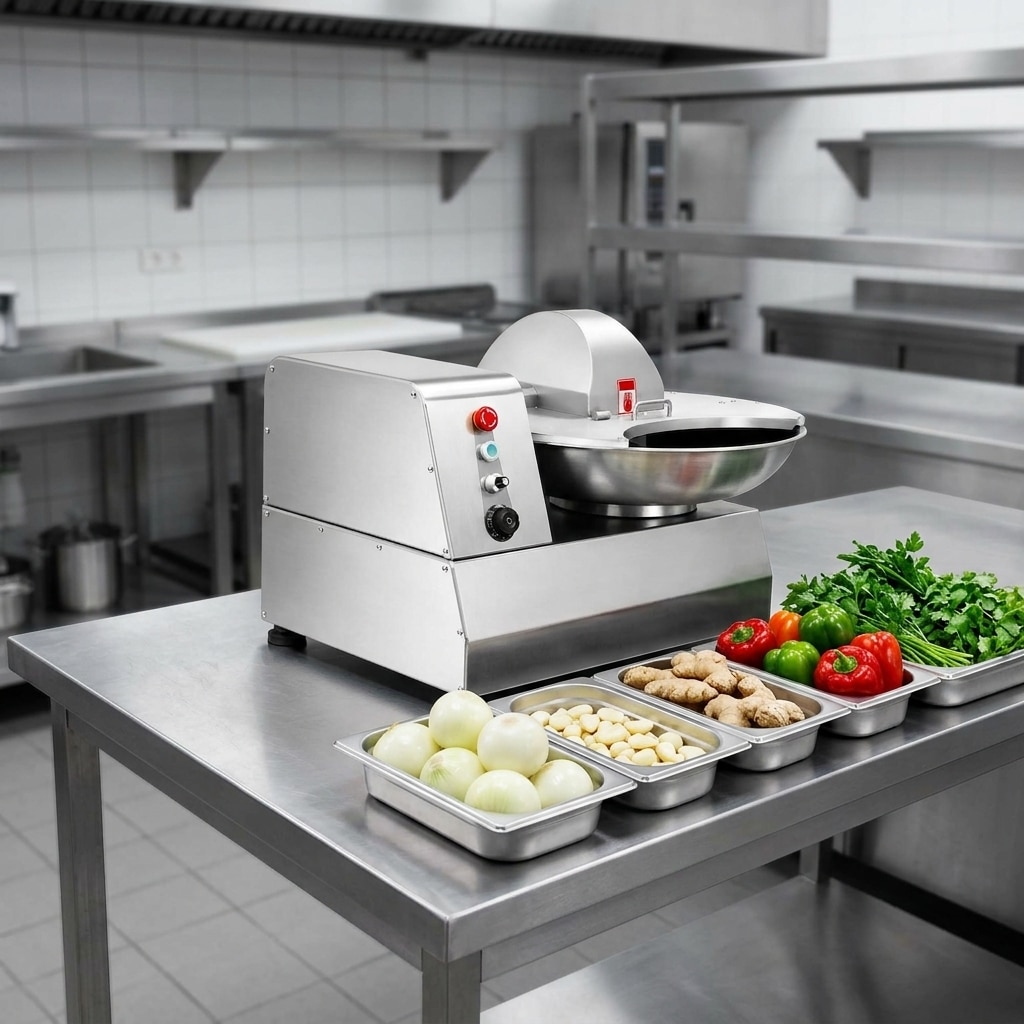
Vegetables, herbs, and aromatics prepared for bowl cutter processing

Commercial bowl cutters can also process many vegetables, herbs, and aromatics. Common examples include onions, garlic, ginger, leafy herbs, peppers, mushrooms, and cooked or soft vegetables used in fillings, sauces, prepared foods, and seasoning bases. The machine can create anything from a rough chop to a fine paste-like texture, depending on the ingredient and processing method.

Wash and inspect produce before processing, then remove unsuitable parts such as stems, stones, ties, labels, and damaged material. Cut large vegetables into manageable pieces before loading. Very dry or light ingredients may not circulate in the bowl in the same way as a moist product, while watery vegetables can release liquid quickly when finely cut. Both factors affect the batch result.

Operators should separate allergen-containing recipes and strongly flavoured ingredients from other production where required by their site controls. Garlic, onion, chilli, herbs, and spice blends can leave residues and aromas on food-contact surfaces, making prompt cleaning important before a different product is run.

For vegetable-heavy recipes, it is sensible to make a small trial batch first. This helps determine whether the desired result needs a coarse chop, a short fine-cut stage, or another preparation method before the bowl cutter is used.

Fats, Seasonings, and Other Additions

A bowl cutter processes more than the main protein or vegetable ingredient. It can distribute fats, salt, dry spices, fresh herbs, approved recipe liquids, ice, and certain binders or functional ingredients through a mixture. This makes it useful where even distribution is important to product appearance, texture, and batch consistency.

These additions should be loaded in a planned sequence rather than all at once. Fine powders can clump if added poorly, while liquids may pool or splash if they are introduced too quickly. Fat should be in a condition appropriate for the product and process. The correct approach depends on the recipe, raw materials, knife action, and target texture.

Measure additions accurately and keep a batch record when repeatability matters. This is particularly important for products that contain allergens, curing ingredients, or recipe components subject to local labelling and food-control requirements. A bowl cutter can help distribute ingredients, but it does not replace recipe validation, weighing procedures, or operator checks.

When changing products, inspect the bowl, knives, cover area, discharge points, and adjacent surfaces for residue. Small deposits of spices, powders, or fat can affect the next batch if cleaning is incomplete.

Prepared Food Mixtures

Beyond meat applications, a commercial bowl cutter may be used for selected prepared-food mixtures where controlled chopping and blending are needed. Examples can include stuffing mixtures, dumpling or pie fillings, vegetable blends, dips, spreads, cooked ingredient mixtures, and sauce bases. Suitability depends on the product’s texture, moisture level, ingredient size, and required final consistency.

Some recipes contain a combination of meat, vegetables, cooked starches, cheese, sauces, or seasonings. In these cases, operators should consider which ingredients should be cut first and which should be folded in near the end. An ingredient that is intended to remain visible in the finished product should not be subjected to the same knife time as an ingredient intended to form a smooth base.

For operations handling multiple product lines, a bowl cutter can support efficient batch preparation when the workflow includes clear separation of raw and ready-to-eat materials, controlled recipe changeovers, and thorough sanitation. Learn more about how commercial bowl cutters support high-volume food preparation when planning a broader production workflow.

What Should Not Go Into a Bowl Cutter

A commercial bowl cutter is designed for food ingredients that can safely circulate and be cut by the machine’s knife system. It should not be used as a substitute for a bone saw, a frozen-meat saw, or equipment intended for hard materials.

Do not load the following unless the machine manufacturer specifically confirms suitability for the product and application:

  • bones, shell fragments, hard pits, stones, or other hard foreign material;
  • solid frozen blocks that cannot circulate safely through the cutting zone;
  • metal clips, plastic packaging, ties, labels, or utensils;
  • excessively large pieces that have not been pre-cut;
  • non-food materials or cleaning tools;
  • ingredients that conflict with the site’s allergen, raw-to-ready-to-eat, or sanitation controls.

For bone-in or frozen meat cuts, use equipment designed for that task. A suitable cutting process protects the product, helps avoid premature knife damage, and supports safer operation. If a production line includes both cutting and bowl processing, review the intended role of each machine before purchase or installation.

Selection and Process-Control Factors

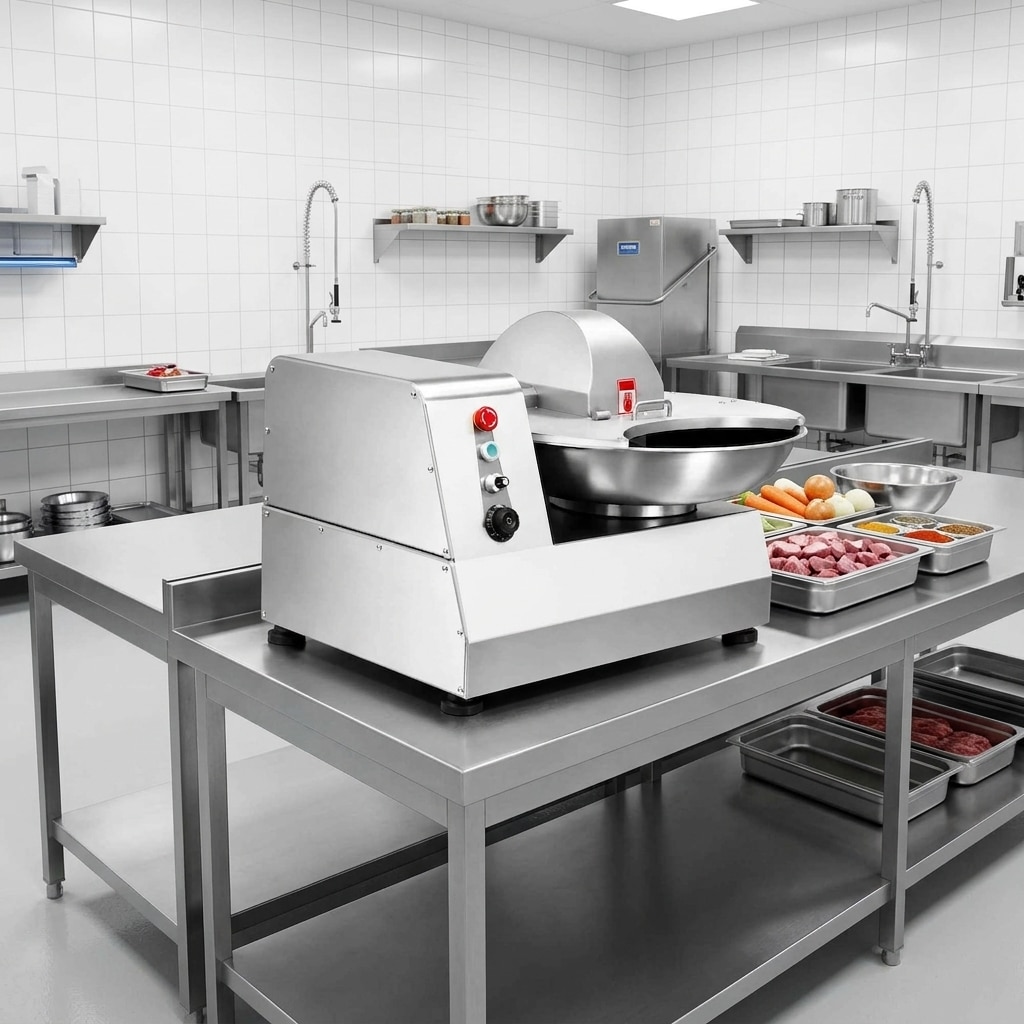
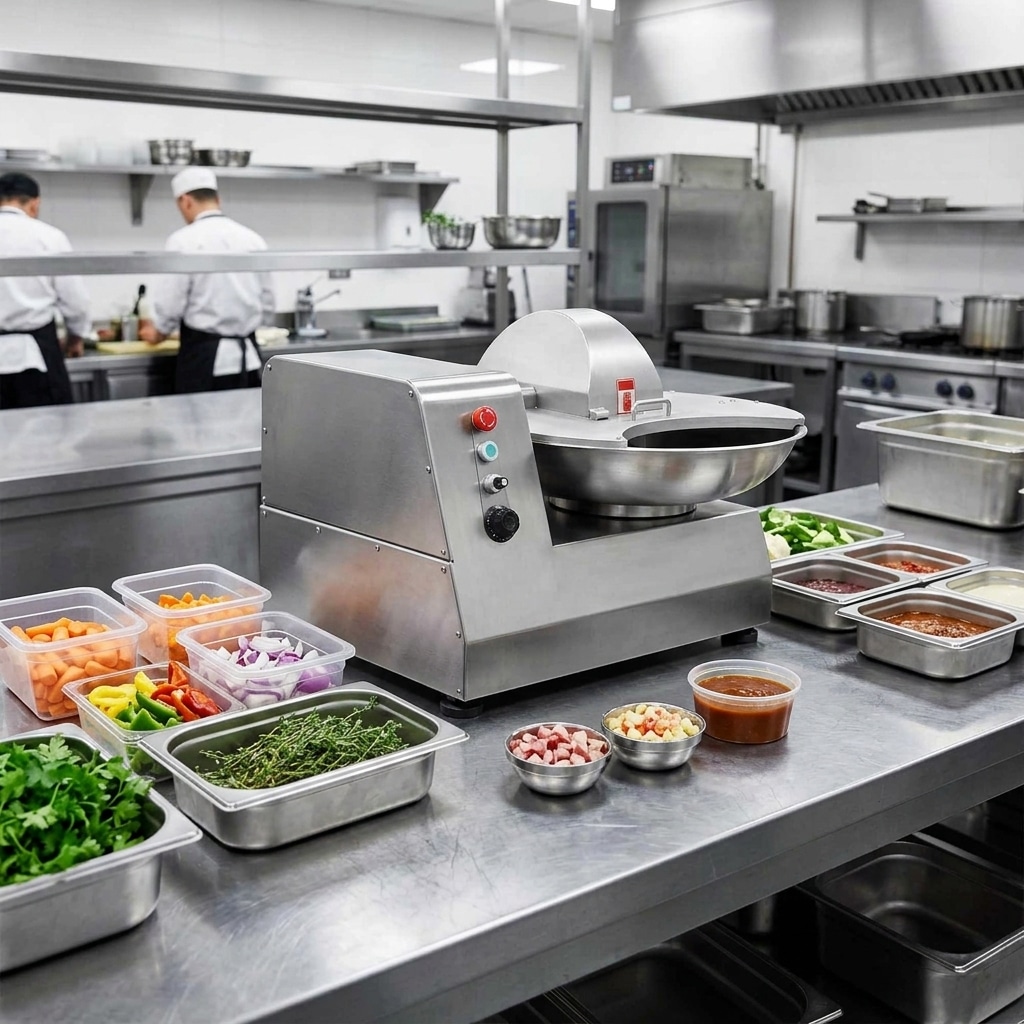
Commercial bowl cutter installed in an organised food processing kitchen

When selecting a commercial bowl cutter, start with the products you intend to make rather than choosing by machine size alone. A processor making coarse burger mix, a deli producing fine sausage meat, and a prepared-food kitchen making vegetable fillings may require different bowl size, knife configuration, process controls, and workflow arrangements.

Key questions for buyers include:

  • What ingredients will be processed, and are they raw, cooked, chilled, or partly frozen?
  • What texture is required: coarse chop, defined particle size, fine mince, or a smooth emulsion?
  • What batch size fits the production schedule without routinely underloading or overloading the bowl?
  • How will product temperature be monitored and managed?
  • What electrical supply, floor space, access clearance, and cleaning area are available?
  • What operator training, cleaning procedure, spare-parts access, and service support are needed?

Installation also affects process reliability. A stable position, correct electrical connection, safe access around the machine, and a defined cleaning routine should be established before production begins. Review this guide on setting up a bowl cutter in a commercial kitchen to plan the work area and operating controls.

Before committing to a production method, test representative ingredients and recipes. A trial should assess texture, temperature movement, ingredient distribution, cleaning time, and how the machine fits the wider workflow. This is more useful than assuming that one setting or knife time will work for every product.

Cleaning and Maintenance After Processing

The range of foods a bowl cutter processes makes cleaning especially important. Meat proteins, fat, vegetable fibres, herbs, spice powders, and allergens can remain on the bowl, knives, cover, discharge area, and nearby surfaces. Cleaning should take place according to the site’s food-safety procedure and the machine instructions after each relevant production run or changeover.

Before cleaning, stop the machine, isolate it from its energy source, and follow the manufacturer’s safe-access instructions. Do not reach into the knife area while the machine is connected to power. Use appropriate tools and personal protective equipment required by the site, particularly around sharp blades.

Knife care also affects both product quality and operating consistency. Dull or damaged blades can change cutting performance and may encourage operators to extend processing times unnecessarily. Check knife condition routinely and investigate unusual vibration, noise, poor cutting, or inconsistent texture before continuing production.

Use the step-by-step resource on how to clean and sanitize a commercial bowl cutter to support a structured cleaning routine. For blade-related operating factors, see how to prevent bowl cutter blades from dulling early.

Conclusion

A commercial bowl cutter can process a broad range of suitable food ingredients, including chilled meat, poultry, fish, fat, vegetables, herbs, seasonings, and selected prepared-food mixtures. Its value is the ability to combine controlled cutting and mixing within a batch, but the correct result depends on recipe design, raw-material preparation, temperature management, knife condition, and disciplined cleaning.

For the best fit, define the ingredients, required texture, batch pattern, site utilities, sanitation plan, and operator workflow before selecting equipment. This approach helps ensure that the bowl cutter supports the products you actually intend to make and the daily routine needed to make them consistently.

Bowl Cutter vs Food Processor: Which Does Your Kitchen Need?

Table of Contents

A bowl cutter is usually the better choice for commercial kitchens that need repeatable meat texture, controlled mixing, and regular production of sausage meat, emulsions, or fillings. A food processor is better suited to lighter, smaller-batch chopping, slicing, puréeing, and general prep. The right choice depends on your products, batch frequency, texture standard, cleaning process, and available workspace.

Quick Answer: Bowl Cutter vs Food Processor

Commercial bowl cutter and food processor in separate professional kitchen prep areas

A commercial bowl cutter is generally the right choice when your kitchen regularly prepares minced, chopped, blended, or emulsified meat products and needs consistent texture from batch to batch. It is especially relevant for sausage meat, meat fillings, pâté-style mixtures, formed products, and other recipes where knife action, mixing, ingredient order, and processing time must be controlled.

A food processor is generally better for broad, lighter-duty preparation tasks such as chopping vegetables and herbs, making sauces or purées, preparing breadcrumbs, and processing smaller batches. It can be a useful all-purpose prep machine, but it is not automatically a substitute for a bowl cutter in sustained meat-production work.

The practical decision is not simply about which machine has blades. Compare the products you make, batch size, frequency of use, target texture, cleaning process, safety controls, work area, and service access. In many professional kitchens, the two machines perform different roles rather than competing directly.

What Is a Bowl Cutter?

Commercial bowl cutter positioned in a clean meat preparation area

A bowl cutter, also called a bowl chopper in some markets, is a food-processing machine built around a rotating bowl and a set of knives. During processing, the bowl moves ingredients through the knife zone while the operator controls the process according to the product recipe and machine instructions.

This design is particularly useful when cutting and mixing must happen as one controlled operation. For meat applications, operators can add ingredients in stages, observe the developing texture, and stop before the mixture is overprocessed. Results still depend on raw-material condition, knife sharpness, batch loading, processing time, and temperature management; the machine alone does not guarantee a finished product standard.

Commercial bowl cutters are commonly considered by butcher shops, delicatessens, central kitchens, caterers, meat processors, and food manufacturers. They may also be used for selected vegetable, cheese, seafood, or filling applications when the recipe and machine instructions allow.

For meat work, process control begins before the machine is switched on. Chilled raw materials, a sensible loading sequence, and observation during the cut are central to repeatable results. Our guide to making consistent meat texture with a bowl cutter explains the operating factors that deserve attention during production.

What Is a Food Processor?

Commercial food processor used for vegetable and sauce preparation

A food processor is a general-purpose preparation machine that typically uses a work bowl and interchangeable cutting, chopping, slicing, grating, or mixing tools, depending on the model. It is designed to reduce manual preparation for a range of ingredients rather than to focus solely on meat emulsification or sausage preparation.

In a commercial setting, food processors are often valuable at the vegetable-prep station, cold kitchen, bakery, or sauce-production area. They can support everyday tasks such as chopping onions, preparing herb blends, making dressings, processing cooked ingredients into purées, or producing breadcrumbs.

However, a food processor’s suitability for meat depends on the particular machine, recipe, and production demand. Small or intermittent meat batches may be workable where permitted by the equipment instructions. Repeated heavy batches, a precise fine texture, or a product that requires controlled cutting and mixing may call for dedicated bowl-cutter equipment instead.

Do not select a food processor only because it appears less complex or has a lower initial purchase price. Consider whether its bowl size, duty cycle, tool design, cleaning requirements, and workflow actually suit the products your team must prepare every day.

Key Differences Between Bowl Cutters and Food Processors

The central difference in a bowl cutter vs food processor comparison is the intended processing method. A bowl cutter continuously presents the product to moving knives through a rotating bowl. A food processor usually processes ingredients within a fixed work bowl using a central tool or disc system. Both can cut ingredients, but the way they handle product and the level of process control are different.

Texture and product control

A bowl cutter is normally selected where the development of a meat mixture matters. Operators can manage the cut as the product moves through the machine, using the recipe, visual checks, and established operating procedures. This is useful for products where an uneven chop, insufficient bind, or excess processing can affect the final result.

A food processor can produce useful chopped or blended results for many prep tasks, but it may be less suitable when the operation requires a repeatable fine meat texture across frequent batches. The exact outcome depends on the machine configuration and ingredient preparation.

Workload and workflow

For regular production, a bowl cutter can support a dedicated meat-preparation workflow. It is more appropriate to evaluate it as part of a production station, including ingredient staging, chilled storage, cleaning space, safe operator access, and downstream filling or forming steps.

A food processor is often more flexible across a menu, particularly where staff process many different non-meat ingredients in modest quantities. It may help a compact kitchen avoid repetitive manual chopping, but frequent task changes can increase cleaning and changeover time.

Equipment role

A bowl cutter is a specialist machine. A food processor is an all-purpose prep machine. Choosing between them becomes easier when buyers identify the operation that creates the most labour, inconsistency, or production delay. Buy for that limiting process, not for the broadest possible description on a product label.

When a Bowl Cutter Is the Better Choice

A commercial bowl cutter is usually the stronger fit when meat processing is a routine and important part of your operation. Consider this type of equipment if your kitchen needs to do one or more of the following:

  • Prepare sausage meat, meat fillings, forcemeat, or similar mixtures on a regular schedule.
  • Produce chopped or emulsified products where texture needs to be monitored and repeated.
  • Combine cutting and mixing in one controlled batch process.
  • Handle production that is too frequent or too demanding for a general-purpose prep appliance.
  • Establish a dedicated, documented procedure for meat preparation, cleaning, and operator training.

A bowl cutter may also be suitable where you need to standardise a recipe across shifts. Standardisation does not mean removing operator responsibility. It means giving trained staff a repeatable method: defined ingredient preparation, a controlled loading order, established processing checks, and a clear endpoint for each batch.

For sausage applications, the most useful comparison is often between your current manual or general-purpose process and the texture your finished product requires. See the practical steps in our article on using a bowl cutter for sausage meat preparation, including chilled ingredient handling and processing observation.

Before purchase, confirm the machine’s actual specifications with the supplier. Required batch size, electrical supply, dimensions, guarding, supplied accessories, and local compliance responsibilities should be reviewed for the exact model and destination market.

When a Food Processor Is the Better Choice

A food processor is often the better investment when your main need is flexible preparation across many ingredients rather than dedicated meat production. It may suit your kitchen if you mainly need to:

  • Chop vegetables, onions, garlic, herbs, nuts, or cooked ingredients.
  • Prepare sauces, dips, dressings, purées, or breadcrumb mixtures.
  • Slice or grate ingredients where compatible discs or attachments are available.
  • Handle smaller batches with frequent changes between recipes.
  • Save preparation time in a compact kitchen with a varied menu.

It can be the sensible starting point for cafés, restaurants, bakery kitchens, and caterers whose meat preparation is limited or occasional. Even then, teams should avoid using any machine outside its stated purpose or instructions. The need to process raw meat should be assessed separately from vegetable and cooked-food tasks because of sanitation, allergen control, and cross-contamination procedures.

When one unit is expected to perform too many unrelated tasks, the apparent convenience can create a bottleneck. Waiting for cleaning, tool changes, or sanitation checks between raw and ready-to-eat ingredients can disrupt service. A separate bowl cutter and food processor may be more practical once volume and product range increase.

How to Choose for Your Kitchen

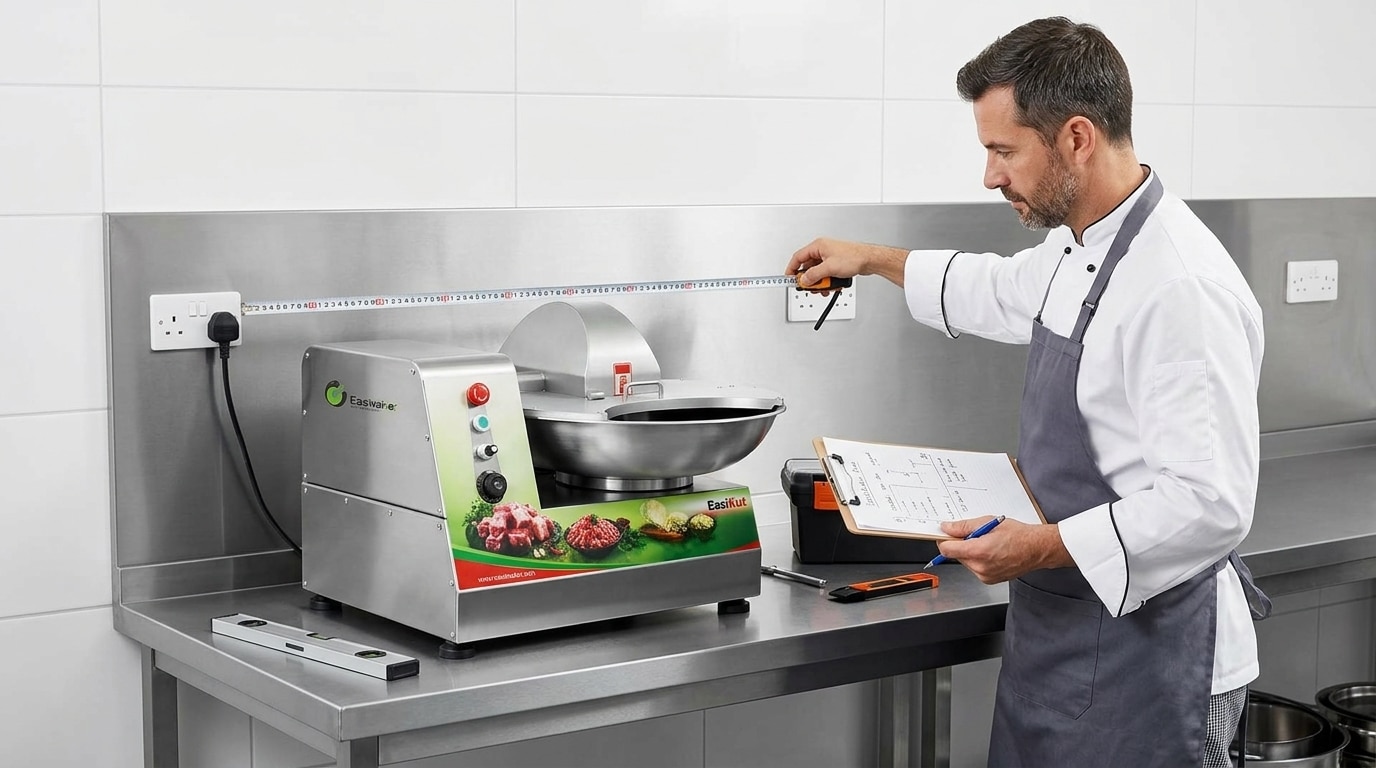
Commercial kitchen equipment planning for a bowl cutter installation

Use the following questions to make a practical equipment decision.

1. What products create the most work?

List your top products by frequency, not only by sales value. If staff repeatedly prepare meat mixtures, a bowl cutter deserves serious consideration. If the main workload is vegetables, sauces, and general prep, a food processor may meet the need more directly.

2. What texture must you achieve?

Define whether the finished product should be coarse, chopped, fine, blended, or emulsified. Describe the acceptable result in operational terms your team can check. If the standard depends on a controlled meat-cutting process, evaluate a bowl cutter with your actual ingredients rather than relying on generic demonstrations.

3. How large and how frequent are your batches?

Look at the busiest realistic period, not only the average day. Record how many batches are needed, the time allowed between them, and whether the machine must be cleaned before changing products. Match machine size and workflow to demand without assuming that a larger machine is automatically better for every recipe.

4. Can the work area support the machine?

Measure the installation location, operator standing area, cleaning access, and route for bringing ingredients in and taking product out. Check the local electrical supply against the selected model. A safe, stable installation is part of equipment performance, not an afterthought. Review our guidance on setting up a bowl cutter in a commercial kitchen before finalising the layout.

5. Who will operate and maintain it?

Assign responsibility for daily inspection, safe use, cleaning, and reporting problems. Ask the supplier about operating information, spare parts, service communication, and support for your market. Equipment is easier to manage when the purchasing team considers its full operating life, not just delivery and installation.

Operation, Cleaning, and Maintenance Considerations

Whichever machine you choose, safe and hygienic operation depends on a written routine. Operators should receive training on the manufacturer’s instructions, guards and interlocks, loading practices, shutdown, cleaning, and what to do if equipment does not operate normally. Never reach into a machine while moving parts can operate, and isolate the equipment before cleaning or maintenance as required by the applicable procedure.

For a bowl cutter, knife condition is a direct operational issue. Dull or damaged knives can affect cut quality and may encourage staff to extend processing time in an attempt to reach the desired texture. This can make results less predictable. Read our advice on preventing bowl cutter blades from dulling early to help build a practical inspection and handling routine.

Cleaning should be planned around the foods you process. Remove residue promptly, clean food-contact surfaces using suitable methods and chemicals, rinse where required, sanitise according to your procedure, and allow parts to dry appropriately before reassembly. Follow the machine manual and local food-safety requirements. For a more detailed sequence, see how to clean and sanitise a commercial bowl cutter.

Food processors need the same discipline. Blades, discs, lids, seals, bowls, and food-contact accessories should be inspected and cleaned according to the manufacturer’s instructions. If the same equipment is used for raw ingredients and ready-to-eat foods, establish clear separation, sanitation, and scheduling controls.

The Bottom Line

In a bowl cutter vs food processor decision, choose a bowl cutter when repeatable meat texture and regular cutting-and-mixing production are central to your business. Choose a food processor when broad, smaller-batch preparation for vegetables, sauces, and similar tasks is the main requirement.

For operations with both needs, the best answer may be to use each machine where it adds the most value: a bowl cutter at the dedicated meat-processing station and a food processor at the general-prep station. This approach can make procedures clearer, reduce avoidable changeovers, and support more consistent work.

Before buying, document your products, busiest production periods, ingredient condition, available installation space, cleaning process, and local power supply. Then compare specific models and confirmed specifications with the supplier rather than making a decision based on machine category alone.

Discuss the Right Setup for Your Food Production

If you are planning a commercial meat-preparation workflow, Easimaker can help you discuss the equipment type, batch requirements, installation considerations, and support needs for your market. Request a quote or share your application details with our team.

Request a Commercial Equipment Quote

Sugarcane Juice Machine Maintenance: Ensuring Long-Term Durability in Commercial Settings

Sugarcane Juice Machine Maintenance: Ensuring Long-Term Durability in Commercial Settings

In high-traffic juice bars, kiosks, and foodservice operations, a sugarcane juice machine is a revenue-critical asset. Unplanned downtime means lost sales, product waste, and frustrated customers. With structured maintenance and correct daily handling, a quality sugarcane juicer can run reliably for years, even under heavy commercial workloads.

This guide is written for B2B operators, distributors, and purchasing managers who work with commercial sugarcane juice machines and want to maximize machine life, minimize repairs, and protect their investment.

Commercial sugarcane juice machine in stainless steel for foodservice use

1. How Commercial Sugarcane Juice Machines Work (and Why Maintenance Matters)

Most commercial sugarcane juice machines share a similar structure:

  • Food-grade stainless steel housing (commonly 304 or similar grades)
  • Heavy-duty rollers that crush the cane and extract juice
  • Gearbox and drive system (direct drive or chain/belt driven)
  • Motor sized for continuous-duty commercial use
  • Juice outlet and pulp outlet with removable trays

Cane juice is sugary, moist, and slightly acidic. If it remains on metal surfaces, in crevices, or around seals, it can cause:

  • Stickiness and roller slippage
  • Premature wear of moving parts
  • Corrosion of non-stainless components
  • Bacterial growth and hygiene issues

A consistent maintenance routine ensures stable extraction performance, safer operation, and longer machine life.

2. Daily Care Checklist for Commercial Operations

Daily maintenance is the single biggest factor in longevity. The routines below are designed for busy shops running multiple shifts.

2.1 Pre-Shift Checks (Before First Use)

  • Visual inspection: Check housing, covers, and guards are correctly installed and undamaged.
  • Roller area: Ensure no cane fibers, tools, or foreign objects are in the feed area.
  • Power and cable: Inspect power cord and plug for cuts, burns, or loose connections.
  • Test run: Run the machine for 10–20 seconds without cane, listening for unusual noises (grinding, rattling, or knocking).

2.2 During Operation

  • Avoid overfeeding: Feed cane at a steady rate; overloading increases stress on the motor and gearbox.
  • Use appropriate cane size: If cane is too thick, split it before feeding. Forcing oversized cane can damage rollers or stall the motor.
  • Monitor temperature: If the housing feels excessively hot or a burning smell appears, stop and investigate.
  • Keep the area dry: Wipe spills around the base to prevent moisture from entering electrical components.

2.3 End-of-Day Cleaning Routine

End-of-day cleaning should be non-negotiable in any commercial setting:

  • Disconnect power: Always unplug before cleaning to avoid electric shock or accidental start-up.
  • Disassemble removable parts: Remove trays, covers, and any detachable juice guides or filters as instructed in the user manual.
  • Rinse with warm water: Rinse food-contact surfaces to remove cane fibers and sugar residue. Avoid high-pressure jets at electrical sections.
  • Mild detergent only: Use a food-safe, non-corrosive detergent and a soft brush or sponge. Do not use steel wool on stainless surfaces.
  • Rinse thoroughly: Remove all detergent before drying.
  • Dry completely: Wipe with a lint-free cloth and allow air drying where necessary to reduce corrosion risk.
  • Reassemble correctly: Ensure all guards and covers are refitted and secured, following the machine manual.

For distributors and franchise networks, standardizing this daily checklist across outlets can significantly reduce repair calls and warranty issues.

3. Weekly & Monthly Maintenance for Long-Term Durability

In addition to daily cleaning, structured weekly and monthly checks keep the mechanical and electrical systems in good condition.

3.1 Weekly Tasks

  • Deep clean rollers: Inspect rollers for hardened residue or minor rust spots. Clean with warm water and a non-abrasive brush.
  • Check fasteners: Lightly check accessible screws and bolts for looseness (do not overtighten).
  • Inspect seals and gaskets: Look for cracks, deformation, or leaks at juice outlets and covers.
  • Functional test: Run the machine with a small batch of cane and verify normal sound, speed, and juice output.

3.2 Monthly Tasks

Frequency can be adjusted depending on usage (heavy-duty operations may perform these every 2 weeks):

  • Lubrication checks: Where the design allows, inspect recommended lubrication points (e.g., chains, gears, bearings) and apply suitable food-grade lubricant as per the manual.
  • Electrical inspection: Have a qualified technician check connections, plugs, and switches for heat marks or wear.
  • Roller alignment: Check for uneven wear marks or inconsistent squeezing. Misalignment can reduce extraction efficiency and increase stress on the drive system.
  • Drainage and base: Ensure there is no standing liquid around the base or under the machine which can promote corrosion or electrical hazards.

4. Common Problems and Basic Troubleshooting

Proper maintenance reduces issues, but some common problems still appear in commercial environments. Below is a practical overview of symptoms, likely causes, and initial actions.

Symptom Possible Causes Initial Actions (Non-Technical)
Machine does not start Power issue, tripped breaker, safety switch not engaged, loose plug Check plug & outlet, confirm main switch is ON, ensure covers/guards are correctly closed, reset breaker if safe
Motor stalls during crushing Overloading, cane too thick, internal blockage Turn off and unplug, remove cane, reduce cane size, feed more slowly
Unusual noise (grinding, knocking) Foreign object in rollers, loose parts, worn bearings/gears Stop immediately, unplug, inspect visible areas; if noise persists, contact a technician
Reduced juice yield Worn rollers, roller gap too wide, slippage due to sticky residue Perform deep cleaning, check roller surface, avoid overripe/very dry cane; if unresolved, request technical inspection
Minor leaks around juice outlet Damaged gasket, loose fittings, residue buildup Clean thoroughly, check and correctly position gaskets; replace if visibly damaged

For safety and warranty reasons, more complex interventions (gearbox opening, electrical repairs, structural modifications) should be handled by the manufacturer or a qualified service partner.

5. Design and Specification Factors that Impact Maintenance

When selecting a sugarcane juice machine for a commercial project or distribution portfolio, look beyond output capacity and price. Design and material choices will directly affect maintenance effort and long-term durability.

5.1 Material Selection

  • Stainless steel construction: Housing and food-contact parts made of corrosion-resistant stainless steel (often 304 or similar grades) simplify cleaning and extend service life.
  • Food-contact surfaces: Smooth welds, rounded corners, and minimal crevices reduce residue accumulation and make hygiene management easier.
  • Roller material and finishing: Robust, corrosion-resistant rollers with proper surface finishing maintain grip without excessive fiber retention.

5.2 Ease of Disassembly and Cleaning

  • Tool-less or simple-tool access to key areas (rollers, juice tray, pulp outlet) saves time and lowers labor costs.
  • Clear separation between food zones and electrical/drive zones reduces cleaning risk.
  • Accessible drainage to prevent liquid accumulation inside the machine body.

5.3 Drive System and Motor

  • Continuous-duty motor rating: For commercial environments, motors should be chosen for repeated or extended runs, not only intermittent use.
  • Protection features: Overload protection, thermal cut-offs, and emergency stop switches can prevent severe damage under misuse.
  • Enclosed gearbox: Properly sealed gearboxes keep lubrication inside and contaminants out, reducing maintenance frequency.

6. Best Practices to Extend Machine Life in Commercial Use

Beyond routine cleaning, operational discipline and environment management greatly influence durability.

6.1 Train Staff on Correct Usage

  • Provide simple, visual SOPs for starting, operating, and shutting down the machine.
  • Emphasize not forcing objects or oversized cane into the rollers.
  • Remind staff to always unplug the machine before cleaning or removing jammed cane.

6.2 Control the Operating Environment

  • Stable, appropriate power supply: Where power fluctuations are common, consider voltage stabilization to protect the motor and control circuits.
  • Ventilation: Allow sufficient space around the machine so heat can dissipate.
  • Dry placement: Avoid standing water, floor drains directly under the machine, or exposure to rain in outdoor setups.

6.3 Manage Spare Parts and Service Support

  • Keep essential consumables (gaskets, seals, basic fasteners) in stock for multi-outlet operations.
  • Maintain a log of maintenance activities, issues, and replacements; this helps identify patterns and plan preventive servicing.
  • Coordinate with your supplier for recommended service intervals and response times for repairs.

7. Buying & Deployment Considerations for B2B Projects

For distributors, chain accounts, or brand owners planning multiple installations, maintenance should be part of the initial purchasing analysis, not an afterthought.

7.1 Matching Machine Capacity to Usage

  • Estimate peak-hour volume and daily cane throughput.
  • Select a machine model whose capacity comfortably exceeds expected peak demand to avoid constant overloading.

7.2 Installation and Commissioning

  • Verify that electrical requirements (voltage, frequency, plug type) match local conditions.
  • Ensure the counter or stand can support the machine weight and vibration.
  • Provide staff with initial hands-on training and a maintenance checklist from day one.

7.3 Service Agreements and Warranty

  • Clarify how routine maintenance affects warranty coverage.
  • Agree response times and typical spare parts availability with your supplier.
  • Document serial numbers and installation dates for each machine in your network.

8. FAQs: Sugarcane Juice Machine Maintenance and Longevity

1. How often should a commercial sugarcane juice machine be cleaned?

At minimum, food-contact areas should be cleaned at the end of every operating day. In high-volume or hygiene-sensitive environments, a mid-shift rinse and wipe-down can be added. A deeper cleaning of rollers and internal areas is recommended weekly.

2. Can staff use high-pressure water jets to clean the machine?

High-pressure jets are generally not recommended on or near electrical components and sealed gearboxes, as water ingress can damage internal parts. Use controlled water flow and avoid spraying directly at switches, motors, or ventilation openings.

3. What type of detergent is safe for cleaning?

Use a mild, food-safe detergent that is non-corrosive to stainless steel and suitable for food-contact surfaces. Avoid chlorine-heavy or highly abrasive cleaners unless specifically approved by the equipment manufacturer.

4. When should bearings, rollers, or gaskets be replaced?

Replacement intervals depend on usage intensity, cleaning quality, and the specific machine design. Warning signs include persistent noise, vibration, leaks, or notable reduction in juice extraction efficiency. For multi-unit operations, it is helpful to review these symptoms with the supplier and set preventive replacement guidelines.

5. What should be done if the machine frequently trips the circuit breaker?

Frequent tripping may indicate overloading, a power supply issue, or an electrical fault. Check that cane is not being forced through and that the outlet meets the machine’s power requirements. If the issue continues, have a qualified technician or the supplier inspect the machine and the electrical installation.

6. Is lubrication required, and can regular grease be used?

Some designs include sealed components that do not require user lubrication; others may have specified lubrication points. Only use lubricants recommended by the manufacturer, and where food-contact proximity exists, a suitable food-grade lubricant is typically advised. Avoid general-purpose grease unless clearly approved.

7. How can distributors reduce maintenance issues across multiple locations?

Standardize operating and cleaning procedures, provide consistent training, keep basic spare parts at selected sites, and implement a simple reporting system for issues. Monitoring recurring problems helps refine purchasing decisions and maintenance schedules.

9. Plan for Reliability from Day One

In commercial environments, sugarcane juice machines are expected to deliver consistent performance under demanding conditions. A combination of robust machine design, correct installation, disciplined daily care, and periodic technical checks is the most reliable way to extend service life and protect your return on investment.

If you are planning a new installation, upgrading existing equipment, or building a regional distribution program for sugarcane juice machines, it can be useful to discuss maintenance requirements and long-term durability at the quotation stage.

Ready to specify a sugarcane juice machine for your project?

  • Discuss capacity, duty cycle, and maintenance expectations with a specialist.
  • Review cleaning and service guidelines before placing volume orders.
  • Align spare parts and support plans with your deployment schedule.

Request a quote / Get a sample to evaluate a commercial sugarcane juice machine configuration that matches your operational and maintenance requirements.

Gearbox vs. Belt Drive: Understanding Transmission Systems in Commercial Sugarcane Machines

In the commercial beverage equipment industry, the transmission system is the heart of any sugarcane juicer. Unlike soft fruits, sugarcane is a fibrous, tough stalk that offers significant resistance during crushing. For B2B buyers—ranging from equipment distributors to procurement managers for juice bar franchises—choosing the right transmission technology is critical for operational efficiency and machine longevity.

The debate often settles on two primary technologies: Gearbox (Direct Drive) systems and Belt or Chain Drive systems. While both can extract juice, their performance under heavy loads, maintenance requirements, and total cost of ownership differ significantly.

This guide analyzes the technical differences between these systems to help you source equipment that minimizes downtime and maximizes torque.

The Role of Torque in Sugarcane Juicing

Before comparing the mechanisms, it is essential to understand the physics of juicing sugarcane. To extract maximum yield from a dry, fibrous stalk, the rollers must apply immense pressure at relatively low rotational speeds (RPM). High speed often leads to friction heat, which can spoil the juice flavor, and lower extraction rates.

Therefore, the transmission system’s primary job is speed reduction and torque multiplication. The motor spins fast, but the rollers must turn slowly with high force. How the machine achieves this reduction defines its reliability.

1. Gearbox Transmission (Direct Drive)

In a gearbox-driven system, the electric motor is connected directly to a gear reduction box (often worm gears or helical gears), which then drives the rollers. This is the standard for modern, heavy-duty commercial machines.

Advantages

  • High Torque Efficiency: Gearboxes provide a direct transfer of power with minimal energy loss. This ensures that even the thickest, hardest cane stalks are crushed without the machine stalling.
  • Zero Slippage: Unlike belts, gears have interlocking teeth. There is no risk of the transmission slipping under heavy load, ensuring consistent throughput.
  • Low Maintenance: Gearboxes are typically sealed units lubricated for life or requiring infrequent oil changes. There are no belts to tension or replace.
  • Hygiene & Safety: Being fully enclosed, gearboxes do not generate rubber dust (from wearing belts) and are easier to clean around, a crucial factor for food safety compliance.

Considerations

  • Initial Cost: Precision-machined gears and sealed housings are more expensive to manufacture than pulleys and belts.
  • Weight: These machines tend to be heavier, which is often a sign of stability but can impact shipping logistics.

2. Belt and Chain Drive Systems

Belt and chain drives connect the motor to the rollers via pulleys and sprockets. While common in older designs or entry-level machinery, they present distinct characteristics for industrial use.

Advantages

  • Shock Absorption: Belts have a slight elasticity. If a rock or metal object accidentally enters the rollers, the belt may slip, potentially saving the motor or rollers from catastrophic damage (acting as a sacrificial fuse).
  • Lower Manufacturing Cost: These systems are generally cheaper to produce, resulting in a lower purchase price for budget-conscious markets.
  • Repairability: Replacing a snapped belt is often simpler and requires less technical skill than repairing a damaged gearbox.

Considerations

  • Slippage & Power Loss: Under heavy load (e.g., high-fiber cane), belts can slip, causing the rollers to stop while the motor spins. This reduces efficiency and throughput.
  • High Maintenance: Belts stretch over time and require regular tensioning. Chains require lubrication, which can attract dust and bagasse fibers, creating a hygiene risk.
  • Noise and Vibration: Chain drives, in particular, can be noisier than precision gearboxes.

Comparative Analysis: Gearbox vs. Belt Drive

Feature Gearbox (Direct Drive) Belt/Chain Drive
Torque Transfer High (Direct, no slip) Moderate (Risk of slip)
Maintenance Low (Sealed system) High (Tensioning, greasing)
Durability Excellent for heavy duty Moderate (Wear parts)
Hygiene High (Enclosed) Medium (Debris accumulation)
Noise Level Low / Smooth Variable / Higher
Initial Cost Higher Lower

Why Gearboxes are Preferred for Heavy-Duty B2B Applications

For B2B buyers supplying busy juice bars, hotels, or supermarkets, reliability is the most critical metric. A machine that is down for belt tensioning or one that jams on thick cane costs the operator revenue.

The “No-Slip” Requirement

Commercial operators cannot afford to stop and reverse machines constantly because a belt slipped on a tough stalk. Gearbox systems power through fiber variations consistently. This consistency is vital for standardized processes in franchise operations.

Hygiene and Contamination Risks

In food processing, particulate matter is a major concern. Belt drives degrade over time, creating fine rubber dust. If the transmission area is not perfectly isolated from the juice extraction zone (which is difficult in open-frame belt designs), this poses a contamination risk. Sealed gearboxes eliminate this variable entirely.

Manufacturing & Quality Assurance

When sourcing these machines, it is important to inquire about the manufacturing standards of the transmission system.

  • Gear Material: Look for hardened steel or high-grade alloys. Plastic or nylon gears inside the box are suitable only for light home use, not commercial environments.
  • Seals and Bearings: High-quality seals prevent lubricant leakage and protect the gears from juice ingress, which is acidic and corrosive.
  • Motor Integration: Ensure the motor is rated for the gearbox’s torque capacity. A powerful motor with a weak gearbox will strip gears; a weak motor with a strong gearbox will stall.

Buying Guide for Distributors

If you are importing or distributing sugarcane machines, consider these factors to reduce warranty claims and improve customer satisfaction:

1. Ask for Transmission Specs

Do not just look at motor power (HP/Watts). Ask the manufacturer for the reduction ratio and the rated torque at the roller shaft.

2. Spare Parts Availability

For belt-driven units, you must stock replacement belts and chains. For gearbox units, stock is generally lower, but you may need full gearbox assemblies for rare catastrophic failures.

3. Customization & MOQ

Manufacturers can often adapt the transmission housing or motor voltage (110V/220V, 50Hz/60Hz) to suit your local market. Confirm Minimum Order Quantities (MOQ) for customized builds, especially if you require specific gear ratios for different cane varieties (soft vs. hard cane).

FAQs: Transmission Systems

Which system is better for hard sugarcane varieties?

The gearbox system is superior for hard cane. Its direct drive capability ensures maximum torque is applied to crush hard fibers without slipping.

Do gearbox machines require oil changes?

Most modern commercial gearbox juicers are sealed for life or require oil changes only after several years of intense usage. Always check the user manual for specific intervals.

Why are belt-driven machines cheaper?

Belts and pulleys are standard, off-the-shelf components that do not require the precision machining and assembly of a sealed gearbox, reducing manufacturing costs.

Can a belt drive system handle commercial volume?

Yes, but it requires more maintenance. Operators must be trained to check belt tension regularly to prevent slipping and premature wear.

What happens if a gearbox machine jams?

Quality machines feature a reverse switch. Because there is no belt to slip, the reverse function instantly disengages the jammed stalk. Most motors also have thermal overload protection to prevent burnout.

Conclusion

While belt-driven machines offer a lower entry price, the gearbox (direct drive) transmission is the industry standard for professional, high-volume sugarcane juicing. Its ability to deliver consistent torque, maintain hygiene, and operate with minimal maintenance makes it the superior choice for B2B buyers focused on long-term value and customer satisfaction.

Ready to upgrade your equipment inventory? Contact us today to discuss specifications, request a quote, or order a sample of our heavy-duty gearbox sugarcane machines.

Implementing Live Sugarcane Juicing Stations in Grocery Stores: Operations & ROI

The Shift to Experiential Retail in the Produce Aisle

Modern grocery retail is moving away from purely transactional models toward experiential shopping. For supermarket operations managers and retail buyers, the challenge is combating the commoditization of the produce section. A live sugarcane juicing station offers a high-margin solution that capitalizes on the “fresh” trend while introducing visual theatre that disrupts shopper autopilot.

Unlike pre-packaged beverages, live extraction validates the freshness claim immediately. This article outlines the operational requirements, equipment specifications, and profitability factors involved in deploying commercial sugarcane juicers in a retail environment.

The Business Case: Margins and Impulse Buys

The primary driver for installing in-store juicing equipment is the significant markup potential between raw produce and finished beverage. Sugarcane is particularly advantageous compared to citrus or vegetable blends due to its low raw material cost and high yield.

Profitability Drivers

  • Low Input Cost: Raw sugarcane stalks are generally inexpensive when sourced in bulk compared to the volume of juice they yield.
  • Premium Pricing: Consumers perceive fresh-pressed juice as a premium product, allowing for price points significantly higher than pasteurized alternatives.
  • Zero Additives: The product requires no added sugar or preservatives, appealing to health-conscious demographics without additional inventory costs.

Visual Theatre: Leveraging the Process to Sell

In a crowded retail environment, static displays often blend into the background. A live juicing station acts as a dynamic point of interest. The concept of “visual theatre” in retail suggests that showing the manufacturing process creates a perception of higher value and hygiene.

For sugarcane specifically, the extraction process is visually distinctive. The crushing of hard stalks into liquid creates a sensory experience—the sound of the motor, the sight of the cane being crushed, and the immediate flow of juice—that triggers impulse purchases. Placing these stations near the entrance or high-traffic produce end-caps maximizes this conversion rate.

Operational Requirements and Setup

Integrating a manufacturing process into a retail floor requires careful planning regarding space, utilities, and workflow.

1. Space and Footprint

Commercial sugarcane juicers are surprisingly compact, but the station requires more than just the machine footprint. You must account for:

  • Input Storage: Space for raw cane stalks (often kept on ice or refrigerated for visual appeal).
  • Waste Management: Sugarcane produces a high volume of fibrous waste (bagasse). An integrated chute leading to a large, concealed under-counter bin is essential to maintain a clean appearance.
  • Serving Area: Space for cups, lids, and ice.

2. Power and Utilities

Unlike standard citrus juicers, sugarcane extractors require high torque to crush fibrous stalks. Ensure your electrical infrastructure can handle heavy-duty motors (often 0.5 HP to 1 HP) without tripping breakers, especially if multiple machines share a circuit. Most commercial units run on standard voltage, but verifying amperage requirements is critical.

3. Hygiene and Maintenance

Live processing introduces food safety considerations. Equipment must be NSF-certified or equivalent for food contact. Look for machines with:

  • Removable Rollers: The crushing rollers must be easy to detach for daily deep cleaning.
  • Stainless Steel Construction: Grade 304 stainless steel is the industry standard for corrosion resistance and ease of sanitation.
  • Closed Loop Systems: To prevent contamination and ensure safety, the juicing mechanism should be fully enclosed during operation.

Selecting the Right Equipment

When procuring machines for a supermarket chain, durability and safety are the top specifications. Consumer-grade models will fail under the continuous load of a retail environment.

Key Specifications for Retail Buyers

Feature Requirement Why it Matters
Roller Material Solid Stainless Steel Prevents rust and withstands high crushing pressure without deformation.
Safety Mechanism Emergency Stop & Enclosed Feed Protects staff and customers; critical for insurance and liability.
Throughput 300-500 kg/hr capacity Ensures the machine can handle peak hours without overheating.
Reverse Function Standard Requirement Allows operators to clear jams instantly without dismantling the machine.

Sourcing and Supply Chain Considerations

The success of the station depends on a consistent supply of quality cane. Retail managers must decide between:

  • Pre-peeled Cane: Reduces labor at the store level and improves hygiene appearance but has a shorter shelf life and higher procurement cost.
  • Whole Stalks: Cheaper and longer shelf life, but requires staff to scrape/clean the cane before juicing, adding labor hours and potential mess.

Most high-volume supermarkets opt for pre-cleaned, vacuum-packed cane to streamline operations and minimize in-store prep work.

Frequently Asked Questions (FAQs)

What is the shelf life of fresh sugarcane juice?

Fresh sugarcane juice oxidizes quickly, changing color and taste within 15–30 minutes at room temperature. It is strictly a “make-to-order” product unless immediate refrigeration and lemon/lime (which delays oxidation) are used. For retail, the on-demand model is recommended to reduce shrinkage.

How much noise does a commercial sugarcane juicer make?

Modern gear-box driven machines are relatively quiet (often under 70dB), allowing for conversation. However, older chain-driven models can be noisy. Check the decibel rating if the machine is placed near checkout counters.

How do we handle the waste (bagasse)?

Bagasse volume is significant. It is organic and compostable. Some stores partner with local farms or composting facilities to dispose of the fiber, marketing this as a sustainability initiative.

What are the cleaning requirements?

The sugar content makes the machine sticky and attractive to pests if not cleaned rigorously. A wash-down cycle should be performed every 4 hours, with a full disassembly and sanitization at the end of every shift.

Is operator training difficult?

Modern machines are designed with “feed-and-go” safety features, requiring minimal skill. Training primarily focuses on hygiene protocols and machine assembly/disassembly for cleaning.

Next Steps for Implementation

Adding a live sugarcane juicing station transforms a passive produce section into an active revenue generator. By selecting heavy-duty, safety-compliant equipment and planning for the unique waste and supply chain needs of sugarcane, supermarkets can drive significant impulse sales.

Ready to explore equipment options? Contact our team to discuss capacity requirements and request a quote for commercial-grade juicing solutions tailored to high-traffic retail environments.

How to Easily Maintain a Sugarcane Juicer to Extend Machine Life: The Complete Commercial Guide

Investing in a high-quality commercial sugarcane juicer is a significant decision for any juice bar, beverage manufacturer, or hospitality business. These machines are the workhorses of your operation, designed to crush tough fibrous stalks and extract sweet, profitable juice day in and day out. However, without a rigorous sugarcane juicer maintenance strategy, even the most robust machine will suffer from premature wear, hygiene issues, and costly downtime.

Sugarcane juice is unique. It is high in sugar, slightly acidic, and leaves behind fibrous residue (bagasse) that can harden like cement if left to dry. Furthermore, the high torque required to crush cane places significant stress on bearings, gears, and rollers. Neglecting maintenance doesn’t just shorten the machine’s life; it compromises the safety and taste of your product.

This comprehensive guide covers everything you need to know about maintaining your commercial sugarcane machine. From daily cleaning protocols to gearbox protection and troubleshooting, we provide the expert insights required to keep your equipment running smoothly for years. We also include a downloadable maintenance schedule to help your team stay on track.

Why Proactive Maintenance is Non-Negotiable

Before diving into the “how-to,” it is vital to understand the “why.” For B2B buyers and operations managers, maintenance is not just a chore—it is an asset protection strategy. Here are the three pillars of why maintenance matters:

  • Hygiene and Food Safety (HACCP): Sugarcane juice is a raw product. Sugar residues in hidden crevices are breeding grounds for yeast and bacteria. A poorly maintained machine can cause fermentation within the crushing mechanism, leading to spoiled juice and health code violations.
  • Mechanical Longevity: The crushing force involved in juicing cane is immense. If rollers are misaligned or bearings are dry, the friction increases exponentially. Preventive care reduces the load on the motor and transmission.
  • Operational ROI: A breakdown during peak hours results in lost revenue and emergency repair costs. Regular checks allow you to identify worn parts—like seals or belts—before they fail completely.

Understanding Your Machine: Key Components

To maintain your equipment effectively, your staff must understand what they are cleaning and protecting. Most commercial sugarcane juicers consist of the following critical systems:

1. The Roller Assembly

This is the heart of the machine, typically consisting of three or four stainless steel rollers. They grip, crush, and extract juice. The gap between these rollers determines the extraction efficiency. If they are dirty, extraction drops; if they are misaligned, the motor overworks.

2. The Gearbox and Motor

The motor provides the power, and the gearbox (reduction gears) increases the torque to crush the cane. These components are usually sealed but require ventilation and protection from moisture ingress.

3. Bearings and Seals

Bearings allow the rollers to spin smoothly. Seals protect those bearings from juice. If a seal fails, acidic juice enters the bearing, leading to rust and seizure. This is the most common cause of catastrophic failure in neglected machines.

The Ultimate Sugarcane Juicer Maintenance Schedule

Structured maintenance is easier to follow. Implement this schedule to ensure consistency across shifts.

Daily Routine: The Hygiene Flush

Frequency: Every day, immediately after the last shift.

Sugarcane juice oxidizes and becomes sticky within minutes. Leaving the machine dirty overnight is the fastest way to damage seals and encourage bacterial growth.

  1. Power Down: Ensure the machine is turned off and unplugged. Safety is paramount.
  2. Remove Bagasse: Clear all fibrous waste from the exit chute.
  3. Disassemble Removable Parts: Take off the feed tray, juice collection tray, and any removable side panels. Wash these in hot, soapy water.
  4. Flush the Rollers: Use warm water to flush the roller mechanism. Note: Never use a high-pressure hose directly on the bearing housings or motor vents.
  5. Brush Scrub: Use a soft-bristle nylon brush to scrub the rollers while manually rotating them (if safe and possible) or by running the machine for brief seconds with water (consult your specific Datasheets & Manuals for safe cleaning modes).
  6. Dry Thoroughly: Moisture is the enemy of longevity. Wipe down all stainless steel surfaces with a dry, clean cloth.

Weekly Routine: Deep Clean & Inspection

Frequency: Once a week (e.g., every Monday morning or Sunday night).

  • Inspect Seals: Look closely at the point where the roller shafts enter the machine body. If you see dark, sticky leakage, a seal may be compromised.
  • Sanitize: After cleaning, use a food-safe sanitizer on the rollers and juice path to eliminate biofilms that soap might miss.
  • Check the Filter/Strainer: If your machine has an integrated tap or reservoir with a mesh filter, check it for tears or clogging. A clogged filter backs up juice, potentially flooding the seals.
  • External Wipe Down: Clean the motor housing and control panel with a damp (not wet) cloth to remove dust and sticky fingerprints.

Monthly Routine: Mechanical Check-Up

Frequency: First week of every month.

  • Roller Gap Inspection: Over time, the gap between rollers may shift due to vibration. Refer to your manual to ensure the gap is set to factory specifications for optimal yield.
  • Electrical Cord Safety: Check the power cord for fraying or cuts, which can happen in busy commercial kitchens.
  • Lubrication (If applicable): Some external chains or drive components may need food-grade grease. Warning: Never grease the crushing rollers themselves. Always check the Maintenance & Support guidelines before applying lubricants.

Deep Dive: Cleaning the Rollers and Juice Compartment

The rollers are where the magic happens, but they are also the hardest part to clean. The grooves in the stainless steel rollers are designed to grip the cane, but they also trap fiber.

The “Reverse” Technique

If your machine has a reverse function, use it during the cleaning process. Run the machine with water, switch to reverse for a few seconds, then forward again. This helps dislodge fibers stuck deep in the grooves.

Avoiding Corrosion

Even Stainless Steel 304 can corrode if exposed to harsh chlorides or left in contact with acidic organic matter for too long.

DO NOT USE: Bleach, steel wool, or wire brushes. Steel wool leaves behind iron particles that will rust and stain your machine.

USE: Soft nylon brushes, sponges, and mild detergents.

Protecting the Motor and Gearbox

The motor and gearbox are the most expensive components to replace. Protecting them is primarily about load management and environment.

1. Prevent Overloading

Do not force oversized cane stalks into the machine. If a stalk is too thick, split it vertically. Forcing the machine causes the motor to draw excessive current, leading to overheating. If the machine stalls, stop immediately and use the reverse function to clear the jam.

2. Ventilation is Key

Commercial juicers generate heat. Ensure the machine’s vents are not blocked by towels, walls, or other equipment. Airflow is essential for cooling the motor during continuous operation.

3. Moisture Protection

Never submerge the main unit in water. While the crushing compartment is wet-area compatible, the motor housing is usually not waterproof. Water ingress into the electrical components is a safety hazard and voids your Warranty.

Troubleshooting Common Issues

Even with great care, issues can arise. Here is a quick guide to common symptoms and solutions.

Symptom Possible Cause Action Required
Machine Squeaking Dry bearings or friction between rollers and housing. Stop immediately. Check for debris rubbing against the housing. If noise persists, bearings may need replacement.
Low Juice Yield Incorrect roller gap or worn rollers. Adjust the roller gap according to the manual. If rollers are smooth (grooves worn down), they may need replacement.
Motor Hums but Won’t Turn Capacitor failure or jammed rollers. Unplug. Check if a hard piece of cane is jammed. If clear, the starting capacitor may be faulty (requires a technician).
Juice Leaking from Shafts Worn seals. This is critical. Contact support to replace seals immediately to prevent motor damage.
Vibration/Shaking Uneven surface or loose components. Ensure the machine is on a level surface. Check rubber feet. Tighten external casing screws.

For more complex issues, visit our FAQs page or contact our technical team.

Signs It’s Time for Professional Service

Operator maintenance can handle cleaning and basic checks, but some tasks require a professional. If you notice any of the following, it is time to schedule a service:

  • Grinding Noises: Indicates internal gearbox wear or bearing failure.
  • Electrical Burning Smell: Indicates motor overheating or wiring insulation failure.
  • Persistent Leaks: If replacing a seal doesn’t stop the leak, the shaft itself may be worn or bent.

Printable Maintenance Checklist

Copy and paste this checklist for your staff to sign off daily.

Daily Sugarcane Juicer Closing Checklist

Date: ___________ Staff Name: ___________

  • [ ] Machine turned off and unplugged.
  • [ ] All bagasse/waste removed from chute.
  • [ ] Feed tray and juice tray washed and sanitized.
  • [ ] Rollers flushed with warm water (no high pressure).
  • [ ] Rollers scrubbed with nylon brush to remove fiber from grooves.
  • [ ] Machine dried with a clean cloth.
  • [ ] Area around the machine wiped down.
  • [ ] Visual check: No loose parts or frayed cords.

Conclusion

A sugarcane juicer is a robust machine designed to generate profit, but it relies on your team to keep it in peak condition. By following a strict cleaning regimen and respecting the mechanical limits of the device, you can extend the life of your equipment significantly. Remember, a clean machine produces better-tasting juice, keeps your customers safe, and protects your bottom line.

Do you need specific parts, a new manual, or advice on upgrading your current setup? We are here to help.

Ready to upgrade or need technical assistance? Contact our support team today or request a quote for our latest models.

Common Commercial Sugarcane Juicer Problems and How to Fix Them

Minimize Downtime and Maximize Yield

In a high-volume commercial environment, a sugarcane juicer is a critical asset. Unlike standard fruit juicers, these machines operate under immense torque to crush fibrous stalks. Consequently, operational issues such as jamming, misalignment, or mechanical noise can immediately halt production and impact revenue.

Understanding the mechanical stress points of your equipment is the first step toward prevention. This guide addresses the most frequent technical issues operators face with commercial sugarcane extractors and provides actionable protocols for troubleshooting and maintenance.

Diagnosing Common Operational Failures

Most sugarcane juicer malfunctions stem from three core areas: feed rate inconsistencies, roller misalignment, or lack of lubrication. Below are the standard procedures for diagnosing and resolving these issues.

1. Machine Jamming and Stalling

Jamming is the most common complaint in commercial settings. It typically occurs when the motor torque is insufficient for the diameter or hardness of the cane being processed.

  • Cause: Feeding cane that is too thick, feeding multiple stalks simultaneously, or using dry, hardened cane.
  • Immediate Fix: Stop the machine immediately. If your model has a reverse switch, engage it to back the stalk out. Do not force the cane through. If no reverse function exists, power down, unplug the unit, and manually rotate the rollers (if accessible) or disassemble the housing to clear the blockage.
  • Prevention: Split thick stalks (typically those over 30mm, depending on machine specs) vertically before feeding. Cut cane ends at an angle to help the rollers grip the material gradually rather than hitting a blunt wall of fiber.

2. Unusual Grinding Noises or Vibration

Commercial juicers are heavy-duty, but they should run relatively smoothly. New noises usually indicate internal friction or loose components.

  • Cause: Worn bearings, lack of gear lubrication, or chain slack (in chain-driven models).
  • Diagnosis:
    • High-pitched squealing: Usually indicates dry bearings or metal-on-metal contact. Lubrication is required.
    • Rhythmic clunking: Often points to a loose chain or a damaged gear tooth.
    • Vibration: Check that the machine is on a level surface and that the mounting bolts securing the motor and roller assembly are tight.
  • Action: Apply food-grade grease to gears and chains according to the manufacturer’s schedule. If bearings are sealed and noisy, they likely need replacement.

3. Poor Juice Extraction (Low Yield)

If the bagasse (crushed cane waste) comes out wet, the machine is not applying sufficient pressure.

  • Cause: Incorrect gap spacing between the rollers. Over time, vibration can loosen the adjustment knobs.
  • Fix: Tighten the roller gap adjustment knobs. This should be done incrementally. Both sides must be tightened equally to ensure the roller remains parallel. If the roller is crooked, it will cause uneven wear on the bearings and poor extraction on one side.

Preventative Maintenance Protocol

Sugarcane juice has a high sugar content, which becomes sticky and hardens like cement when dry. This residue is the primary enemy of moving parts.

Daily Cleaning Procedure

Flushing water through the machine is rarely enough. Sugar syrup penetrates seals and accumulates on axles.

  • Disassembly: Remove the front panel and juice tray daily.
  • Hot Water Flush: Use hot water to dissolve sugar deposits on the rollers.
  • Drying: Ensure the machine is dry before reassembly to prevent corrosion, even on stainless steel parts.

Lubrication Schedule

Commercial machines rely on heavy gears and chains. Neglecting lubrication increases amp draw on the motor and leads to burnout.

  • Weekly: Inspect chains for tension and apply chain lubricant.
  • Monthly: Grease external bearings and gear teeth. Always use food-grade lubricants for any part that has even a remote chance of contacting the juice path, although the drive mechanism should be sealed off from the extraction zone.

Repair vs. Replace: Evaluating Equipment Viability

When facing persistent issues, operators must decide whether to invest in repairs or upgrade to a more robust unit. Consider the following factors:

Component Failure Repair Feasibility Replacement Indicator
Rollers High. Rollers can be cleaned or re-knurled in some industrial cases. If the stainless steel surface is deeply pitted or corroded, compromising hygiene.
Motor Medium. Capacitors can be replaced easily. If the motor windings are burnt due to repeated stalling/overheating, a new machine is often more cost-effective.
Gearbox Low. Gearbox repairs are labor-intensive. Cracked casings or stripped gears usually warrant a machine replacement.

Technical Considerations for New Equipment

If your current equipment requires frequent repairs, it may be undersized for your volume. When sourcing commercial sugarcane juicers, prioritize these specifications:

  • Roller Material: Ensure rollers are solid 304 Stainless Steel. Inferior plated rollers will flake over time, contaminating the product.
  • Gearbox Design: Look for heavy-duty gear reduction systems rather than direct drives or belt drives, which may slip under heavy loads.
  • Reverse Function: Essential for clearing jams quickly without disassembly.
  • Safety Features: Emergency stop buttons and isolated electrical boxes are standard requirements for industrial safety compliance.

Frequently Asked Questions

Why is my sugarcane juicer leaking oil?

Oil leaks typically originate from the gearbox or seal failure on the roller shafts. If the seals separating the drive mechanism from the juicing compartment fail, stop using the machine immediately to prevent product contamination. Replace the seals and check the shaft for wear.

How often should I sharpen or replace the rollers?

Sugarcane rollers do not typically need “sharpening” like knife blades, but the knurling (grooves) can wear down after years of heavy use, reducing grip. If the machine struggles to pull the cane in, the rollers may need replacement.

Can I process frozen sugarcane?

No. Frozen cane is significantly harder than fresh cane and can shatter gears or bend roller shafts. Always allow cane to thaw completely before juicing.

What causes the motor to hum but not turn?

This often indicates a failed start capacitor or a seized bearing. If the roller moves freely by hand (when unplugged) but the motor won’t start, check the capacitor. If it cannot be moved by hand, a mechanical jam or seized bearing is likely the cause.

Secure Reliable Processing Equipment

Minimizing downtime requires a combination of disciplined maintenance and high-quality machinery. If your current equipment is no longer meeting your production demands, or if you require specific replacement parts, we can assist.

Contact us today to request a quote for commercial-grade sugarcane juicers or to discuss custom manufacturing specifications for your market.

Is TiniForce S3 Performance Better Than Traditional Manual Equipment? A Comprehensive B2B Comparison

Introduction: The Evolution of Commercial Sugarcane Juicing

For decades, the image of sugarcane juicing has been defined by heavy, hand-cranked iron wheels and manual labor. In many markets, traditional manual equipment remains a staple due to its low entry cost and simplicity. However, as the global demand for fresh, hygienic, and efficiently produced natural beverages grows, the limitations of manual extraction are becoming operational bottlenecks for modern businesses.

For B2B buyers—ranging from beverage equipment distributors to commercial kitchen procurement managers—the choice between maintaining traditional manual setups and upgrading to electric tabletop solutions is driven by data: yield efficiency, labor costs, hygiene compliance, and customer experience. The TiniForce S3 has emerged as a significant contender in this space, offering a compact, electric alternative that challenges the dominance of manual presses.

This article provides an in-depth technical and operational comparison between the TiniForce S3 electric tabletop sugarcane machine and traditional manual equipment. We will analyze performance metrics, hygiene standards, return on investment (ROI), and suitability for different business models.

1. The Mechanics of Extraction: Manual vs. Electric Engineering

Traditional Manual Equipment: The Physics of Leverage

Manual sugarcane juicers rely entirely on mechanical advantage generated by human effort. They typically feature a large flywheel connected to a gear system that rotates two or three heavy rollers.

  • Force Application: The operator must physically turn a wheel or crank. The torque applied to the sugarcane depends on the operator’s strength and stamina.
  • Consistency Issues: As operators fatigue, the speed of rotation and the force applied often decrease, leading to inconsistent crushing and lower juice extraction rates over time.
  • Mechanical Simplicity: These machines have fewer electrical components to fail but rely heavily on open gears and bearings that require frequent greasing.

TiniForce S3: Precision Electric Drive

The TiniForce S3 represents the modern approach to extraction, utilizing an electric motor and a precision gearbox system designed for consistent torque delivery.

  • Constant Torque: Unlike manual operation, the electric motor delivers consistent power regardless of the cane’s thickness or hardness. This ensures that the rollers maintain optimal crushing pressure from the first stalk to the last.
  • Tabletop Compact Design: The engineering focuses on reducing the footprint without sacrificing power, making it a compact sugarcane juice machine suitable for indoor counters where space is at a premium.
  • Automated Feeding: The roller geometry is designed to grab and pull the cane through automatically, removing the need for the operator to force-feed the stalk.

2. Performance Analysis: Speed, Yield, and Efficiency

When evaluating TiniForce S3 performance against manual options, three key metrics define the winner: throughput (speed), extraction rate (yield), and operational continuity.

Output Speed and Throughput

In a commercial setting, time is revenue. Manual machines are inherently limited by human speed.

  • Manual Speed: A skilled operator might process 1-2 stalks per minute, but this rate drops significantly after 15-20 minutes of continuous labor due to fatigue.
  • Electric Speed: The TiniForce S3 operates at a consistent RPM optimized for extraction. It can run continuously without slowing down, allowing for a predictable output calculation (e.g., liters per hour) that is essential for high-volume service environments.

Juice Extraction Rate (Yield)

Yield is defined by the percentage of juice weight extracted from the raw cane weight. This is where the difference between manual and electric becomes financially significant.

Manual machines often suffer from “operator variance.” If the operator is tired, they may not tighten the rollers sufficiently or may pass the cane through fewer times. In contrast, the TiniForce S3 utilizes fixed or spring-loaded roller gaps that apply consistent, high pressure. This results in a “dry bagasse” (waste) after a single pass, maximizing the juice yield per kilogram of cane purchased. Over a year, a 5-10% increase in yield can translate to significant savings in raw material costs.

3. Hygiene and Food Safety: The Critical Differentiator

For B2B buyers in regulated markets (Europe, North America, premium Asian markets), hygiene is not optional—it is a legal requirement. This is the area where traditional manual machines face their biggest challenges.

The “Open Gear” Problem of Manual Machines

Most traditional manual juicers feature exposed gears and chains. To keep these moving parts functional, operators must apply grease and oil regularly.

  • Contamination Risk: There is a high risk of lubricants dripping onto the rollers or into the juice collection tray.
  • Cleaning Difficulty: The open design allows dust, insects, and cane debris to settle in hard-to-reach crevices. Thoroughly cleaning a heavy cast-iron manual machine is labor-intensive and rarely done to a food-grade standard daily.

The Sanitary Design of TiniForce S3

The TiniForce S3 is engineered as a cleaner/hygienic accessible surface machine.

  • Enclosed Drive System: The motor and gearbox are sealed away from the juicing area. There is zero contact between the mechanical lubricants and the food zone.
  • Food-Grade Materials: The rollers and juice contact parts are typically made from SS304 stainless steel, which is resistant to corrosion and easy to sanitize.
  • Removable Components: Modern electric designs often allow for quick disassembly of the juicing compartment, enabling operators to wash components in a sink or dishwasher at the end of a shift.

4. Operational Environment: Noise and Aesthetics

Where the machine is placed determines which technology is superior. For a roadside stall, noise may not matter. For a hotel buffet or a quiet café, it is paramount.

Noise Levels

  • Manual: Generally silent in terms of motor noise, but the mechanical squeaking of gears and the physical exertion of the operator can be disruptive.
  • Standard Electric: Older industrial electric machines are notoriously loud, often resembling the sound of a lawnmower.
  • TiniForce S3: Marketed as a quiet sugarcane juicer, the S3 utilizes precision-machined gears and a high-quality motor to operate at ultra-low decibels. This allows it to be used front-of-house without interrupting customer conversations.

Aesthetics and Branding

A rusty, hand-cranked machine conveys a “rustic” feel that may work for specific street food themes but often signals “low hygiene” to premium consumers. The TiniForce S3 features a sleek, modern enclosure that aligns with professional kitchen equipment standards. It signals to the customer that the establishment prioritizes quality and cleanliness.

5. Labor Economics and ROI

When deciding between manual vs electric sugarcane juicers, the initial purchase price is only one part of the equation.

The Hidden Cost of Manual Operation

While a manual machine is cheaper upfront, it requires a dedicated operator who is physically capable of strenuous labor.
1. Labor Cost: You are paying a staff member to act as a motor. Their productivity is capped by physical limits.
2. Injury Risk: Repetitive strain injuries (RSI) from hand-cranking are common, leading to staff downtime.
3. Multitasking: An operator cranking a machine cannot simultaneously handle payments, serve customers, or prep other drinks.

The Efficiency of Electric Automation

The TiniForce S3 allows for “hands-free” extraction once the cane is fed.
1. Multitasking: The operator can feed the cane and immediately turn to prepare a cup or take payment while the machine processes the stalk.
2. Lower Skill Barrier: Any staff member can operate the machine with minimal training and zero physical strength requirements.
3. Throughput Revenue: The ability to serve more customers per hour during peak times directly increases revenue potential.

6. Comparison Table: TiniForce S3 vs. Manual Press

Feature Traditional Manual Machine TiniForce S3 (Electric Tabletop)
Power Source Human Effort (Manual Crank) Electric Motor
Throughput Consistency Variable (Declines with fatigue) High & Constant
Juice Yield Medium (Depends on operator strength) High (Precision roller gap)
Hygiene Low (Exposed gears, grease risk) High (Sealed drive, SS304 parts)
Noise Level Silent (except mechanical squeaks) Ultra-Low Noise
Operator Effort High (Physically demanding) Minimal (Automatic feeding)
Space Requirement Large (Needs leverage space) Compact Tabletop
Ideal Setting Remote areas (No electricity) Hotels, Juice Bars, Cafés, Malls

7. Technical Specifications & Manufacturing Quality

For distributors and engineers, understanding the build quality is essential. The TiniForce S3 is not just a consumer appliance; it is a small commercial cane juice machine built for durability.

Materials and Durability

Manual machines are often cast from iron, which is heavy and prone to rust if the paint chips. The TiniForce S3 typically utilizes a stainless steel body and rollers. Stainless steel 304 is the industry standard for food contact, offering resistance to the acidic nature of sugarcane juice.

Motor and Gearbox

The reliability of an electric juicer lies in its transmission. The TiniForce S3 is designed to handle the high-torque requirements of crushing fibrous cane without stalling. High-quality bearings and heavy-duty gears ensure a long service life, provided routine maintenance is followed.

8. Buying Guide: Factors for B2B Buyers

If you are considering adding the TiniForce S3 to your distribution portfolio or upgrading your kitchen equipment, consider the following:

Volume Requirements

If your business processes hundreds of liters per day, you may need a heavy-duty floor-standing unit. However, for most juice bars, restaurants, and hotels, the TiniForce S3 offers the perfect balance of output and size.

Electricity Availability

The only scenario where a manual machine wins is in locations with absolutely no access to electricity (e.g., remote mobile carts). For all other scenarios, the electric option offers superior ROI.

Maintenance Capabilities

While the TiniForce S3 requires less daily tinkering than a manual machine, it does require adherence to a cleaning schedule to protect the seals and ensure hygiene. Ensure your staff is trained on proper cleaning procedures.

9. Frequently Asked Questions (FAQs)

Is the TiniForce S3 suitable for commercial use?

Yes, despite its compact size, the TiniForce S3 is engineered as a commercial-grade unit capable of continuous operation in juice bars, restaurants, and hotels.

Can the TiniForce S3 crush different sizes of sugarcane?

Yes, the machine is designed to handle various cane diameters. However, for extremely thick stalks, it is sometimes recommended to split the cane or peel the hard knots to extend the roller life.

How does the noise level compare to a blender?

The TiniForce S3 is significantly quieter than a commercial blender. It operates with a low hum rather than a high-pitched whine, making it appropriate for front-of-house use.

Is it difficult to clean?

No. Unlike manual machines with fixed rollers and exposed gears, the TiniForce S3 usually features removable parts or easily accessible flushing points, allowing for full sanitization in minutes.

Where can I buy the TiniForce S3?

You can purchase the machine directly through Easimaker. Visit our contact page to request a quote or discuss distribution opportunities.

Conclusion

While traditional manual sugarcane pressers have served the industry for decades, they struggle to meet modern standards of efficiency, hygiene, and aesthetics. For businesses operating in competitive environments where speed, cleanliness, and labor costs are critical, the TiniForce S3 offers a clear performance advantage.

By upgrading to an electric tabletop solution, businesses can increase juice yield, ensure food safety compliance, and provide a better experience for both staff and customers. The TiniForce S3 proves that high performance can come in a compact package.

Ready to upgrade your operation?

Contact Easimaker today to request a quote or get a sample of the TiniForce S3 and see the difference for yourself.