Commercial Bone Saw Machine Buying Checklist for Butchers

Table of Contents

A commercial bone saw should match the products you cut, daily workload, available space, cleaning routine, electrical supply, and service requirements. This checklist helps butchers compare machines on practical operating factors before purchase.

Quick answer: what to check before buying
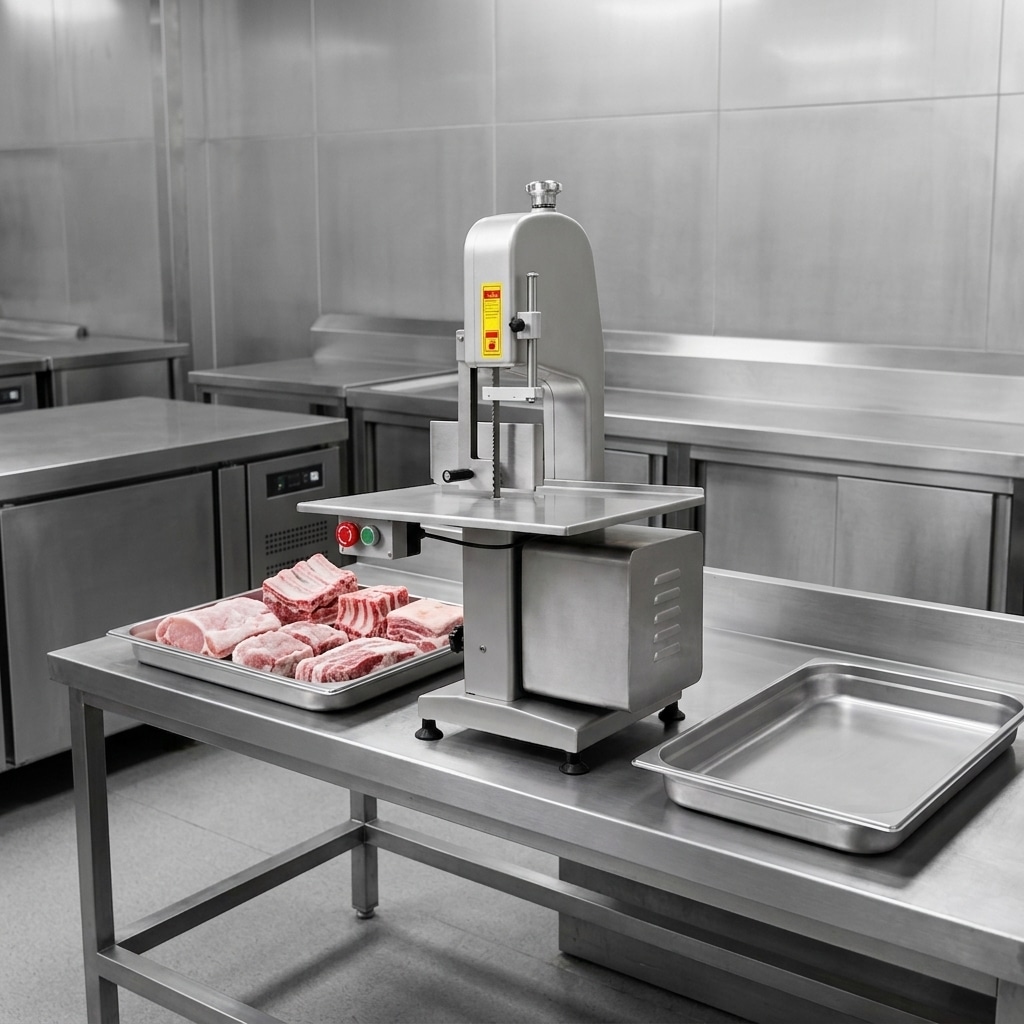
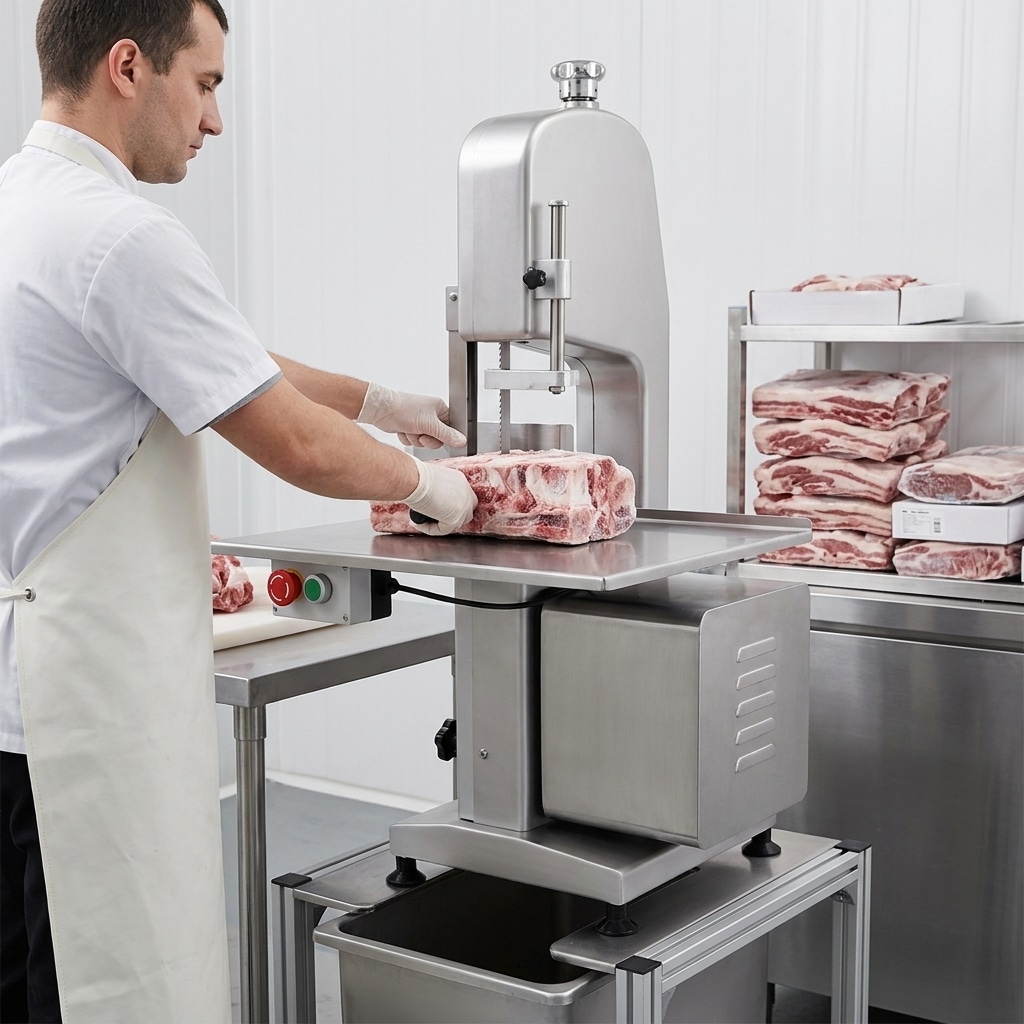
Commercial bone saw machine in a clean butcher preparation area

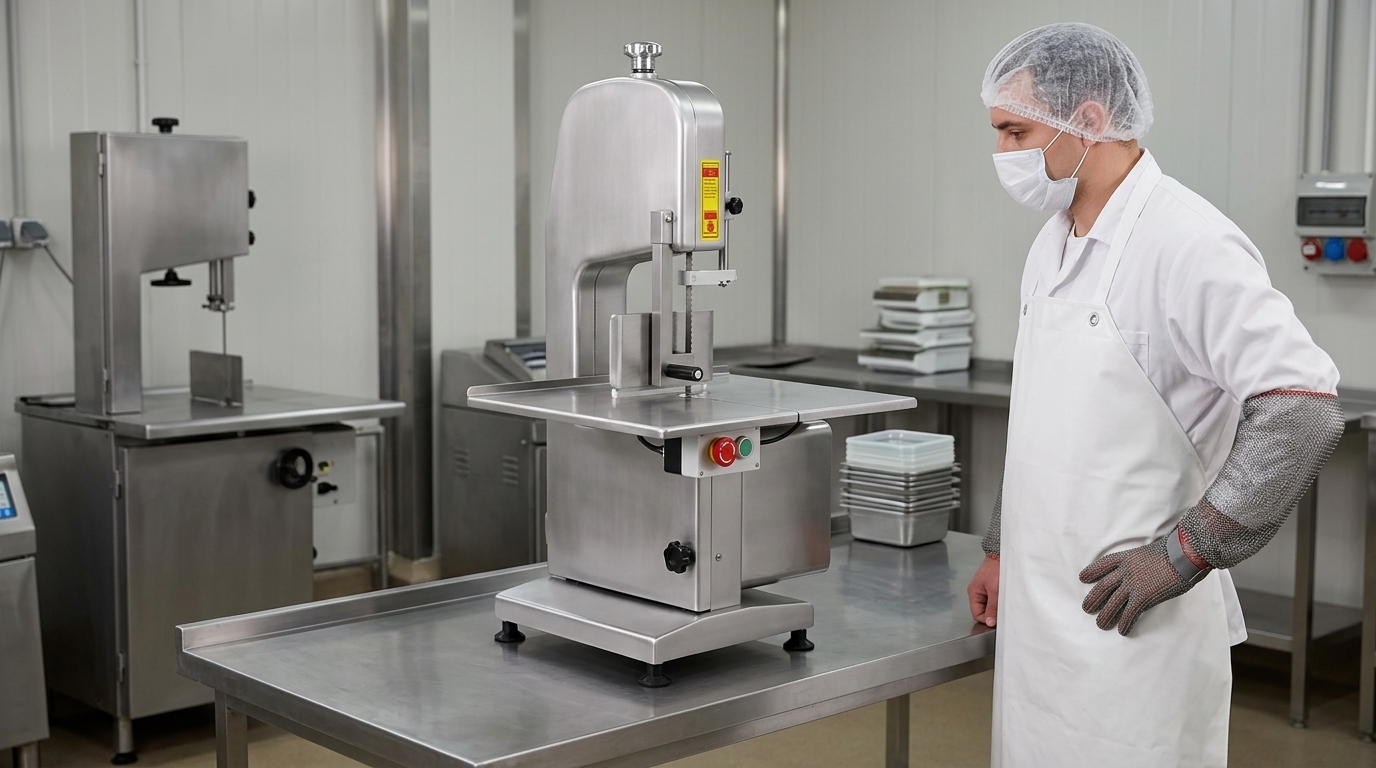
The right commercial bone saw machine is the one that safely handles your usual product size, temperature, and daily cutting volume without creating a difficult cleaning or service burden. Before comparing prices, confirm the meat and bone-in products you will cut, the largest product dimensions, the required bench or floor space, local electrical supply, blade availability, and the safety procedures your team can consistently follow.

For most butcher shops, meat counters, restaurants, and small processing rooms, the buying decision should be based on workflow rather than motor ratings alone. A machine may appear suitable on paper but still be a poor fit if its worktable is too small, its cutting clearance does not accept your typical cuts, or replacement blades are difficult to source.

Use this bone saw machine buying checklist to create a written specification before requesting quotations. Ask each supplier to confirm the supplied configuration, compatible blade dimensions, electrical requirements, cleaning instructions, available parts, and service process for your market.

What is a commercial bone saw machine?

A commercial bone saw machine, often called a meat band saw or butcher band saw, uses a continuous band blade to portion meat, bone-in cuts, poultry, fish, or frozen products. It is commonly used where consistent portions and clean, repeatable cuts are needed before retail display, further processing, or kitchen preparation.

It is not a general-purpose workshop saw. Food-contact construction, guarding, blade tensioning, worktable design, washable surfaces, and safe handling procedures are central to its intended use. The correct machine must also suit the condition of the product. Fresh bone-in meat, chilled poultry, and frozen blocks can behave very differently during cutting.

Operators should follow the machine manual, their local food hygiene requirements, and workplace safety rules. A bone saw is only one part of the process: receiving, chilled or frozen storage, preparation space, packaging, cleaning tools, and staff training all affect the result.

1. Start with your products and cutting workload
Butcher reviewing products before selecting a commercial bone saw

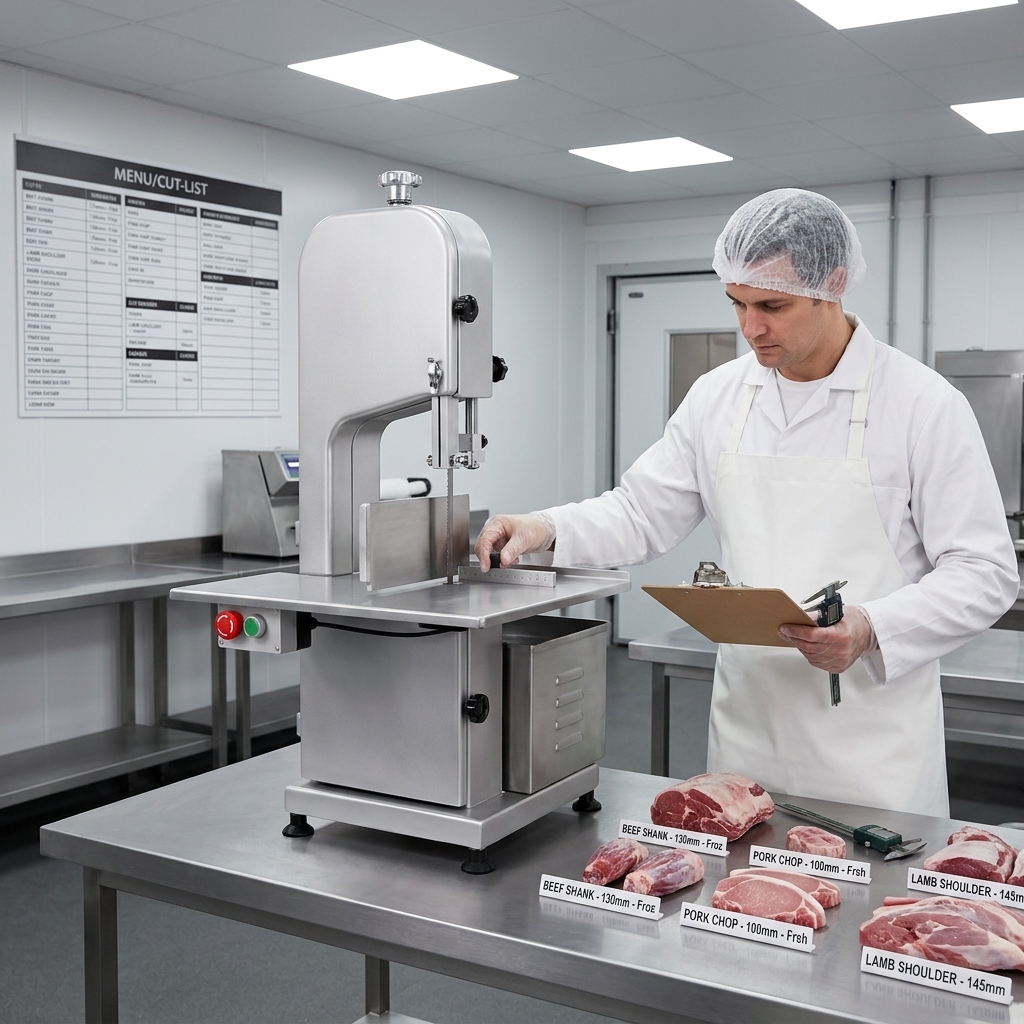
List what the machine will cut during a normal day, not only the occasional difficult item. Include product type, whether it is fresh, chilled, tempered, or frozen, typical dimensions, the heaviest pieces, and the desired finished portion. This information is more useful than a vague request for a “powerful” saw.

Questions to answer before selecting a machine

  • Which products will be cut: beef, pork, lamb, poultry, fish, ribs, shanks, chops, or frozen blocks?
  • Are products normally fresh or chilled, fully frozen, or partially tempered before cutting?
  • What are the maximum height and width of the products at the cutting station?
  • How many cutting sessions occur in a day, and how long does each session last?
  • Do you need repeated portions of a fixed thickness, or flexible one-off cuts?
  • Will the same machine be used by several operators across shifts?

Frozen material generally requires a more deliberate selection process because hardness, product shape, and blade tooth configuration affect cutting behaviour. Do not assume that a saw suitable for fresh bone-in products will be appropriate for every frozen item. Review the practical differences in this guide to choosing a bone saw for fresh versus frozen meat before finalising the intended application.

Be realistic about peak periods. A machine chosen for a few occasional cuts may not suit a busy counter preparing multiple product lines before service. Conversely, selecting a large machine for a compact operation can waste valuable space and complicate cleaning.

2. Choose tabletop or floor configuration
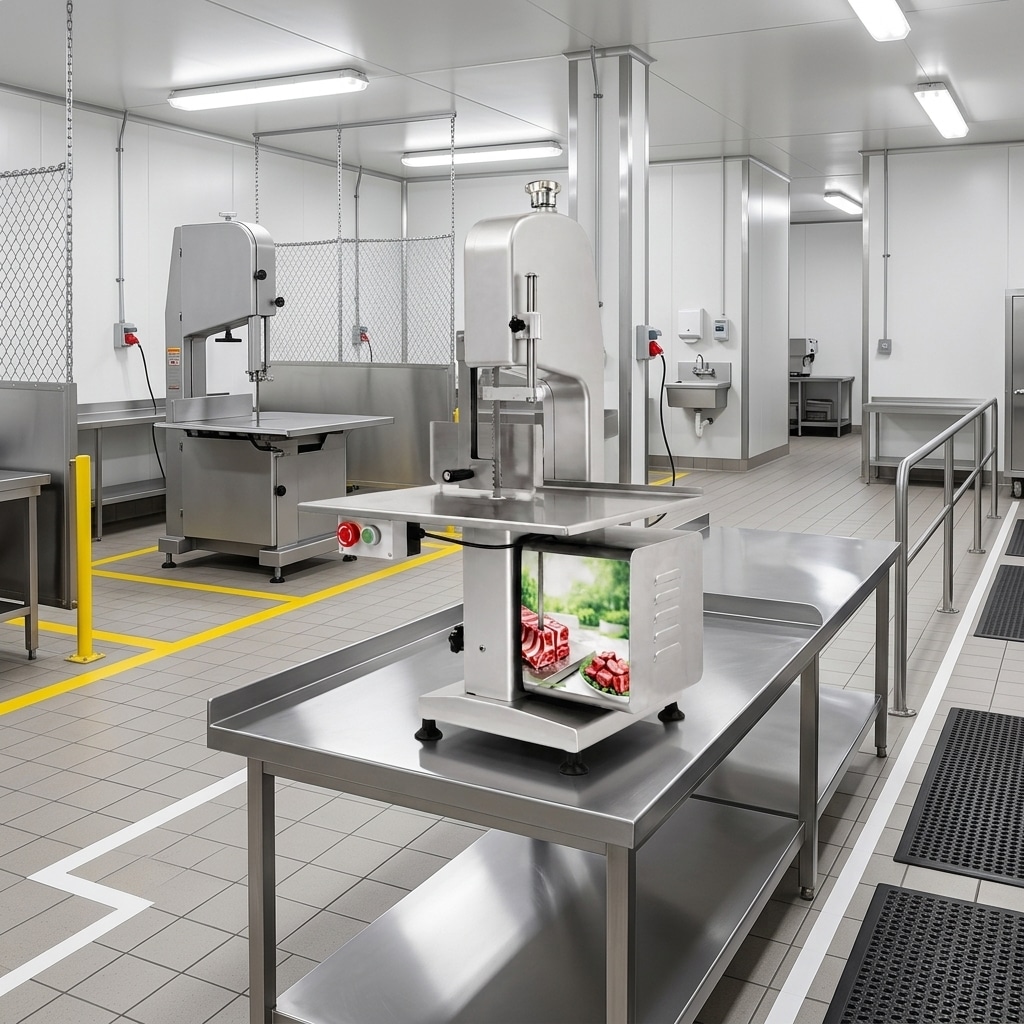
Tabletop and floor commercial bone saw configurations in a cutting room

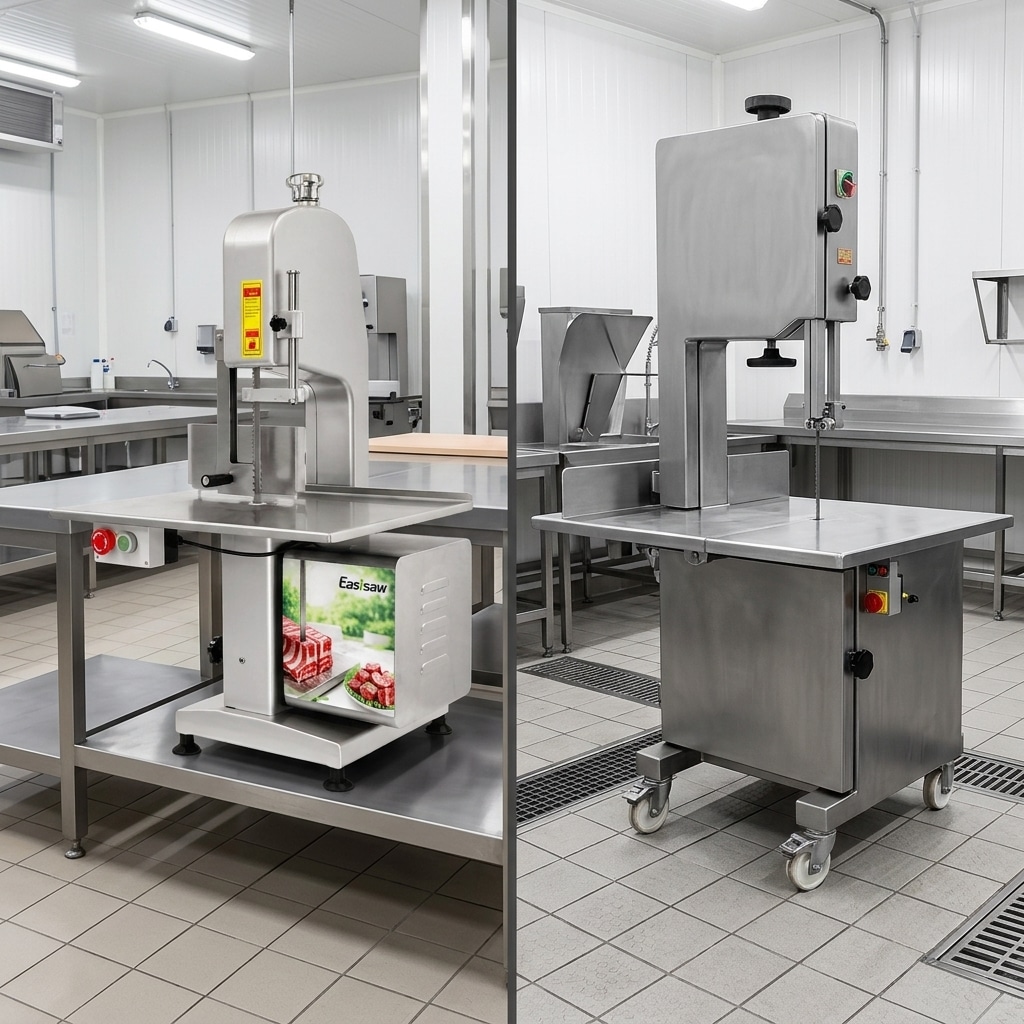
The machine footprint should suit the cutting area, operator movement, product flow, and cleaning access. Tabletop machines can be practical where a stable, suitably sized workbench is available and cutting demand is moderate. Floor models may suit operations that need a dedicated cutting station, a larger working area, or more room to manage larger products.

Measure more than the installation footprint. Leave practical space for product infeed and discharge, packaging trays, cleaning access, and safe operator positioning. Consider where chilled or frozen product arrives, where it waits before cutting, and where finished portions move next. A saw placed in a narrow route can create congestion and increase handling risk.

The bench or floor must support the machine securely and remain stable in use. In wet food-processing areas, assess drainage, splash control, lighting, and the distance to a suitable handwashing and cleaning area. If the machine is expected to move for cleaning, check how that movement can be done safely.

For a more detailed layout comparison, see tabletop versus floor bone saw considerations for commercial operations. The best format is not automatically the largest one; it is the one that provides adequate product support and safe working space in your actual room.

3. Check cutting clearance and worktable support

Cutting clearance is the usable space available for the product around the blade and under the upper guide assembly. It must accommodate the largest items you plan to cut with enough room to position them safely. Do not estimate this from product photographs or overall machine dimensions; request the manufacturer’s stated usable cutting dimensions for the exact model.

The worktable should give the operator stable support while keeping the product under control. Review the fence or thickness guide if uniform portions are important. It should be straightforward to set, easy to clean, and secure during use. Also consider whether the product can be supported without operators placing hands close to the blade path.

Bring a dimensioned product list to the supplier discussion. Include items such as large bone-in joints, long rib sections, poultry frames, or frozen blocks that may be awkward to manoeuvre. If products are received in cartons or bags, make sure the material is removed and the product is properly prepared according to your process before it reaches the saw.

A good specification states the maximum product envelope, the typical cut thickness range required by the business, and the need for a suitable guide or fence. It should not rely on assumptions such as “standard butcher cuts.”

4. Confirm blade compatibility and cutting setup
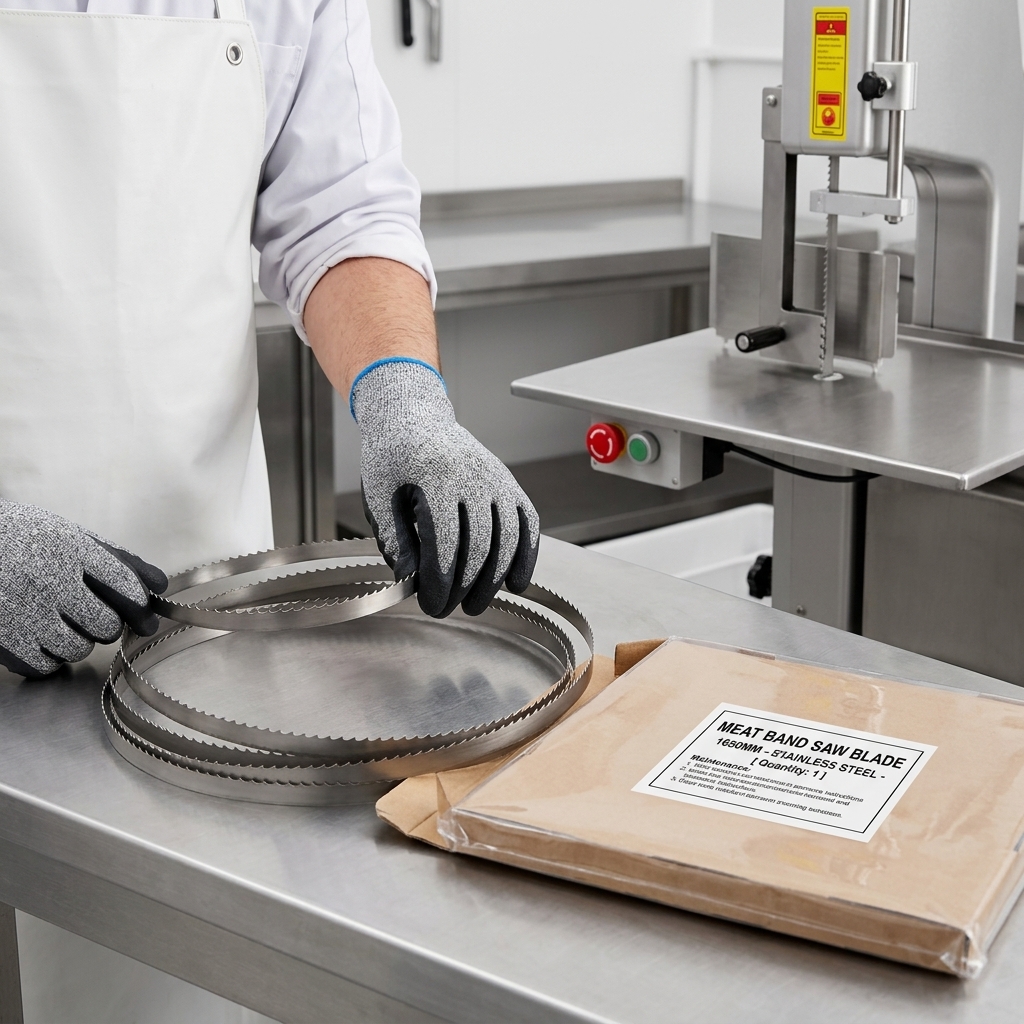
Inspection of a replacement blade for a commercial meat band saw

The blade is a consumable working component, not an afterthought. Before purchase, confirm the required blade length, width, tooth pitch, material specification, and approved replacement options for the model being considered. Keep these details with the machine records so that the team does not order an incompatible blade later.

Blade selection should reflect product hardness and the type of cut. A tooth pattern that works well for one application may not be the best choice for another. Rather than selecting by appearance alone, discuss the product list with the supplier and follow the machine manufacturer’s guidance. This commercial meat band saw blade selection guide explains why blade dimensions and tooth pitch should be matched to the saw and application.

Ask how blade tension is set and checked, how guides are adjusted, and which components should be inspected before each shift. Poorly fitted, worn, or incorrectly tensioned blades can affect cut quality and may create avoidable operational risk. Operators should never attempt improvised substitutions or adjustments beyond the manufacturer’s instructions.

Plan a controlled blade inventory. Keep the correct replacement blades in clean, protected storage; label them by model and specification; and establish a documented process for changing and disposing of blades. Your local procedures should address safe handling of sharp components and food-area hygiene.

5. Assess safety, cleaning, and sanitation

A commercial bone saw should be selected with safe daily use and complete cleaning in mind. Examine the blade guard arrangement, upper and lower blade coverage, product guide, emergency stopping method, non-slip footing or stable mounting, and access to areas that need routine cleaning. The safety features must be used correctly; they do not replace training, supervision, and a documented safe operating procedure.

Ask the supplier to explain the normal shutdown, isolation, disassembly, cleaning, rinsing, sanitising where required by your procedure, drying, reassembly, and pre-use inspection steps. Avoid equipment that cannot be practically cleaned within the time and staffing available. Areas around blade guides, wheels, doors, worktables, and product guides deserve particular attention because residue can build up during service.

Operators should be trained to use the pusher or product-handling tool supplied or specified for the machine, keep hands away from the blade path, avoid loose clothing and jewellery, and stop work if guards, blades, or controls are not in proper condition. Cleaning and blade changes should only be performed after the machine has been stopped and isolated according to the manual and site procedure.

Use essential commercial bone saw safety and maintenance protocols as a starting point for building your routine. Your site plan should also comply with local occupational safety and food hygiene obligations.

6. Confirm power and installation requirements

Confirm the electrical requirements for the exact machine and destination market before ordering. Check the rating plate specification or formal supplier documentation for voltage, frequency, phase, plug arrangement, and any local installation requirements. Never assume that an available outlet is suitable because the plug appears similar.

Share the site electrical details with the supplier early. If a qualified electrician is required to prepare the circuit, arrange that work before delivery. The electrical connection, protective device, grounding arrangements, and any local inspection requirements should be handled in accordance with applicable regulations and by qualified personnel where required.

Also plan the physical delivery route. Measure doorways, corridors, lifts, ramps, and the final installation point. Confirm whether the machine is shipped assembled, what must be fitted on site, and who is responsible for commissioning. Installation should include a stability check, verification of guards and controls, and operator familiarisation before production begins.

7. Review service, spare parts, and total ownership

The purchase price is only one part of ownership. A practical commercial bone saw program includes replacement blades, routine inspection, cleaning supplies, operator training, planned maintenance, and a clear route for obtaining parts or technical support.

Ask the supplier which wear items are expected to need routine attention, how spare parts are identified, how technical questions are handled, and whether manuals are supplied in a language suitable for your operators. Request a parts list or exploded diagram where available. Keep machine serial number, model information, blade specification, purchase documents, and maintenance records together.

For distributors, multi-site operators, and private-label buyers, discuss packaging, documentation, market-specific electrical configuration, branding, and after-sales responsibilities before placing an order. A clear agreement is more valuable than assumptions about what support is included.

Finally, assess the supplier’s responsiveness during the quotation stage. If product questions about configuration, product fit, or support cannot be answered clearly before purchase, that may indicate difficulty after commissioning. Select a partner that can help you define a machine specification appropriate to your process rather than simply offering a generic model.

Final pre-purchase checklist

Use the following checklist before approving a commercial bone saw machine purchase:

  • Documented list of products, temperature condition, and maximum dimensions.
  • Expected daily and peak cutting workflow defined.
  • Tabletop or floor configuration selected for the actual layout.
  • Usable cutting clearance confirmed in writing for the exact model.
  • Worktable, fence, and product support assessed for your portions.
  • Correct blade dimensions and application-appropriate tooth configuration confirmed.
  • Replacement blade source and controlled storage plan established.
  • Guarding, product-handling method, emergency stop, and safety procedures reviewed.
  • Cleaning access and end-of-shift sanitation routine evaluated.
  • Voltage, frequency, phase, plug, and installation requirements confirmed.
  • Delivery route, final placement, and commissioning responsibilities checked.
  • Manuals, parts information, maintenance guidance, and support route confirmed.

A complete checklist reduces the chance of buying a machine that is too small, poorly matched to frozen products, difficult to clean, or unsupported in your operating market. Keep the completed document with your purchasing records and use it to compare quotations on the same basis.

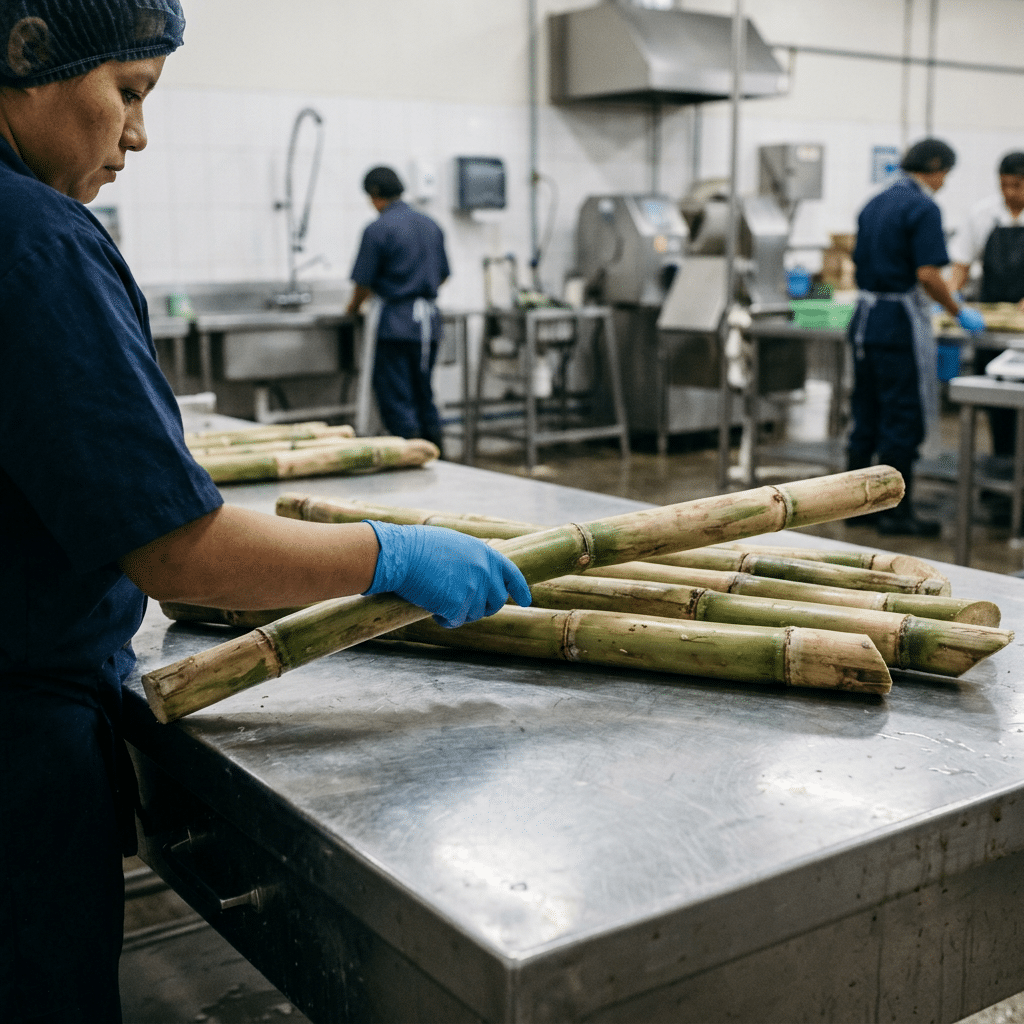
How to Store Sugarcane for Fresh Juice Service

Table of Contents

Store whole sugarcane clean, dry, shaded, and protected from heat, standing water, pests, and damage. Buy in manageable batches, inspect every delivery, rotate stock first-in-first-out, and wash and trim cane shortly before extraction for a more consistent fresh juice service.

Quick Answer: The Best Way to Store Sugarcane

Quick Answer: The Best Way to Store Sugarcane

For fresh juice service, store whole sugarcane in a clean, dry, shaded, well-ventilated area, away from direct sun, rain, standing water, chemical products, pests, and strong odours. Keep canes off the floor on clean racks, pallets, or food-safe bins where practical. Do not leave cut ends, peeled cane, or washed cane exposed for long periods; prepare only the quantity your team expects to juice soon.

The most reliable commercial approach is to buy sugarcane in manageable deliveries, inspect it on arrival, label the receiving date, and use the oldest acceptable stock first. Storage time varies with cane variety, harvest condition, transport, local climate, and the condition of the stalks at delivery. Rather than relying on one fixed number of days, set an internal quality standard and inspect stock every day.

Before feeding cane into a commercial sugarcane juice machine, wash the exterior with potable water, remove visibly damaged sections, and keep the preparation area separate from dirty receiving stock. This protects juice quality, supports cleaner operations, and helps operators work more consistently during busy service.

Why Sugarcane Storage Matters for Juice Service

Worker inspecting whole sugarcane stalks before juice service

Sugarcane is a raw agricultural material, not a shelf-stable ingredient. From harvest through delivery and storage, stalks can lose moisture, develop surface spoilage, collect dirt, or sustain handling damage. These changes can affect how easy the cane is to prepare and press, as well as the appearance, aroma, and consistency of the juice served to customers.

Good storage does not mean trying to hold cane indefinitely. It means slowing avoidable deterioration and giving staff a simple process for identifying stock that should be used, trimmed, or rejected. For a commercial operator, this is especially important because a single weak batch can create slower preparation, more cleaning work, and inconsistent service at the counter.

It is also useful to separate two operating questions: how to store whole raw sugarcane before pressing, and how to handle extracted sugarcane juice after pressing. Raw-cane storage is mainly about receiving, cleanliness, temperature exposure, moisture control, and rotation. Extracted juice requires a separate preservation and food-safety process. For guidance on the latter, see our article on methods for handling the shelf life of fresh sugarcane juice.

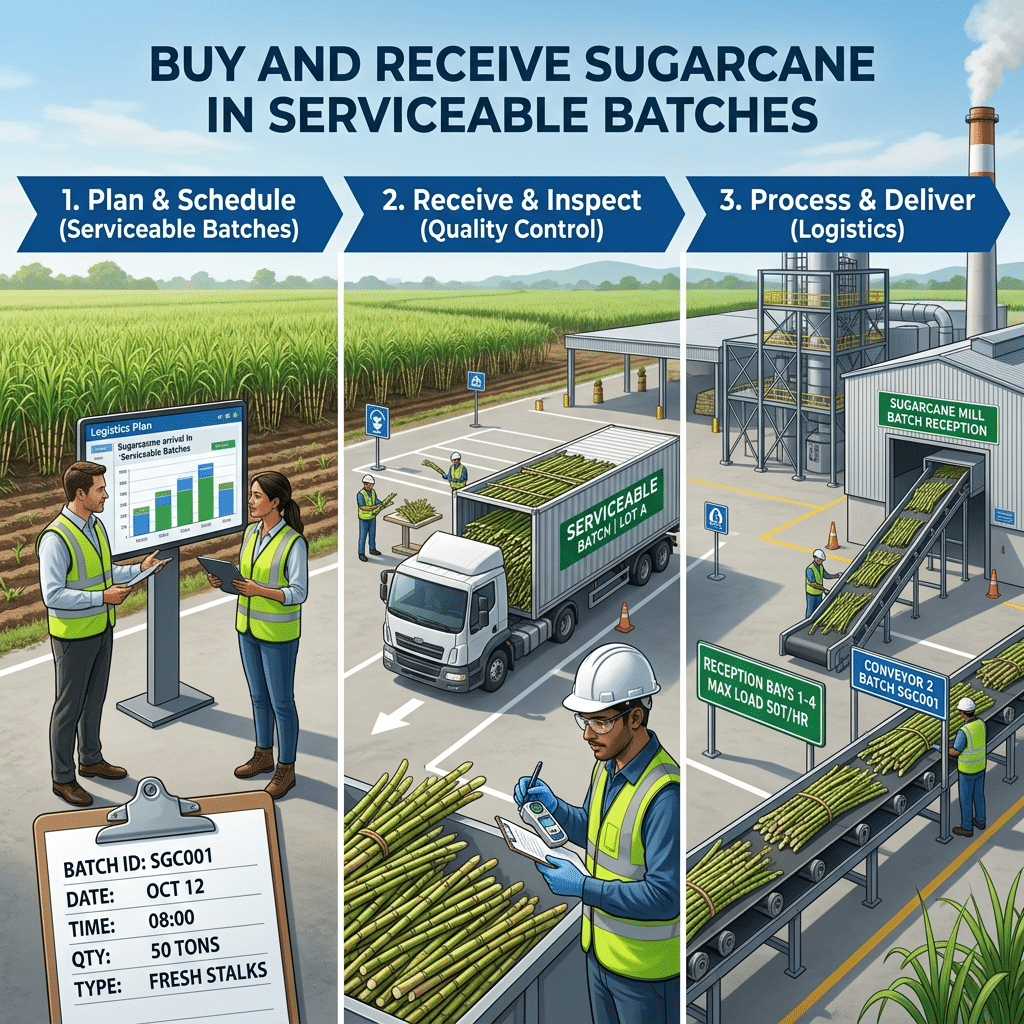
Buy and Receive Sugarcane in Serviceable Batches

Buy and Receive Sugarcane in Serviceable Batches

Storage starts with purchasing. Ordering more cane than your operation can inspect, store properly, and use while it remains acceptable increases waste risk. Build deliveries around realistic demand, expected weather, storage space, supplier lead time, and your ability to receive stock without disrupting service.

At receiving, check a representative sample from each delivery. Look for stalks that are reasonably firm and intact, with no obvious mould growth, fermentation odour, excessive softness, leaking areas, pest damage, or heavy dirt accumulation. Some external dryness or colour variation may occur naturally, but canes with suspect odour, widespread discolouration, wet breakdown, or extensive damage should be separated and assessed against your site procedure.

Record the supplier, delivery date, batch or lot information if available, and the staff member who accepted the stock. A simple receiving label makes first-in, first-out rotation much easier. If a delivery arrives wet from rain or transport washing, avoid stacking it tightly in a closed area. Allow surface moisture to dry under clean, shaded, ventilated conditions before placing it into normal storage.

Do not treat receiving as a paperwork exercise only. It is the point where a manager can prevent poor raw material from reaching the juicing station. Clear acceptance criteria also help suppliers understand the condition your business needs for daily fresh juice service.

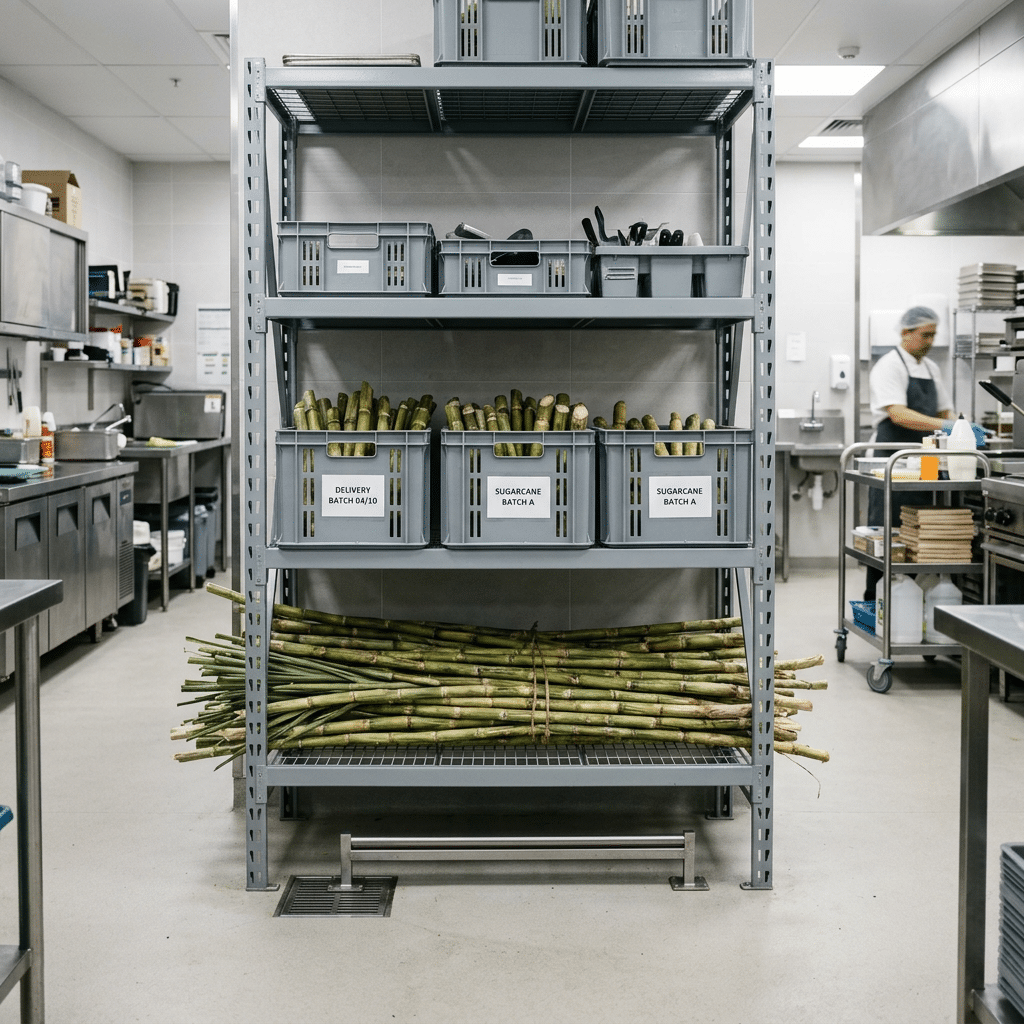
Set Up a Clean, Dry Sugarcane Storage Area

Sugarcane stored off the floor on clean racks in a commercial back room

A suitable sugarcane storage area should be easy to clean, protected from weather, and separate from waste, chemicals, cleaning tools, and pest access points. Keep the cane away from floor drains, damp walls, refuse containers, raw meat or seafood storage, and areas where it may be sprayed or splashed during cleaning.

Use clean racks, pallets, or sturdy food-appropriate containers to lift stalks off the floor. Raising stock improves access for cleaning and inspection and reduces the chance that cane will sit in water or collect dirt from foot traffic. Avoid overloading stacks. Heavy or poorly arranged piles can crush lower stalks, make rotation difficult, and create safety issues for staff.

Where possible, assign separate zones for newly received cane, approved stock ready for use, and stock waiting for inspection or disposal. This does not require a large warehouse. Even a small kiosk can use labelled crates or clearly marked shelf positions to prevent old and new deliveries from becoming mixed together.

Keep the area tidy. Cardboard, loose leaves, damaged stalk pieces, and standing water can attract pests and make it harder to identify stock condition. A short opening and closing inspection by the shift lead is often more useful than an occasional deep check after a problem has already developed.

Manage Temperature, Moisture, and Airflow

Manage Temperature, Moisture, and Airflow

Heat, direct sunlight, excessive moisture, and poor airflow are common causes of avoidable sugarcane quality loss. A shaded, cool, dry location is generally easier to manage than an exposed outdoor area or a hot back room. The correct temperature arrangement depends on local climate, the condition of the delivered cane, available facilities, and your local food-handling requirements, so operators should follow their documented site process rather than assume one storage setting suits every market.

Dry storage does not mean allowing cane to dehydrate in direct airflow or sun. The aim is to protect the stalks from weather and surface wetness while maintaining a clean environment with reasonable air movement. Never store cane in pooled water, seal damp stalks in non-breathable packaging, or wrap wet cane tightly. Trapped moisture can encourage surface deterioration.

If you use refrigerated storage, make sure the space is clean, not overloaded, and suitable for storing raw produce. Monitor for condensation. Cold surfaces and wet floors can create problems if stalks are stored against walls or packed too tightly. If your team is unsure whether chilled storage is appropriate for the cane supplied in your market, test a small controlled batch and compare condition, preparation time, and juice-service results with your usual method.

Mobile operators need particular care because food trucks and pop-up sites may have limited protected storage. Power availability, interior heat, and workflow should be planned before purchasing large quantities of raw cane. Our guide to integrating sugarcane juicers into food trucks covers related space and utility planning considerations.

Use First-In, First-Out Stock Rotation

First-in, first-out, often called FIFO, is the simplest stock-control rule for sugarcane juice operations: use the oldest acceptable delivery before opening newer stock. Put the receiving date on each rack position, crate, or batch label, and physically position older cane where staff will select it first.

FIFO works only when it is combined with daily condition checks. The oldest batch is not automatically suitable just because it arrived first. If stalks show spoilage, unusual odour, serious softness, contamination, or damage that cannot be safely trimmed according to your internal procedure, remove them from the production flow. Do not hide poor stock beneath new cane or leave it in the storage area until the next delivery.

A practical routine is to inspect stock before the first shift, estimate the quantity required for the day, move that quantity to the preparation area, and leave reserve stock protected in storage. This reduces repeated handling and keeps the juicing counter from becoming a raw-material holding area.

During high-demand periods, review purchase frequency rather than simply increasing the order size. Seasonal venues can use demand forecasts, delivery schedules, and a clearly marked rotation system to keep service moving. The operational approach discussed in operating sugarcane juice stands during busy summer periods can also help managers plan stock and staffing for variable footfall.

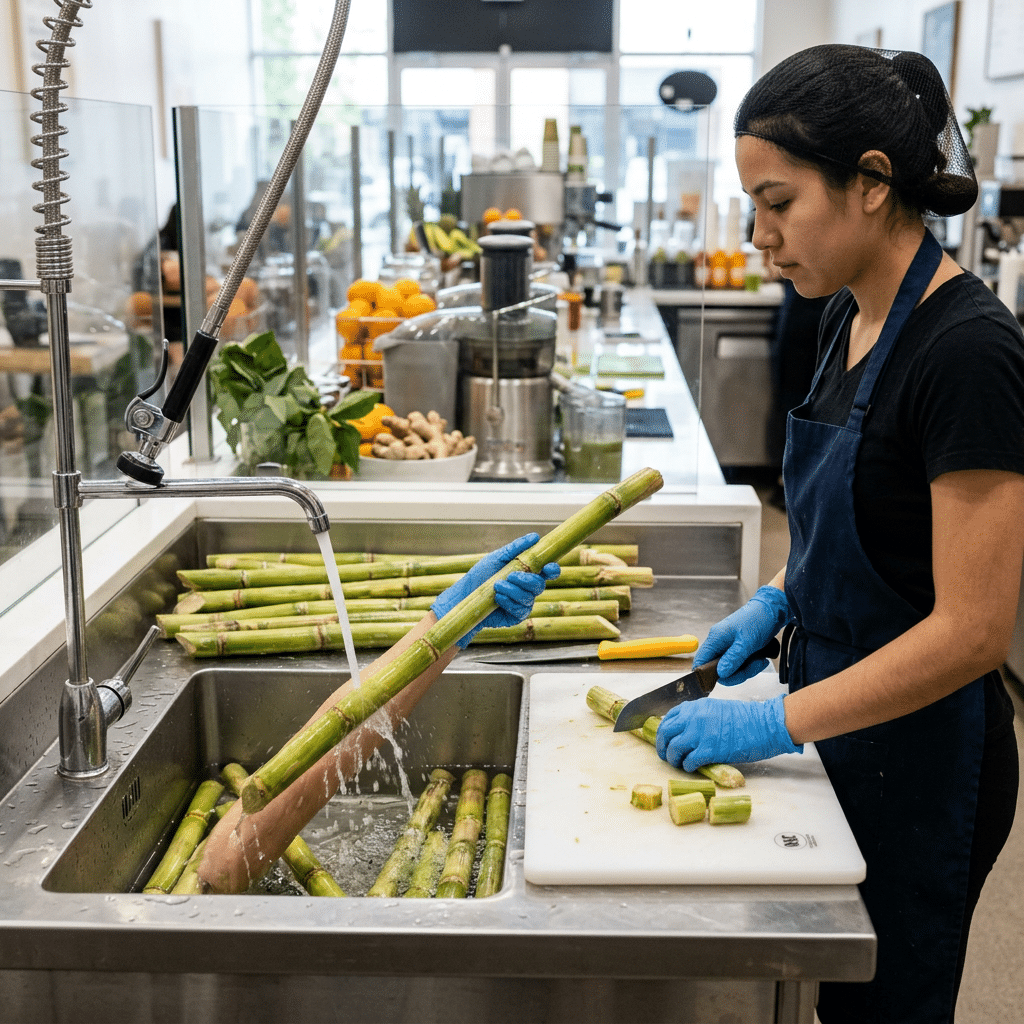
Wash and Prepare Sugarcane at the Right Time

Sugarcane being washed and trimmed at a clean commercial preparation station

Keep raw-cane washing and trimming close to the time of extraction. This reduces the amount of wet, cut material waiting around the juicing station. Whole cane usually tolerates handling better than cane that has already been cut into short sections, peeled, or washed, so avoid preparing an entire delivery far in advance unless your documented process and storage controls support it.

Use potable water to wash the exterior of the stalk. Brush away visible soil where needed, then allow excess surface water to drain before feeding the cane into the machine. Use clean preparation surfaces, knives, cutting boards, and containers. Staff should wash hands and follow the same hygiene controls used for other ready-to-serve beverage ingredients.

Trim visibly damaged ends and remove sections that do not meet your quality standard. The exact cutting method depends on the cane diameter, the feed opening of your machine, and your operator safety procedure. Never force oversized, badly bent, or foreign-material-contaminated stalks into the rollers. Prepare pieces that can be fed steadily and safely.

Separate raw-cane preparation from the clean side of the beverage operation. Cups, ice, garnishes, finished drinks, and cleaned machine parts should not share a cluttered surface with unwashed cane. This layout is important whether you serve juice immediately or plan to bottle products for local distribution. If bottling is part of your business model, review our guidance on bottling and distributing fresh sugarcane juice locally alongside local regulatory requirements.

Daily Quality Checks and Common Storage Problems

A short daily inspection protects both product quality and staff efficiency. Check several stalks from the batch that will be used first, not only the top stalks in a stack. Record recurring issues so that purchasing and supplier discussions are based on clear observations rather than memory.

  • Soft, wet, or leaking areas: isolate affected cane and assess it under your site quality procedure. Check whether racks, packaging, or storage surfaces are retaining moisture.
  • Mould or unusual odour: remove suspect stock from the production area. Clean and inspect nearby storage surfaces before placing new cane in the same location.
  • Excessive dryness or shrivelling: review exposure to heat, sun, direct airflow, and the age of stock. Smaller, more frequent deliveries may be more suitable.
  • Dirty cane at the juicing counter: improve receiving and move washing into a dedicated preparation step rather than trying to clean stalks during customer service.
  • Mixed dates and unclear stock order: simplify labels and assign one team member per shift to check rotation.
  • Pest activity: remove food debris, inspect entry points, and follow your approved pest-control process. Do not apply uncontrolled chemicals around raw produce.

Clean storage equipment regularly. Pallets, crates, shelves, and nearby floors should be included in the site cleaning schedule. If an issue repeats across deliveries, photograph the condition where appropriate, document the batch details, and discuss it with the supplier promptly.

Plan Storage Around Your Service Model

The right sugarcane storage process should fit the way you sell juice. A fixed juice bar may have room for labelled racks, a separate washing bench, and frequent deliveries. A food truck may need compact containers, strict daily ordering, and a clear plan for heat exposure. A seasonal kiosk may require closer coordination between delivery timing, peak traffic, and staff preparation capacity.

Match your storage process to the machine workflow as well. Operators need enough prepared cane near the equipment to maintain service, but not so much that wet or cut stock accumulates beside the machine. Position raw stock, wash stations, cutting surfaces, waste bins, and finished-drink assembly points to minimise crossing paths. A well-organised layout reduces unnecessary lifting, repeated handling, and congestion during busy periods.

Write the procedure down in simple steps: receive, inspect, label, store, select by FIFO, wash, trim, juice, clean, and review waste. Train every operator to follow the same sequence. This is more dependable than relying on one experienced staff member to judge cane condition informally.

For commercial buyers, equipment selection and raw-material workflow should be planned together. Easimaker works with operators that need practical sugarcane juice equipment for daily service and can help discuss machine fit, workspace considerations, and production workflow for the intended market.

Fresh vs Frozen Meat: Choosing the Right Bone Saw

Table of Contents

A bone saw for frozen meat must be selected around the actual hardness, product size, daily workflow, and cleaning requirements of your operation. This guide explains the practical differences between cutting fresh and frozen meat and the specifications buyers should confirm before purchasing.

Quick answer: Which bone saw is right for your meat?

Commercial bone saw prepared for portioning frozen bone-in meat in a clean food processing workspace

Choose a bone saw for frozen meat when your main products are frozen meat blocks, bone-in portions, poultry, fish, or other firm products that need controlled portioning before sale or further processing. The right machine should be specified for the product’s frozen condition, maximum product dimensions, intended cut type, electrical supply, and cleaning routine.

A commercial bone saw may also be used for chilled or fresh bone-in meat when the manufacturer permits it and the product can be handled safely and hygienically. However, fresh meat is softer and can be more difficult to guide consistently. It may also leave more residue on the blade and worktable. A business that processes both fresh and frozen items needs a workflow that prevents cross-contamination and allows effective cleaning between product types.

Do not choose only by motor rating or machine size. The practical decision depends on what you cut each day: the species and bone structure, whether product arrives solidly frozen or partially tempered, the largest block or carcass section, the number of cuts required per shift, available installation space, and local food-safety obligations.

Why fresh and frozen meat cut differently

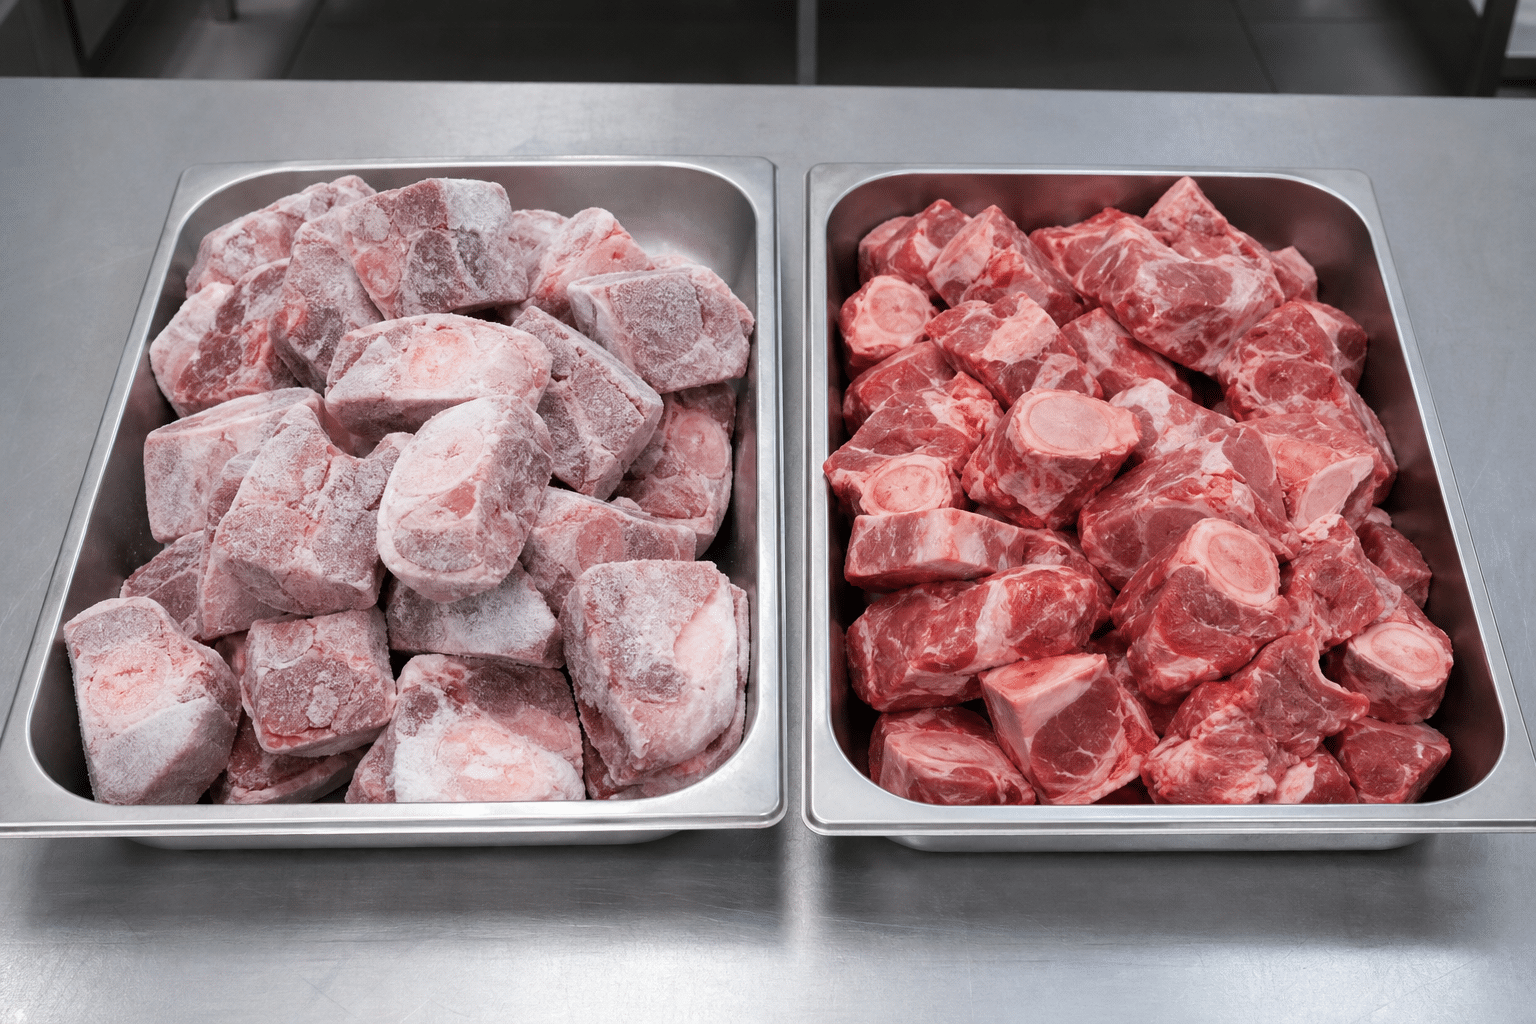
Separate trays showing frozen and chilled bone-in meat for comparison in a commercial preparation area

Meat condition changes the cutting task. Frozen product is firm and holds its shape, but it presents greater resistance at the blade, particularly where dense bone is present. Chilled or fresh meat is softer, more flexible, and more likely to move if it is not supported and fed correctly. These differences affect blade choice, operator technique, cleaning frequency, and the type of saw configuration that suits the operation.

Frozen meat and bone-in blocks

Frozen meat is commonly portioned to create manageable retail, food-service, or production sizes. The saw needs enough usable cutting clearance for the largest product that will be introduced, and the table should support stable, straight feeding. Product that is frozen unevenly may not cut in a uniform way: a hard exterior with a softened centre can affect control and cut finish. Operators should follow the equipment manual and site procedures for the permitted product condition.

Chilled or fresh bone-in meat

Fresh meat can be cut into chops, ribs, steaks, and smaller bone-in portions, but the soft tissue can pull or drag if the blade is dull, contaminated, incorrectly tensioned, or fed too quickly. Fresh product also requires disciplined separation from frozen stock, especially where different species or raw and ready-to-use products are handled. A bone saw is not automatically the best tool for every fresh-cut task; knives, portion cutters, or other equipment may be more appropriate for boneless or delicate products.

In both cases, the objective is controlled cutting, not forcing product through the blade. A stable product, correctly maintained blade, clean table, and trained operator are more important than trying to increase speed through excessive feed pressure.

How to choose a bone saw for frozen meat

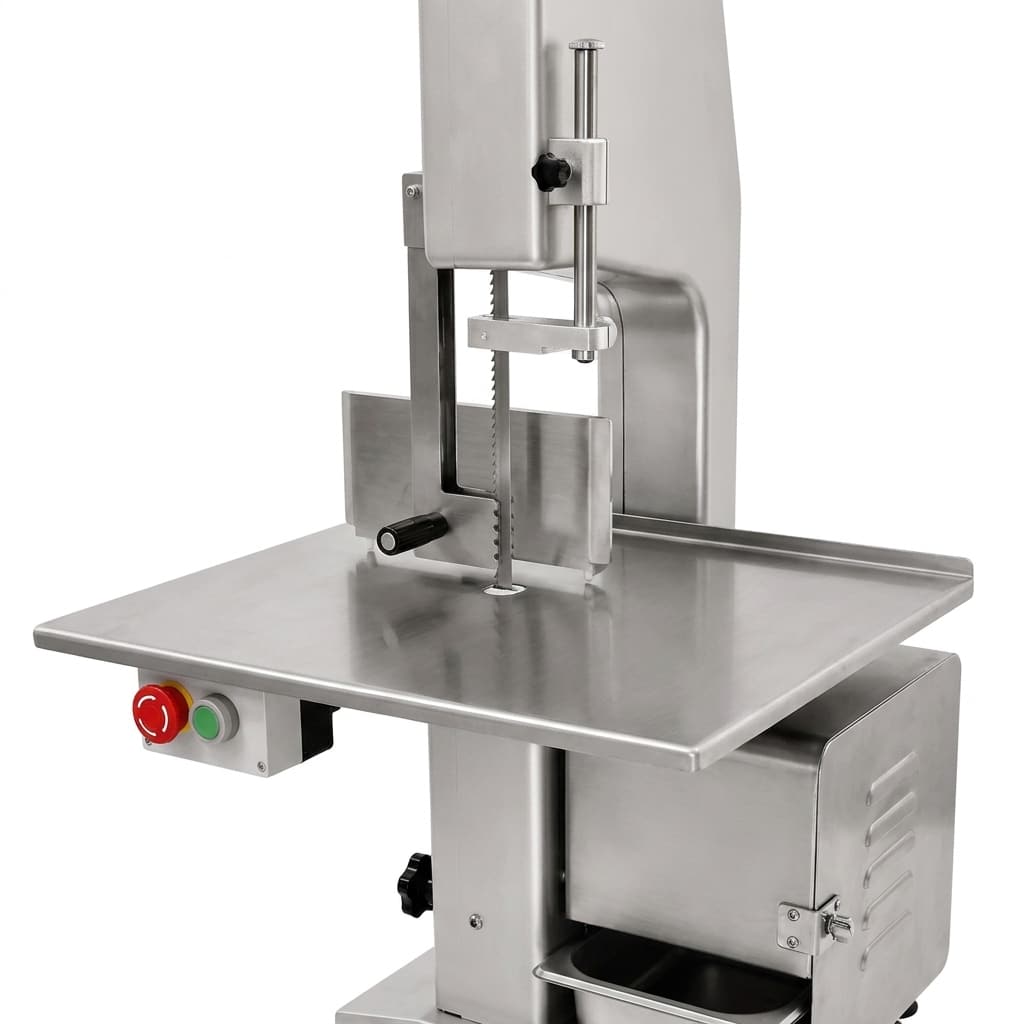
Commercial bone saw showing a clean worktable, product guide, and blade guard

When comparing a commercial bone saw for frozen meat, start with the real product and process rather than a generic machine category. Request complete technical information from the supplier and confirm that the proposed model is appropriate for your planned use.

  • Product type and condition: Identify whether you will cut frozen beef, pork, lamb, poultry, fish, bone-in portions, or mixed products. State whether products are solidly frozen, chilled, or partially tempered.
  • Maximum cutting dimensions: Measure the widest, tallest, and longest product you expect to process. Check usable throat clearance and table space, not only overall machine dimensions.
  • Required cut: Define whether you are cross-cutting blocks, making chops, splitting bone-in sections, or producing consistent retail portions. The desired cut size influences table guidance and operator workflow.
  • Blade and tensioning arrangement: Confirm the compatible blade type and dimensions, the adjustment process, and the supplier’s guidance for inspection and replacement. A blade must be maintained within the machine’s approved specification.
  • Construction and cleanability: Review food-contact areas, access for cleaning, removable components where applicable, drainage, and areas where meat residue could accumulate.
  • Power and installation: Verify rated voltage, frequency, phase, plug or hard-wiring requirements, and the space needed for safe access around the machine. Never assume a machine configured for another market matches your local electrical supply.
  • Support and spares: Ask about manuals, recommended service intervals, blade supply, wear parts, and the process for obtaining technical support.

Safety devices, guards, blade tension, and operating controls should be checked before every shift. For a useful reference point, see these commercial bone saw safety and maintenance protocols when building your equipment evaluation and staff training process.

When a bone saw is suitable for fresh meat

A bone saw can be a practical part of a fresh-meat operation when the job involves bone-in portions and the machine is approved by its manufacturer for that use. But it should fit within the full preparation line, not be treated as a universal cutter.

For example, a butcher shop may use a saw to cross-cut bone-in products, then use knives for trimming and final presentation. A central kitchen may portion frozen blocks before controlled thawing or further preparation. A processor that receives a mixture of chilled and frozen material may need separate production periods, cleaning breaks, labelled utensils, and defined storage routes to keep the workflow under control.

Fresh meat requires careful support during cutting. Product should be placed flat and kept stable against the table and any approved guide. Operators should not use hands close to the blade path, should not reach around guards, and should not attempt to correct a moving or unstable piece while the blade is running. If the product is too small to hold safely, use the manufacturer-approved pushing or holding method rather than improvising.

Avoid selecting a larger saw merely because fresh items occasionally include bone. The better choice is the model and workflow that safely handles the largest regular product, supports the normal number of cuts, and can be cleaned without compromising the next production task.

Safe operating practices for meat bone saws

Bone saws use a moving blade and must be operated only by trained personnel working to the machine manual and the site’s safety procedures. Guards and safety components are part of the operating system; they must not be removed, bypassed, or modified to make a difficult cut easier.

Before starting, inspect the work area and machine. Confirm that the blade is correctly installed and in acceptable condition, guards are in place, the table is clean, the product guide is secure where fitted, and the electrical connection matches the machine rating. Keep the floor dry and free of packaging, offcuts, or other trip hazards.

During cutting, use a calm, even feed. Do not force a hard frozen block into the blade. Forcing can reduce control, affect cut quality, and increase stress on the blade and machine. Stop the saw before clearing a jam, retrieving a dropped item, adjusting a guide, or cleaning the cutting area. Follow lockout or isolation procedures required by your workplace before servicing.

Operators should use the personal protective equipment specified by their risk assessment and local rules. Equipment does not replace training: written procedures, supervised onboarding, and regular refresher instruction remain essential. Use a documented daily inspection routine based on bone saw operating safety guidance so that defects are reported before processing begins.

Cleaning and maintenance between products

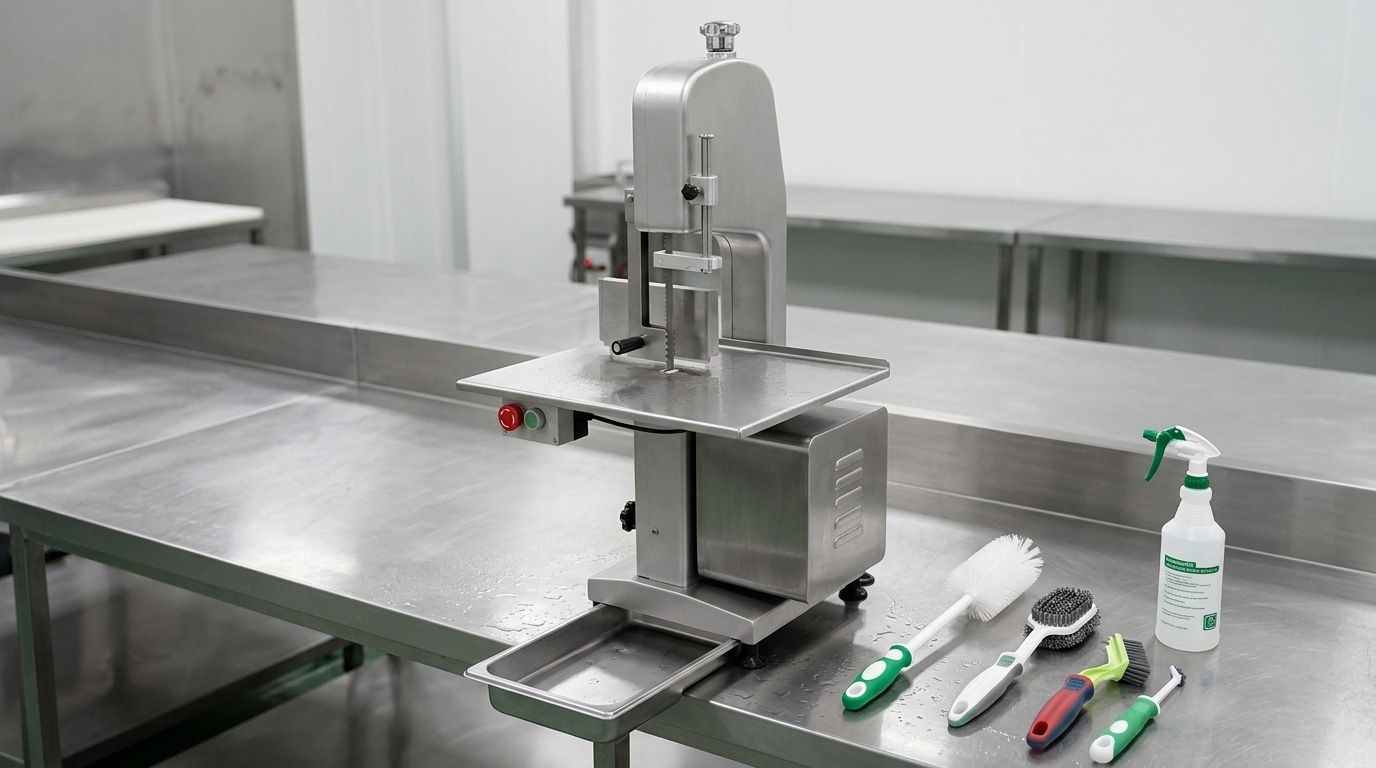
Clean commercial bone saw prepared for routine inspection and maintenance

Effective cleaning is particularly important in operations that switch between fresh and frozen products, different meat species, or different batches. The exact cleaning method depends on the machine design, the instructions supplied with it, and your food-safety plan. Always disconnect or isolate the machine before cleaning, and never direct water at electrical areas unless the manufacturer specifically confirms that the machine and cleaning method are suitable.

At the end of a production period, remove visible residue from accessible areas using the approved method. Clean and sanitise food-contact surfaces, the worktable, guides, blade-area components, and removable parts according to site procedures. Allow components to dry as required before reassembly. Inspect the blade for damage, wear, residue, and correct condition before returning the machine to service.

Keep a maintenance record covering cleaning, blade changes, inspections, adjustments, faults, and repairs. This record helps managers identify repeat problems, schedule replacement parts, and demonstrate that routine checks are being completed. Blade replacement and internal servicing should be carried out by trained personnel following the equipment documentation.

For a structured starting point, adapt these preventive maintenance steps for commercial bone saws to your approved sanitation schedule and the instructions for your specific model.

Buyer checklist before ordering

Before requesting a quotation for a bone saw for frozen meat, prepare a clear brief for the supplier. This makes it easier to identify a machine configuration that matches your operation and local market.

  • List each product to be cut, including species, bone-in or boneless condition, and typical temperature at cutting.
  • Provide the maximum dimensions and approximate weight range of the largest regular product.
  • Describe the cuts you need to make and the expected number of cutting sessions per day.
  • Confirm available installation space, access route, bench or floor arrangement, and cleaning area.
  • State your local voltage, frequency, phase, and applicable food-processing or workplace requirements.
  • Ask for the current product documentation, machine dimensions, electrical details, blade specification, cleaning instructions, and spare-parts support.
  • Plan for staff training, operating procedures, cleaning records, and blade inspection from the first day of operation.

The best bone saw is not simply the one designed for the hardest product. It is the one that is correctly specified for your frozen and fresh-meat workflow, installed correctly, operated safely, and supported with a realistic maintenance routine.

Discuss your bone saw requirement

If you are planning to process frozen blocks, fresh bone-in portions, or a combination of both, contact Easimaker with your product dimensions, product condition, local power supply, and intended workflow. Our team can help you discuss the practical equipment considerations for your market and operation.

Contact Easimaker

How to Choose a Commercial Meat Bone Saw Machine

Table of Contents

Choose a commercial meat bone saw machine around the products you cut, the size of each cut, daily workload, available space, cleaning routine, and local power supply. A suitable machine should fit the operator’s real workflow rather than simply offering the largest table or motor.

How to choose the right commercial bone saw

Commercial meat bone saw machine in a clean food processing workspace

Choose a commercial meat bone saw machine by first defining what you will cut: fresh meat, frozen meat, bone-in portions, poultry, fish, or larger primal cuts. Then confirm the maximum product dimensions, expected cutting periods, available counter or floor space, electrical supply, cleaning process, and the support available after installation.

The best choice is not automatically the largest machine. A compact butcher counter may need a tabletop saw that is easy to position and clean. A dedicated processing room may need a floor-standing machine with a larger working area and more space around the cutting zone. In both cases, the machine, blade, guards, worktable, and operator procedures must suit the actual product and daily routine.

Before comparing models, make a simple list of your hardest product, largest product, busiest service period, staff experience level, and site limitations. This turns a broad equipment search into a practical specification that a supplier can assess accurately.

Start with the products and workflow

Fresh and frozen meat products prepared for commercial bone saw selection

Product condition has a major effect on saw selection. Fresh cuts, chilled meat, frozen blocks, and bone-in products do not present the same cutting resistance or handling requirements. A machine intended for occasional trimming of chilled cuts may not be the right fit for repeated cutting of hard frozen products. Be precise about the temperature condition in which product normally reaches the cutting station.

Also consider the cut you need to produce. Portioning ribs, cutting poultry, splitting bone-in meat, and reducing larger blocks can require different table support, clearance, blade characteristics, and operator handling. Bring sample dimensions or a written range of product sizes to the supplier discussion. The maximum width, height, and length matter more than an average piece.

Workflow is equally important. Ask whether staff will make intermittent cuts during retail service or process batches in a preparation period. A busy batch operation needs a clear route for receiving product, cutting, collecting portions, packing, and cleaning down. A poorly planned layout can slow work even when the saw itself is capable of the required cut.

For a more detailed assessment of product hardness and handling, review this guide to choosing a bone saw for fresh versus frozen meat. It is useful when one operation handles both chilled and frozen inventory.

Choose between tabletop and floor models

Tabletop and floor-standing commercial bone saw workspace layouts

The first format decision is usually tabletop versus floor-standing. A tabletop commercial bone saw can be a practical option where counter space is available, product sizes are moderate, and the cutting station must fit into a compact butcher shop, market, restaurant, or deli preparation area. The supporting bench must be stable, level, capable of carrying the equipment safely, and positioned to allow cleaning around the machine.

A floor-standing bone saw is generally better suited to a dedicated cutting area where operators need more working room, a larger table surface, or easier handling of larger products. It can also simplify workstation planning by creating a permanent processing position rather than occupying a multi-use counter.

Do not decide by footprint alone. Measure the full operating envelope, including access for loading product, using the pusher, collecting cut portions, opening removable parts for cleaning, changing blades, and allowing staff to move safely. Confirm doorways, delivery routes, floor condition, drainage arrangements, and the distance to refrigerated storage.

See the practical comparison of tabletop and floor bone saws for commercial operations before choosing a format. It can help buyers match the machine style to available room and expected workload.

Check cutting area, clearance, and machine layout

Evaluate the usable cutting area rather than relying on overall machine dimensions. The worktable must support the product securely while leaving the operator enough room to guide it with the intended pusher or feeding aid. If the product overhangs the table or cannot be held in a controlled position, the cutting task may be unsuitable for that model.

Confirm the manufacturer’s stated cutting clearance and compare it with the largest product you expect to process, including irregular shapes. A large bone-in cut may need more height or throat clearance than a regular frozen block. Allow a sensible margin rather than selecting a machine that only just accommodates the largest item.

Look at the layout of the table, fence, blade area, scrap collection zone, and product exit path. An adjustable guide can support consistent portion sizes, but it should be easy for staff to set, verify, and clean. The collection area should prevent cut pieces from falling into an unsuitable location or interrupting the operator’s movement.

Where repeatable portioning is important, establish a documented setting and check it during the shift. This is often more reliable than expecting operators to judge every cut by eye. Training, product preparation, and a stable guide setting all contribute to a consistent result.

Match the blade and electrical supply

Inspection of a commercial meat band saw blade

The blade is a working component, not an afterthought. Its dimensions must match the saw manufacturer’s requirements exactly. Blade tooth form and tooth pitch should be selected for the product being cut, especially where frozen meat, bone, or different product types are involved. An unsuitable or worn blade can reduce cut quality, increase product handling time, and place unnecessary stress on the equipment.

Ask the supplier which blade specification is recommended for your planned products, whether replacements are readily available in your market, and what the correct fitting procedure is. Keep replacement blades in suitable storage and establish a clear inspection routine. Staff should know when to stop using a blade because of damage, poor cutting performance, or other visible concerns.

This commercial meat band saw blade selection guide explains why blade size and tooth configuration need to match both the machine and the product.

Electrical compatibility also requires careful confirmation. Check the rating plate requirements for voltage, frequency, phase, plug type, and any installation requirements against the actual supply at the intended location. Do not assume that a machine supplied for one market will connect correctly in another. A qualified local professional should assess site electrical work where required by local rules.

Prioritise hygiene and practical cleaning

A commercial meat bone saw machine should be selected with the cleaning routine in mind. Meat and bone residue can collect on the table, guide, blade area, guards, wheels, and nearby surfaces. The machine should be positioned so that operators can access the parts that need cleaning without unsafe reaching or moving heavy equipment unnecessarily.

Before purchase, ask which components are removable for routine cleaning, how they are removed, whether tools are needed, and how parts should be reassembled. Request the operating and cleaning instructions for the specific model. A cleaning process that is too complex for the available shift time is less likely to be carried out consistently.

Plan cleaning as part of the work schedule rather than treating it as an extra task. Separate clean and unclean tools, use food-contact-safe cleaning and sanitising products according to their instructions, and allow parts to dry appropriately before reassembly. Follow local food hygiene regulations and your site’s documented sanitation procedures.

Also review the floor and surrounding workstation. Splash control, waste handling, drainage, handwashing access, and cleaning-tool storage all influence whether the saw can be maintained hygienically in day-to-day use.

Review operator safety requirements

Bone saw selection must include operator safety from the beginning. Confirm that the machine configuration, guards, intended pusher or product-holding methods, controls, and emergency-stop arrangements are suitable for your local requirements and workplace risk assessment. The operator needs a clear, stable position with adequate lighting and enough space to handle product without rushing.

Never treat training as optional. Operators should be trained on startup and shutdown, correct product feeding, use of guards and pushers, blade awareness, cleaning, blade replacement procedures, fault reporting, and isolation before maintenance. Supervisors should verify that the documented operating method is followed, particularly when new staff start work or product types change.

Do not use a damaged blade, missing guard, loose component, or machine that behaves unexpectedly. Remove the equipment from service, isolate it as required by site procedure, and arrange inspection by an appropriately competent person. Routine checks before a shift can identify visible issues before they become an operating problem.

For an operational reference, read the essential safety and maintenance protocols for commercial bone saw machines. Always follow the instructions supplied with the specific machine and applicable local rules.

Consider service, spares, and total operating cost

Purchase price is only one part of the decision. A dependable commercial bone saw programme also considers delivery, installation preparation, operator training, routine cleaning time, blades, wear parts, planned maintenance, repair support, and possible downtime. The lowest initial price may not offer the best value if replacement parts or technical guidance are difficult to obtain.

Ask practical support questions before placing an order: Which routine parts are expected to require replacement? How can the correct blade be identified and ordered? What information is needed when requesting technical help? Are manuals and parts diagrams available? Who will provide support in your region? Clear answers help the buyer plan rather than react to a stoppage.

For multi-site businesses, standardising equipment and consumables can simplify staff training, blade purchasing, cleaning documentation, and maintenance records. For a single site, it is still useful to keep a machine record containing model details, serial information, installation date, blade specification, service history, and reported issues.

When comparing quotations, ensure they describe the same scope. Check whether the quoted configuration, electrical version, included accessories, blade supply, documentation, packaging, shipping terms, and support arrangements are directly comparable.

Commercial bone saw purchase checklist

Use this checklist when speaking with a commercial meat bone saw machine supplier:

  • What fresh, chilled, frozen, and bone-in products will be cut?
  • What are the maximum product dimensions and approximate product weights?
  • Will cutting be occasional service work or regular batch processing?
  • Is a tabletop or floor-standing layout more suitable for the site?
  • What usable cutting area and clearance are required?
  • What blade dimensions and tooth configuration are specified for the planned products?
  • Does the site electrical supply match the machine rating requirements?
  • Can staff access all required cleaning areas and carry out reassembly correctly?
  • What training, safety procedures, spare parts, and technical support will be available?
  • Does the proposed machine fit local food hygiene and workplace requirements?

A well-defined brief helps a supplier recommend an appropriate configuration and reduces the risk of selecting a machine that is oversized, undersized, or unsuitable for the product mix. Keep product details and site photographs ready when requesting a quotation, as they can help clarify fit before delivery.

Essential Food Safety Certifications for Commercial Juicers

In the commercial beverage industry, equipment procurement is not merely about yield or motor speed; it is fundamentally about risk management. For juice bars, restaurants, and industrial food processing facilities, the juicer is a critical control point. Dealing with raw produce—which often lacks a thermal kill step (cooking) before consumption—requires equipment that adheres to the strictest hygiene and safety standards.

Purchasing uncertified or non-compliant machinery exposes businesses to liability, health inspection failures, and brand-damaging contamination events. This guide outlines the essential international certifications and standards procurement managers and operations directors must verify when selecting commercial juicing equipment.

The Difference Between Electrical Safety and Sanitation Standards

A common misconception in B2B procurement is that a single certification covers all aspects of machine safety. In reality, commercial juicers must generally satisfy two distinct categories of compliance:

  • Electrical & Mechanical Safety: Ensures the machine will not cause fire, electric shock, or physical injury to the operator.
  • Sanitation & Hygiene: Ensures the machine is constructed of safe materials and designed to be thoroughly cleaned to prevent bacterial growth.

Buyers should look for marks that cover both categories. A machine that is electrically safe but impossible to sanitize is a health code violation waiting to happen.

Key Sanitation and Hygiene Certifications

Hygiene certifications focus on equipment design—specifically, the elimination of crevices where bacteria like Listeria or E. coli can harbor. They also verify that materials in contact with food do not leach harmful chemicals.

NSF / ANSI (North America & International)

The NSF International mark is arguably the most recognized sanitation standard globally for commercial food equipment. For juicers, the relevant standard is typically NSF/ANSI 8 (Commercial Powered Food Preparation Equipment).

NSF certification verifies:

  • Cleanability: All food zones are easily accessible for cleaning and inspection.
  • Material Safety: Materials are non-toxic and corrosion-resistant (e.g., specific grades of stainless steel).
  • Design Radii: Internal corners are rounded (coved) to prevent food buildup.

For buyers in North America, NSF certification (or an equivalent like ETL Sanitation) is often mandatory for passing local health inspections.

HACCP Compliance Compatibility

While HACCP (Hazard Analysis Critical Control Point) is a management system rather than a machine certification, equipment must be “HACCP-compliant” in design. This means the juicer fits into a HACCP plan by being easy to disassemble, clean, and inspect. Suppliers should be able to demonstrate how their equipment supports your facility’s HACCP protocols.

FDA Food Code & Material Compliance

In the United States, materials used in the juicer must meet FDA (Food and Drug Administration) requirements for food contact surfaces (often referred to as GRAS – Generally Recognized As Safe). Common compliant materials include:

  • Stainless Steel (304 or 316 Grade): The industry standard for durability and hygiene.
  • Food-Grade Plastics: Must be BPA-free and resistant to acidic fruit corrosion.

Electrical and Mechanical Safety Standards

These certifications ensure the equipment is safe for employees to operate in a wet, industrial environment.

UL and ETL (North America)

Underwriters Laboratories (UL) and Intertek (ETL) test for electrical safety. For commercial juicers, look for:

  • UL 763: Standard for Motor-Operated Commercial Food Preparing Machines.

Note: The ETL Listed Mark is legally equivalent to UL. However, buyers must distinguish between the ETL Listed Mark (Electrical) and the ETL Sanitation Mark (Hygiene).

CE Marking (European Economic Area)

The CE (Conformité Européenne) mark indicates conformity with health, safety, and environmental protection standards for products sold within the EEA. For juicers, this typically involves compliance with:

  • Machinery Directive (2006/42/EC): Mechanical safety.
  • Low Voltage Directive: Electrical safety.
  • EMC Directive: Electromagnetic compatibility.

While CE is a self-declaration by the manufacturer, reputable B2B suppliers will have technical files and third-party test reports available to back up their CE marking.

RoHS and REACH

These regulations restrict hazardous substances in electrical equipment. RoHS (Restriction of Hazardous Substances) ensures that the electronics within the juicer do not contain lead, mercury, or other restricted materials, which is crucial for environmental compliance and disposal.

Why “Food Grade” Isn’t Enough

A supplier may claim a machine is made of “food-grade materials.” While this is a minimum requirement, it is insufficient for commercial operations. A machine can be made of food-grade stainless steel but still have poor welding seams, inaccessible internal cavities, or non-removable gaskets that trap juice residue.

Commercial buyers should prioritize “Hygienic Design” over simple material claims. Look for:

  • Tool-free disassembly for daily cleaning.
  • IP ratings (Ingress Protection) that allow for wash-down (e.g., IPX5 or higher) if the environment requires hose cleaning.
  • Smooth welding seams that do not snag cleaning cloths.

Buying Guide: Verifying Certifications

When sourcing commercial juicers, especially from international manufacturers, verification is key. Do not rely solely on a logo printed on a brochure.

1. Request the Certificate Number

Legitimate certifications have a unique file or license number. Ask the supplier for this number and verify it on the certifying body’s official website (e.g., the NSF or Intertek directory).

2. Check the Scope

Ensure the certification applies to the specific model you are purchasing. Sometimes manufacturers certify one base model, but the customized version or a new iteration has not yet been approved.

3. Ask About Spare Parts

Maintenance is a safety issue. Ensure that replacement gaskets, blades, and screens are also compliant. Using non-OEM parts that do not meet the original certification standards can void the machine’s safety listing.

FAQs: Commercial Juicer Compliance

Can I use a household juicer in a commercial setting?

Generally, no. Household juicers are not NSF/ANSI 8 certified. Using them in a commercial kitchen often violates local health codes, voids insurance policies, and risks rapid equipment failure due to the lack of heavy-duty cooling systems.

Is CE certification accepted in the USA?

CE is a European standard. While it indicates a level of safety, US health inspectors typically look for NSF (sanitation) and UL/ETL (electrical). CE alone is usually insufficient for US compliance, though the machine may meet the technical requirements.

What is the difference between NSF and ETL Sanitation?

Functionally, they are very similar. Both test to the same ANSI standards (like NSF/ANSI 8). NSF is the organization that wrote the standard, while Intertek (ETL) is a testing lab that certifies to that standard. Both are widely accepted by health departments.

How often do certifications need to be renewed?

Certifications are usually subject to annual audits and fees. If a manufacturer stops paying or fails an audit, their listing is removed. Always check the live directory before placing a large volume order.

Secure Your Supply Chain with Compliant Equipment

Investing in certified commercial juicers protects your customers and your business reputation. Ensure your machinery meets the rigorous demands of modern food safety regulations.

Ready to upgrade your production line with fully certified, high-performance juicing equipment?

How to Clean a Sugarcane Juicer: The Complete Commercial Hygiene Guide

Elevating Hygiene Standards in Commercial Juice Bars

In the competitive world of beverage service, the quality of your product is inextricably linked to the cleanliness of your equipment. For operators of commercial sugarcane juicers, hygiene is not merely a regulatory checkbox; it is the foundation of customer trust, operational efficiency, and the longevity of your machinery. Sugarcane juice is unique among fresh beverages due to its high sucrose content and low acidity, creating a biological environment that demands rigorous sanitation protocols.

Unlike acidic citrus juices that naturally inhibit some bacterial growth, sugarcane juice is pH-neutral and rich in nutrients, making it an ideal medium for fermentation and microbial activity if equipment is left uncleaned even for short periods. For B2B buyers, juice bar owners, and operations managers, understanding how to clean a sugarcane juicer effectively is as critical as selecting the right machine in the first place.

This comprehensive guide explores the technical and practical aspects of sugarcane juicer hygiene. We will cover the material science of 304 stainless steel, the operational benefits of removable rollers, and provide a detailed 10-step cleaning checklist designed to standardize your sanitation procedures.

The Science of Sugarcane Residue and Food Safety

To implement an effective cleaning strategy, one must first understand the nature of the residue being removed. Sugarcane stalks contain fibrous bagasse and a sticky, sugar-rich juice. When this juice dries, it forms a hard, varnish-like coating on rollers and internal components. This residue does more than just look unsightly; it creates a biofilm—a protective layer for bacteria that is resistant to simple rinsing.

Why Sugar Residue is a Risk

  • Rapid Fermentation: Yeast and bacteria can begin fermenting sugarcane residue within hours, leading to off-flavors that can ruin a fresh batch of juice.
  • Pest Attraction: The intense sweetness of the residue is a beacon for ants, fruit flies, and other pests that compromise food safety.
  • Mechanical Strain: Buildup on rollers and bearings increases friction, forcing the motor to work harder and potentially shortening the lifespan of your equipment.

Effective cleaning disrupts this cycle, ensuring that every glass served is fresh, safe, and reflective of your brand’s quality standards.

Materials Matter: Cleaning 304 Stainless Steel

Most high-quality commercial sugarcane juicers are constructed from food-grade 304 stainless steel. This material is chosen for its corrosion resistance and non-porous surface, which prevents bacteria from harboring in microscopic crevices. However, stainless steel requires specific care to maintain its passive protective layer.

The Chemistry of Cleaning Stainless Steel

The “stainless” property comes from a thin layer of chromium oxide that forms on the surface. Harsh chemicals, particularly those containing chlorides (like bleach), can strip this layer, leading to pitting and corrosion. Once pitting occurs, the surface becomes rough, making it harder to clean and easier for bacteria to colonize.

Recommended Cleaning Agents:

  • Mild Detergents: pH-neutral dish soaps that cut grease and sugar without attacking the metal.
  • Quaternary Ammonium Compounds (Quats): Often used in food service for sanitizing without the corrosive effects of chlorine.
  • Warm Water: Essential for dissolving crystallized sugar.

Agents to Avoid:

  • Bleach/Chlorine: Causes pitting and stress corrosion cracking.
  • Steel Wool/Abrasive Pads: Scratches the surface, creating hiding spots for pathogens.
  • Hydrochloric Acid: Highly corrosive to stainless steel.

Daily vs. Deep Cleaning: Establishing a Protocol

A robust sanitation plan involves two layers of activity: the continuous “clean-as-you-go” approach during the shift, and the intensive “deep clean” at the end of the day. Neglecting either can lead to accumulation that is difficult to reverse.

The “Shift” Clean (Every 4 Hours)

Food safety standards in many jurisdictions recommend cleaning food-contact surfaces every 4 hours at room temperature. For a busy juice bar, this doesn’t mean a full disassembly, but rather a strategic flush.

  1. Water Flush: Run clean, warm water through the machine while it is running (if permitted by the manual) to flush out loose bagasse and liquid juice.
  2. External Wipe: Use a sanitized cloth to wipe down the feeding chute and the juice tap.
  3. Waste Removal: Empty the bagasse bin to prevent overflow and pest attraction.

The “End of Day” Deep Clean

This is the non-negotiable ritual that preserves your machine. The goal is to remove every trace of organic matter. Machines with removable rollers significantly reduce the labor involved in this step, allowing operators to soak and scrub parts in a sink rather than reaching into a confined cabinet.

The 10-Step Deep Cleaning Checklist

Use this checklist to train staff and ensure consistency. Print it out and laminate it for your wash station.

Preparation

1. Electrical Lockout: Always turn off the machine and unplug it from the power source. Safety is paramount; never clean a machine that is energized.

2. Disassemble External Parts: Remove the feeding chute, the transparent viewing windows, and the juice collection tray. Place these in a sink filled with warm, soapy water.

Roller & Cabinet Cleaning

3. Remove Rollers (If Applicable): If your model supports it, unlock and remove the stainless steel rollers. This is the most critical step for thorough hygiene. If rollers are fixed, prepare to clean them in place using specialized long-handled brushes.

4. Soak Components: Let the removed rollers, trays, and chutes soak for 10–15 minutes to soften dried sugar. This reduces the scrubbing effort required and prevents scratching.

5. Scrub the Teeth: Sugarcane rollers have knurled or grooved teeth to grip the cane. These grooves are prime locations for residue buildup. Use a stiff nylon brush (not metal) to scrub parallel to the grooves, ensuring all fiber is removed.

6. Clean the Juice Compartment: While parts are soaking, wipe down the internal cabinet where the juice flows. Pay special attention to the corners and the area around the bearing seals. Use a food-safe degreaser if necessary.

Sanitization & Reassembly

7. Rinse Thoroughly: Rinse all soapy components with clean, hot water. Detergent residue can affect the taste of the juice just as much as sugar residue.

8. Apply Sanitizer: Spray all food-contact surfaces with a food-grade sanitizer (e.g., a no-rinse sanitizer approved by local health codes). Allow it to sit for the recommended contact time (usually 1–2 minutes).

9. Air Dry: Allow parts to air dry on a clean rack. Towel drying can reintroduce bacteria. Moisture trapped inside a reassembled machine can lead to mold growth overnight.

10. Reassemble and Test: Once dry, reassemble the machine. Ensure all seals and gaskets are seated correctly to prevent leaks. Briefly plug in and run the machine for 10 seconds to ensure smooth operation before the next shift.

The Advantage of Removable Rollers

From an operational standpoint, the ability to remove rollers is a game-changer for hygiene. In fixed-roller systems, the operator must reach into the machine, often blindly scrubbing the underside of the rollers. This “blind cleaning” rarely achieves 100% sanitation.

Removable systems allow for:

  • Visual Inspection: You can hold the roller up to the light to ensure every groove is clean.
  • Soaking: Stubborn, dried residue can be submerged, which is impossible with fixed rollers.
  • Bearing Protection: Cleaning removable rollers away from the motor reduces the risk of water entering the motor housing or bearings during the washdown process.

For detailed specifications on machines with these features, consult our Datasheets & Manuals.

Maintenance During Cleaning: What to Look For

Cleaning time is also inspection time. As your staff handles the components, they should be trained to look for signs of wear. Early detection of issues prevents costly downtime.

  • Seals and Gaskets: Check for cracks or brittleness. A compromised seal allows juice to leak into the mechanical compartment, causing sticky messes inside the motor housing and potential electrical faults.
  • Roller Teeth: Inspect for dullness. While stainless steel is durable, processing tons of hard cane eventually wears down the knurling, reducing extraction efficiency.
  • Noise Levels: If the machine makes grinding noises during the brief test run, it may indicate bearing wear or misalignment.

If you identify worn parts, refer to our Maintenance & Support resources to order replacements promptly.

Common Cleaning Mistakes to Avoid

Even with good intentions, improper cleaning techniques can damage your investment.

1. Using High-Pressure Hoses

Blasting a commercial juicer with a high-pressure hose (like a Karcher) is dangerous. It can force water past seals and into the gearbox or motor, leading to catastrophic electrical failure. Always use low-pressure water or a damp cloth for the machine body.

2. Ignoring the Waste Bin

The bagasse bin is often an afterthought. However, bagasse ferments rapidly and generates heat. If the bin is not cleaned and sanitized daily, it becomes a breeding ground for fruit flies that will eventually migrate into the juicer itself.

3. Overlooking the Anti-Splash Guard

Many machines have a small plastic or metal guard to prevent juice from spraying. This part is small and easily lost or forgotten during cleaning, but it collects significant residue. Ensure it is included in the soaking rotation.

Training Your Staff for Hygiene Compliance

The best equipment is only as effective as the operator. For B2B owners managing multiple locations, standardizing the cleaning process is vital.

  • Create a Logbook: Require staff to sign off on the cleaning checklist at the end of every shift. This creates accountability.
  • Visual Aids: Post photos of “Clean” vs. “Dirty” rollers near the wash station.
  • Supply the Right Tools: Ensure your team always has access to the correct brushes and sanitizer. If they have to search for tools, steps will be skipped.

Frequently Asked Questions (FAQs)

How often should I deep clean my sugarcane juicer?

You must deep clean the machine at the end of every operational day. Sugarcane juice residue ferments quickly; leaving it overnight can cause bacterial growth and difficult-to-remove buildup.

Can I put the rollers in a dishwasher?

This depends on the specific model and the material of the bearings inside the rollers. While 304 stainless steel is dishwasher safe, the heat and harsh detergents might damage internal lubricants or seals. Always check the user manual or our datasheets before using a dishwasher.

What should I do if the machine smells sour even after cleaning?

A sour smell indicates trapped organic matter. It is likely hidden behind a seal, under a gasket, or in a juice channel that wasn’t scrubbed. Disassemble the machine as much as possible, inspect gaskets, and perform a deep soak with a sanitizer solution.

Is vinegar a good cleaner for sugarcane machines?

Vinegar is a mild acid and can be used for descaling, but it is not a registered sanitizer for killing pathogens. For commercial food safety, use an EPA-approved food-contact sanitizer after cleaning with detergent.

Does the warranty cover damage from water ingress?

Typically, warranties cover manufacturing defects, not damage caused by improper cleaning (like hosing down the motor). It is crucial to follow the cleaning guidelines to preserve your warranty coverage. For more details, visit our Warranty page.

How do I remove sticky residue that has hardened?

Do not scrape it with a knife, as this scratches the steel. Soak the part in very hot water for 20–30 minutes to dissolve the sugars, then scrub with a stiff nylon brush.

Conclusion: Hygiene as a Competitive Advantage

A spotless sugarcane juicer does more than satisfy health inspectors; it produces a brighter, fresher-tasting juice that keeps customers coming back. By investing time in proper maintenance and utilizing machines designed for easy cleaning, you protect your customers and your bottom line.

For juice bar operators looking to upgrade to equipment that prioritizes hygiene and ease of use, or if you need specific advice on maintaining your current fleet, we are here to help.

Ready to elevate your juice business? Request a quote or contact our support team today for expert guidance on the best sanitary juicing solutions.